
Sizing Your Arcade Artwork Scan
Now that you have the scans of your arcade cabinet artwork finished and the sideart is stitched together you are ready to start tracing those scans into vector artwork using Illustrator. But one important tip before you just place your scan and start tracing, we need to look at what size your artwork needs to be before you start. It can be tempting to just jump right in and start drawing over your scans, but even the fastest computers can get bogged down when trying to re-render if you have a hi-resolution scan with a complex piece of vector artwork. You need to copy and downsample your original scan to a piece of artwork you can easily work with and manipulate, and here’s how.
Part 4: Sizing Arcade Artwork Scan for Vectorizing
Here are the topics we are going to cover concerning scanning;
This is part of an article series that we are calling Arcade Artwork: From Screen to Screen. Keep following Rotheblog as we walk you through all of the pieces of having a piece of arcade artwork reproduced.
Did you read the other Arcade Reproduction articles?
No? Well you might want to check out the arcade artwork parts you missed.
- Primer 1: Researching past arcade reproductions
- Primer 2: Getting committed buying collectors for your reproduction project
- Part 1: Scanning Arcade Game Sideart Upright
- Part 2: Scanning Arcade Game Sideart Laying Flat (Coming Soon)
- Part 3: Stitching Scanned Arcade Artwork in Photoshop (Coming Soon)
Step 1: Make a copy of your scan and downsample it
If you took our scanning tips, you scanned your cabinet artwork somewhere in the range of 300 – 600 DPI. But you don’t need to place your scan in Illustrator at that size to re-trace the artwork.
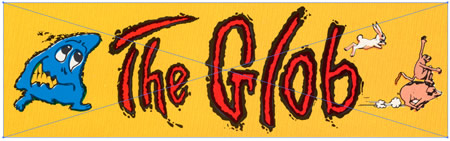
For this tutorial I am going to use my newly acquired, unobstructed ‘The Glob’ logo from Dan Hower over at ArcadeFlyers.com. Dan is an awesome guy and really helpful, and his website has a professional looking design and intuitive user features which is rare for most arcade sites. Most collectors have been to ArcadeFlyers before, but if you are new to the hobby and haven’t been, and are at all curious what the original advertisements for your favorite game looked like, or any game even the most rare games, I bet Dan’s got it.
Ok. Sidebar over.
Find your file locally and make a copy. Rename your scan to something like this;
And name the copied file;
Why not open the larger scan in Photoshop first, and save it as a different name? Well, I have found it is really easy to open your original scan in Photoshop, start resizing and forget what you are doing and before you know it you’ve downsized the original scan, closed the artwork and permanently thrown away resolution. This method should be fairly foolproof. If you want to make sure nothing happens to your artwork scan, burn a CD that contains each of your scanned pieces and the final assembled artwork and nothing else.
Now, open the “Image Size” dialog box. (Image > Image Size or Ctrl + Alt + I)
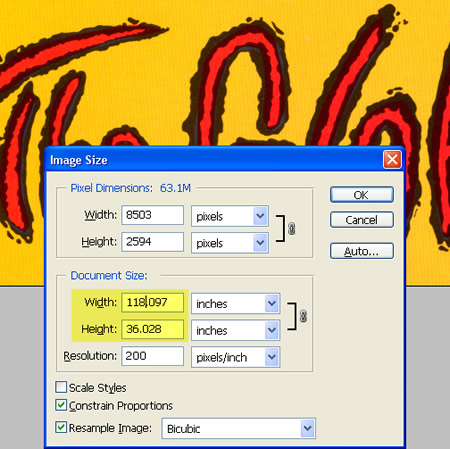
Make sure that ‘Constrain Proportions’ is checked, and change the ‘Resolution’ field to 200 DPI. Now, you might even be able to go lower than 200 DPI, it really depends on the image and having a little bit of vector experience. You will need to zoom into the scan in question and know how what the lowest resolution is before you start to loose even the smallest detail. I have highlighted the actual printable dimensions in yellow, and you will notice that these measurements won’t change when you change the resolution. You are essentially throwing away pixel data, nothing more. The physical dimensions of the scan stay the same.
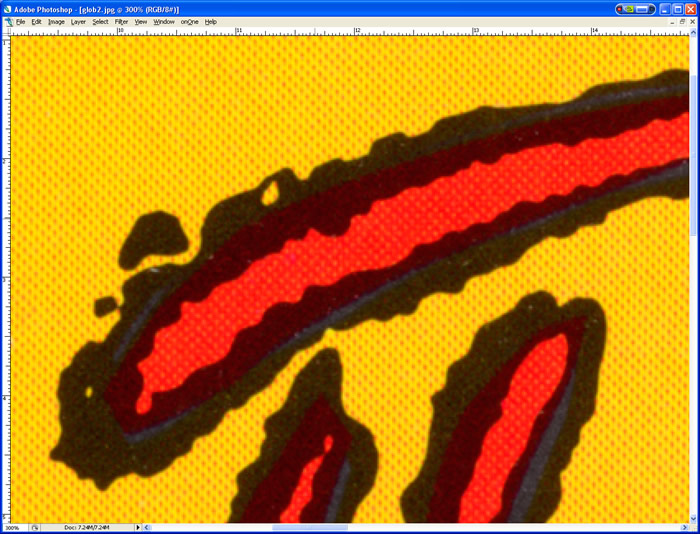
For ‘The Glob’ logo, I felt like 200 DPI was the lowest resolution I could go before losing detail and potentially having an inaccurate vector trace in Illustrator. Look at these two images. You will see that the logo downsampled from 600 DPI to 200 DPI yielded little change. Click on these images for larger detailed comparisons of The Glob lettering.

Step 2: Place your arcade scan in Illustrator
Create a new document (File > New or Ctrl + N).
Place your ‘pac-man_sideart_200.jpg’ file on the canvas (File > Place or Shift + Ctrl + P) If you feel like adjusting your canvas to be larger than your image go right ahead, (Alt + Ctrl + P) I personally like to fit the image, when the canvas is too small it’s distracting.
Step 3: Setup your layers
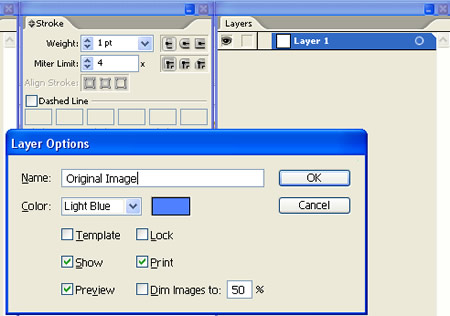
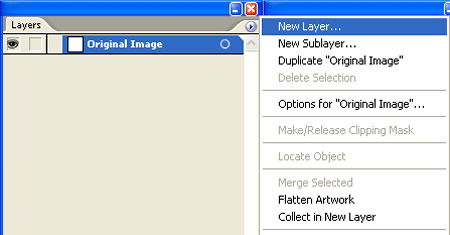
Currently you should have a layer named ‘Layer 1’. Double click the name to rename the layer and type in ‘Original Image’.
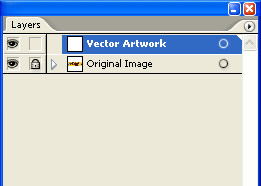
Click the ‘Create new layer’ button at the bottom of the layers palette (looks like a little document) and call the new layer ‘Vector Artwork’. (You can also create a new layer by clicking the little circle with the triangle for the palette menu and select ‘New Layer’)

Now, on the ‘Original Artwork’ layer, click in the square to the right of the eyeball and lock that layer so when you start drawing vectors with your pen tool you don’t move the original artwork scan around.
You’re finished setting up your arcade artwork Illustrator file
Simple and to the point. You are now ready to start using the pen tool and tracing your scanned arcade artwork. Creating vectors in Illustrator is an in depth article, one that we’ll break into pieces so do stay tuned.
Here are some similar arcade posts
- How do I crop something in Illustrator? How do I use Clipping Masks?
- Check arcade artwork dimensions
- Reproducing Control Panel Artwork – Measurements
- Local Arcade Pac-man Sideart Illustrator File Inaccurate
- Photoshop tutorial for punching text ‘effect’ out of an image
If you enjoyed this post, please consider to leave a comment or subscribe to the feed and get future articles delivered to your feed reader.
Comments
@Dan Piraino: I don’t understand your question. An advantage to using Illustrator to reproduce artwork? Vector it? Photoshop is a raster program and should be used for artwork that can’t be reproduced easily with vectors.
Im new to this so Im trying to understand what the difference is between Photoshop and Illustrator. Are there other programs that could be used? Wasnt aware that photoshop was a raster program. I have been looking for info on what software would be best when doing this type of reproduction but havent found it as of yet.
Illustrator is hands down the best software out there to do reproduction arcade artwork. Rich at This Old Game uses the Corel suite, but that is because that is what he learned on, a little bit of a legacy software for him – not because its better.
Its not a software I would recommend looking for a cheap alternative. The capability difference is staggering and the artwork can suffer as a result.
Leave a comment
Your email address is never displayed and cannot be spammed. If your comments are excessively self-promotional you will be banned from commenting. Read our comment privacy policy.


November 6, 2010
Is there an advantage to using Illustrator over Photoshop?
I have Adobe Photoshop CS3. Can I use that and get the same results?