
My Ms. Pac-man Stenciling Progress
I wrote late in August that I had purchased a set of Ms. Pac-man stencils made from the joymonkey artwork pdf file. Before I had gotten the stencils I had completely disassembled my Ms. Pac-man machine, put the parts aside in the basement, took the cabinet outside and started to get ready to repaint it.
Filthy dirty Ms. Pac-man
This was the first time I had cleaned the Ms. Pac-man insides. It had been on location somewhere in it’s life and was filthy. At the time I got it I didn’t feel confident enough taking it apart before moving it into the house so I only cleaned the outside.
Cleaning is first, and then onto prepping the Ms. Pac-man cabinet for the stenciling process. This is the same process that I have already detailed in my Ms. Pac-man stenciling tutorials parts 1-3 so I won’t completely revisit that information.
However, ever person will experience some things that are different than someone else, and I had a couple of those moments myself. Before I get into those notes, here are some photos to date from the last three weeks;
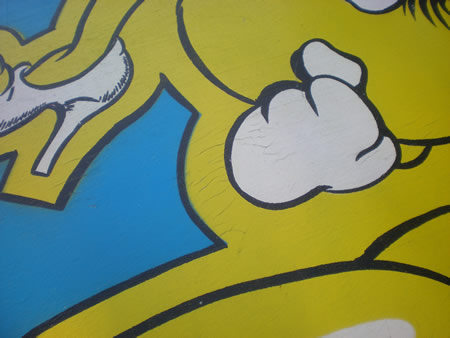
My Ms. Pac-man wasn’t too bad cosmetically, but it had no pink left and the painted artwork was cracked and lifting in some spots on the cabinet.
One thing that surprised me, is I got to see some of the Ms. Pac pink when I started to apply the stripper. Too little pink too late.
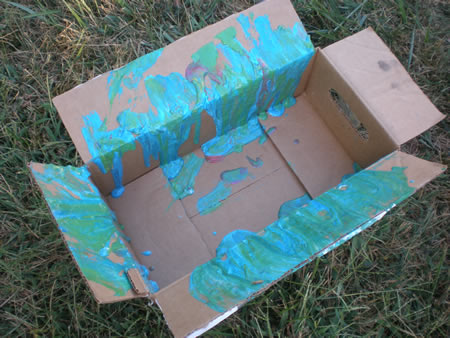
Best thing I had learned this time around. The first cabinet I stripped was an old Pac-man. This time around I grabbed a box hoping to scrap the web stripper / paint mix into it. If you have a box with flaps, flip the flap in and that gives you something to always scrap against and then the paint falls into the bottom of the box and you never run out of edges.
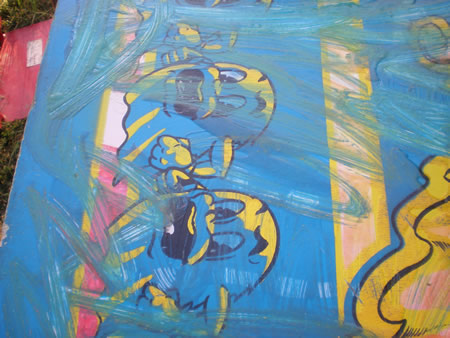
A shot of the Ms. Pac-man cabinet almost stripped on one side. Looks terrible. I was trying to keep costs down as much as possible, but my time is important to me. I went and bought a much larger dry wall scraper when I did the second side and the paint came off like butter…not tiny strips like you see here.

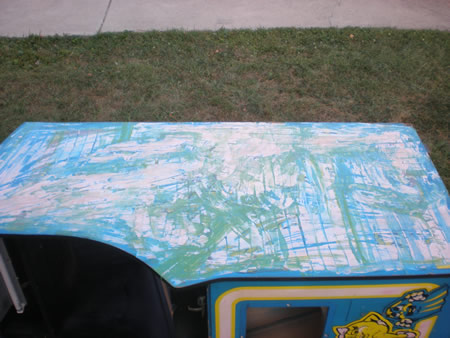
Cabinet sanded down. I was told to sand with a number of level of grit density sand paper. I don’t know if it is just me, or where I am going (Harbor Freight and Home Depot) but I couldn’t find the suggested grits. I was told to use 120 to start, go back over the cabinet in something finer, maybe a 160 grit? and then finish in 180 grit. I could only find 100 and 150 grit in packs of 5, so that is what I used. I started with 100 to get most of the paint off, and then went back over the cabinet in 150. I think I had a 180 in the multi pack that came with my new Ryobi sander that I may have used as well.
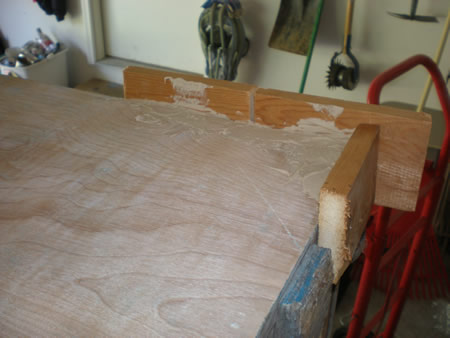
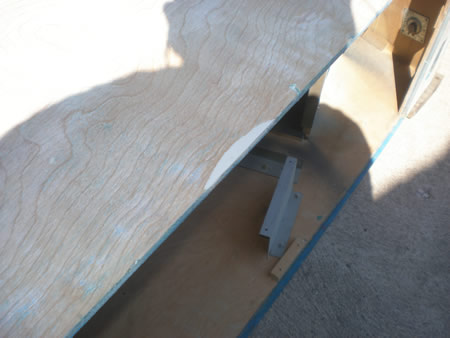
Patching. Before and after. Love the wood wedges, I had always had problem with a maleable substance to stay in the place I needed it on the edge of a cabinet. With these boards I got nice straight edges with my bondo patching.
What else I learned in my stenciling experience
Let’s see. Don’t use a belt sander, you can create grooves in the side of your cabinet. Brian Jones caught me early and told me to only use an orbital sander. I was able to borrow a belt, but no one I knew had an orbital so I sprung for that cost.
The second thing that I didn’t think of that I wish I would have. The section of the Ms. Pac-man cabinet by the bezel / monitor that is painted black. When stripping you might want to mask this off in some fashion. I was pretty careful with the stripper and the edge, but one time some stripper splashed off onto this section and removed some of the black paint. Now I have to repaint that section as well 🙁
Those are the only arcade tips I have for now
Everything else is in the Ms. Pac-man stenciling tutorials and is pretty well explained. I don’t think I’ll get to priming this weekend, which means I am a week or two from getting to the point where the other set of tutorials is held up – the blue Ms. Pac coat.
According to the other owner who is stenciling his cabinet he is held up with other time commitments. His individual color spray cans are in off special order and ready for pick up. Who knows, maybe he’ll beat me to the punch.
Here are some similar arcade posts
- Stencil Ms. Pac-man Cabinet – Part 1
- A stenciled Pac-man arcade game
- Stenciling a Ms. Pac-man – Part 7
- Stenciling a Ms. Pac-man – Part 4
- Prologue – Stencil a Ms. Pac-man Arcade Cabinet
If you enjoyed this post, please consider to leave a comment or subscribe to the feed and get future articles delivered to your feed reader.
Comments
@Jamie:
Right along, everyone had been telling me to get a HVLP gun. Not knowing really what it meant in practice, and knowing that supply costs would run me close to $200 for the job, I wanted to save money where I could. I considered everything. I don’t like not listening to Brian Jones, he has done a ton of cabs this way, and I know nothing. But I do know that I don’t want to end up with $800 into the total cost of one cab. ‘Labor of Love’ is never acceptable to me, I always have to be level headed.
Plus, I thought that a good HVLP gun for spraying arcade cabinets were around $80. I don’t remember where I got that figure, but that is what I was expecting.
So, I borrowed a standard gun with a bottom load paint cannister, it wouldn’t work. I ended up buying a HVLP gun for much cheaper than I thought, and I will probably go into more detail on that later. But I had no idea that I ‘had’ to have a higher gallon air compressor to be able to use the HVLP gun to paint my arcade game.
So, interesting point. It could have been a combination of the gun and the original air compressor that was my time consuming painting problem.
The 2 guns I tried were almost identical. I got them at Home Depot. They were “Husky” brand, and both had a top canister. The difference between the standard and HVLP was incredible on my small compressor. I actually thought the HVLP was broken until I looked into it. Another thing that helps immensely is thinning the paint. I thinned it with water, and something called flotrol (for latex paint). If you don’t thin the paint, it won’t spray right, and if you thin it too much it will drip. Having the nozzle of the gun clean makes a huge difference also.
Keep in mind this is all coming from someone who has sprayed one cabinet in my lifetime. 🙂
@Jamie:
I just posted about my second coat of blue paint on my Ms. Pac-man. It looks a lot better now…
I have found that thinning the latex paint with water hasn’t been nearly as big of a deal as I thought. And now, since I am using all latex based paints (where I thought some would be oil) I really won’t have any problem with the right consistency. You’re right, paint consistency for spraying has been so important.
I think that any advice we give here is just detail that everyone should take in for the best possible job. But the main lesson of this story is;
Anything Brian Jones says – do it. He’s always right about anything cab painting related. If you can spend the money on your arcade game, don’t question anything.
Leave a comment
Your email address is never displayed and cannot be spammed. If your comments are excessively self-promotional you will be banned from commenting. Read our comment privacy policy.


October 17, 2008
Looks good. Looking forward to seeing it after it’s done.
What are you going to use for spraying? If you happen to need the info, I learned something the hard way when I did my Moon Patrol. I have a small (5 gallon?) pancake type compressor. I went to buy a paint spray gun, and figured spending more $ would equal better results. They had one for maybe $35 (ish) that was a standard normal spray gun. They had another one that was more money, listed as a HVLP gun. I figured that would be better not knowing what the hell I was doing. I got it home, and couldn’t get it to spray a good amount of paint. It just barely came out.
HVLP guns are “high volume, low pressure”. They are designed to spray a tiny bit better IF you have a huge compressor (20+gallons). They just don’t work with small compressors.
I brought it back, got the regular one, and it worked great.