
Prologue – Stencil a Ms. Pac-man Arcade Cabinet
You’ve got a Ms. Pac-man that has seen better days and you’re considering the long path of re-stenciling the artwork. You’re lucky, a year ago finding a way to have stencils made for your cabinet was a long tiresome path. But after Paul Murphy released his Ms. Pac-man stencils file every person now has more of an opportunity to restore their cabinet. Take the file to the printer, pay for a set of 9 Ms. Pac-man stencils and you’re one step closer.
However, what are the real cost? And by real I mean, what are the monetary costs, and what are the time costs? How much are you willing to sacrifice to bring that Ms. Pac-man back. Now that I am done with my Ms. Pac-man I thought I would list out the items you’ll need and what you should expect to pay. Results will vary 😉
What kind of money and effort you’ll put into stenciling artwork for a Ms. Pac-man
Before you take on this project evaluate your motivations. Are you thinking about stenciling artwork on a Ms. Pac-man for your own collection? For a friend? or Purely for resale?
I would say that unless you are going to do stenciled artwork for a Ms. Pac cab that is going to stay in your collection for a long time, or permanently, I wouldn’t attempt this project. I spoke to people even last night at Chris Moore’s 2008 Halloween party in Chicago that essentially said “I’ve check that off my list”.
Why would someone say this? Well, it is the time. And not only sheer time, but the patience over a period of time. You have to willing to put potentially weeks if not longer into Ms. Pac-man artwork.
Now, I didn’t record my time to a ‘T’, as it was I was trying to do a good job on the artwork, recording all costs (and the many hardware store trips I made) as well as taking photos with tutorials in mind. It’s exhausting. But if I were to estimate, these are the approximate times I would say it took for each step of the process. Your established skill level will help shorter these times I have no doubt.
Itemized Task Time
- Removing Hardware – 1-2 Hours – Packing and storing as well as labeling
- Cleaning the Cabinet – 1 Hour – I chose to clean the inside of my cabinet, it had never been done. Length of cleaning will depend on how dirty your cab is obviously
- Stripping the Cabinet – 1 Hour + – I know this step took me longer because I ran to the store for a larger traul to scrap the mixture off
- Sanding the Cabinet – 5-10 Hours – When I write this, it seems high. I know I did a ton of sanding though, using different grits getting the cabinet really smooth and remembering I didn’t do it in one day.
- Priming the Cabinet – 1:00-2:00 – That’s per coat if you have the right tools. I did three coats, and I did not have the right tools to start. My time was much longer total. Don’t forget tool cleanup.
- Blue Paint Coat – 1:00-2:00 – That’s per coat if you have the right tools. I did three coats. Don’t forget tool cleanup.
- Sanding Between Coats – :30 – 6 Times. I used 220 grit sandpaper and went over the entire cabinet, which would have been six times between the primer and the blue. The finish was very smooth.
- Yellow Stencils / Painting – 8 Hours – I am pretty sure this is about long it took me. Positioning the artwork – remember, this sets the position for everything else therein – as well as painting yellow on blue. A primer layer would help this, which will be in the tut.
- Pink Stencils / Painting – 5 Hours – Includes cleanup of gun, depressure the tank, storing tools, etc.
- Black Stencils / Painting – 5 Hours – Includes cleanup of gun, depressure the tank, storing tools, etc.
- Clear Coats – :15 Coat – 5 Coats. I had two cans of clear, so I thought I’d use them.
- Re-Assembly – 1-2 Hours – I haven’t done this yet, assumes it takes longer than breaking it down 😉
- Misc Stuff – 5-12 Hours – I would count on some of this. For me it was cutting by hand the yellow paint job with a knife, black touchup on the inside of the cabinet, hand touchup on paint overspray, touchup on the screw on the cpanel, switching parts between machines, etc. etc.
Grand Total = 42:15-62:15 Hours
Adding that all up seems like a crazy amount, but I don’t doubt that I spent that much time. Take to heart that this was my first arcade game stencil job, so I was probably a lot slower than all of you would be. For those of you with great hands on skills and experience, this time I am sure might be cut in half.
Duration in time
Short note here. In theory, I started around the first week of September 2008 and finished my Ms. pac-man stencil job in November 2008. I took my damn time getting from sanding to painting stage, so that was part of the longer duration. Plus, I had weather to deal with. November this year was unseasonably warm, otherwise I may have never finished. I would count on 2-4 weeks, weekends, whatever. Again, you may be faster.
Grand Total = 2-8 Weeks
Itemized List of Tools / Costs
Here is the list of tools that I needed / used. I don’t have a lot of tools already, so my costs were much higher on that side. Either way, you’ll have a fixed base cost if you purchase a set of the Ms. Pac-man stencils. Oh, and some costs may be approximates.
- $200 – Ms. Pac-man Stencils – I don’t know what these cost made new, I bought my mine from an individual and am not disclosing price. But based on material, I am guessing this about the cost for a set of 9.
- $3.20 – 100 5” Circular Sanding Discs
- $17.34 – Larger Putty Knife, Paint Stripper / Remover
- $35.00 – Goggles (Found my other pair later), Respirator
- $50.00 – Bulls Eye Primer, Rotary Sander, 150 Grit Discs
- $15.50 – Can of Wood Hardener / Bondo Hardener (Had the bondo, no hardener), etc.
- $26.74 – Spray gun, filter, etc. (Harbor Freight)
- $1.67 – Threaded quick release for compressor, nylon tape (Tape for connection in air filter for gun)
- $32.10 – Blue, Pink, Yellow and Black paint
- $5.34 – Painters Tape (Went through a ton of this, may not need a whole roll if conserved and planned)
- $.85 – Ear plugs
- $6.37 – Yellow half pint touchup, foam brush
- $21.06 – 2 cans clear coat, 1 can black spray paint
Borrowed Tools – Associated Costs
- $200-$400 – Air Compressor (20 Gallon Tank) – This would probably include the hose and the spray nozzle for getting rid of dust.
- $100-$200 – Garage Heater – If you are in a cold environment or you miss the summer. Will not appy to most people
Grand Total = $415.17-$800 – The $600 is if you buy the really nice, really big air compressor.
The total Ms. Pac-man stencil costs
For me, my project cost me about 60 hours of my time over a two month span and about $215 in supplies. If you buy the stencils outright and have an air compressor, plan on a rounded cost of $350-$400 depending on tools. This isn’t too bad of a price since, last time I checked, a Ms. Pac-man is still valued / worth about $450-$600, maybe more.
Think it through. If you look at these costs and you’re like, “Dammit, I still want an awesome Ms. Pac-man”, or “I’m two seconds from cutting off my ear anyway, why not” then that’s great. We’ve got the Ms. Pac-man tutorial series for you. Here are the links. Best of luck, and of course, if you have any questions you can always leave a comment or drop us a message. Enjoy. (Remember, your email is never displayed in the comments nor disclosed, it is only there to help facilitate conversation through updates back and forth when new comments are added.)
Tutorial – Stencil a Ms. Pac-man Arcade Cabinet – Part 1
Tutorial – Stencil a Ms. Pac-man Arcade Cabinet – Part 2
Tutorial – Stencil a Ms. Pac-man Arcade Cabinet – Part 3
Tutorial – Stencil a Ms. Pac-man Arcade Cabinet – Part 4
Tutorial – Stencil a Ms. Pac-man Arcade Cabinet – Part 5
Tutorial – Stencil a Ms. Pac-man Arcade Cabinet – Part 6
Tutorial – Stencil a Ms. Pac-man Arcade Cabinet – Part 7
Tutorial – Stencil a Ms. Pac-man Arcade Cabinet – Part 8-?
Here are some similar arcade posts
- Second stenciled Ms. Pac-man has left the building
- Stenciling a Ms. Pac-man – Part 7
- How Bally Stenciled Ms. Pac-man Cabinets
- Ms. Pac-man Yellow Finished
- Stenciling a Ms. Pac-man – Part 4
If you enjoyed this post, please consider to leave a comment or subscribe to the feed and get future articles delivered to your feed reader.
Comments
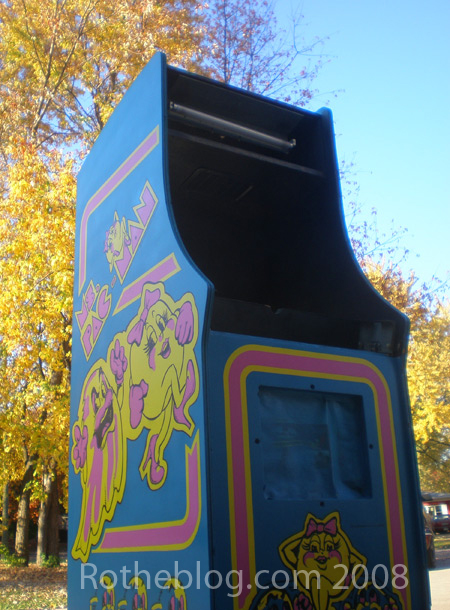
Love that photo with the trees in the background. Looks great. Lots of time, lots of money, but totally worth it for a machine you plan on keeping in your collection. I’ve got my eyes out for a Ms. Pac so I can follow your tutorial.
I agree with you guys. Stencilling a game like ms pac isn’t the easiest or the cheapest but it’s by far the most accurate and most fulfilling when you’re done. Collecting these games isn’t supposed to be about sweating the dollar value of the machine, it’s about the love of the game and returning it to it’s original glory and being proud of what you’ve done to preserve a tiny bit of gaming history.
@Jeff
Should be out of the direct sunlight in my basement, plus shoved up against another cab. Totally worth it for the work….ha.
@Brian
Unfortunately, at least from my perception, the new crop of collectors seem to be more price conscious for eventual resale value. Hard to know what the future holds….I would venture a blind guess that collectors from when you started Brian were more of this same mantra, it isn’t about sweating the dollar value. I don’t know if values of arcade machines were better 10 years ago on common machines like this…so hard to know if that helped feed that idea or not.
I hope to write at least part 4 of this tutorial maybe over the Thanksgiving holiday. It might be like parts 4-6, as I feel like maybe I should shorten the size from how long parts 1-3 were individually.
How much paint did you use? Would a quart of Rhapsody blue be enough to cover the entire cabinet? Thanks!
Leave a comment
Your email address is never displayed and cannot be spammed. If your comments are excessively self-promotional you will be banned from commenting. Read our comment privacy policy.


November 10, 2008
The cabinet looks great! Can’t wait to see it all together. I went the vinyl artwork route for my Pac-Man. I like how it looks but the painted versions are much better.
Remember to keep your game out of direct sunlight!!!