
Stenciling a Ms. Pac-man – Part 7
It’s finally time. All the cabinet prepping, spraying down solid coats of primer and blue, your Ms. Pac-man cabinet is ready for the fun part, appling the artwork. It’s time to add the yellow, the largest artwork stencil and the most crucial as this will set the tone for the other two colors. We’ll also talk about what not to do, which yours truly managed to discover by experience 😉
You have to trick the yellow into working
Last time we ended with your yellow stencils all applied and your cabinet masked off with tape and newspaper. At this point in my stenciling I finally let myself get excited. The boring stuff was over! This is where I finally get to see the Ms. Pac-man artwork take shape! So I jumped right in without thinking I needed to do any research. For someone who doesn’t do a lot of work like this, this is where a ‘one stencil tutorial fits all’ format isn’t true.
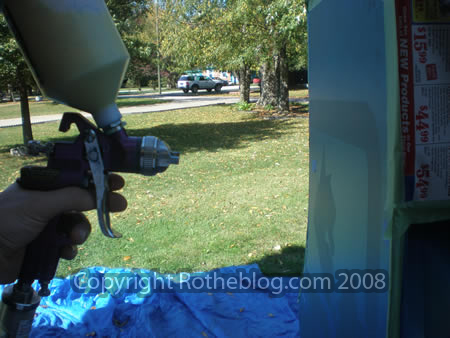
Before I start, here is a photo I took to try to demonstrate how far you should be holding the gun away from the cabinet when spraying, which I figured out why this distance was important the hard way halfway through the application of the blue.
User Note:
You need to add a coat of primer to your yellow stencil, white primer. I would think that your coat of primer doesn’t need to be solid – solid white, but more than a dusting, so probably two passes of primer will do. I did not do this, and I had a heck of a time with my cabinet. If anyone attempts this restenciling and lays down some primer, can you please submit some photos to this tutorial series at rothecreations@gmail.com.
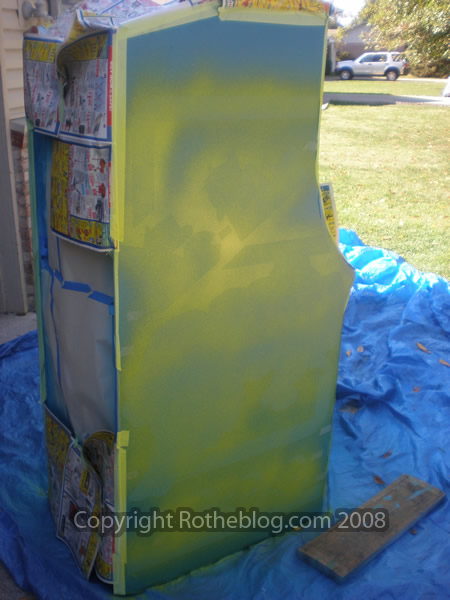
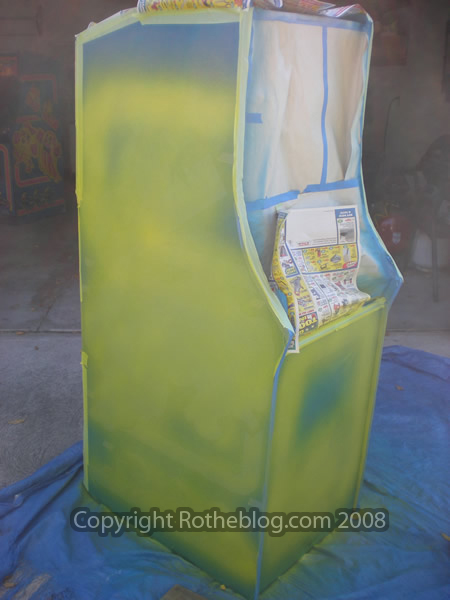
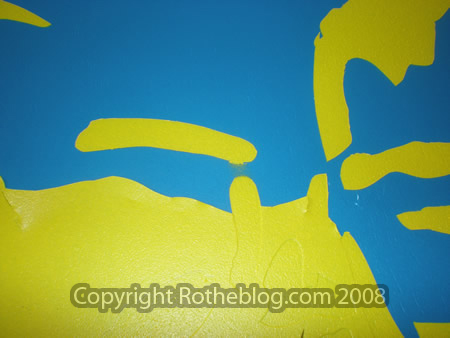
I will show you a bunch of photos showing the coat progressive of my yellow. However, you will see that I needed somewhere in the realm of 6 passes of yellow throughout the cabinet to get it solid enough. It took forever to build up the color because the yellow is such a light color and never seemed to cover that dark blue to my liking. The next set of photos gradually will show that progression. I have a ton more of these in hi-res, but here are just a couple from that set.

You might think, “Well, I don’t mind doing 6 coats of yellow if it prevents me from having to do another cleaning and paint switch in my gun”. Here is the other problem I ran into that might be a flaw with that thinking.
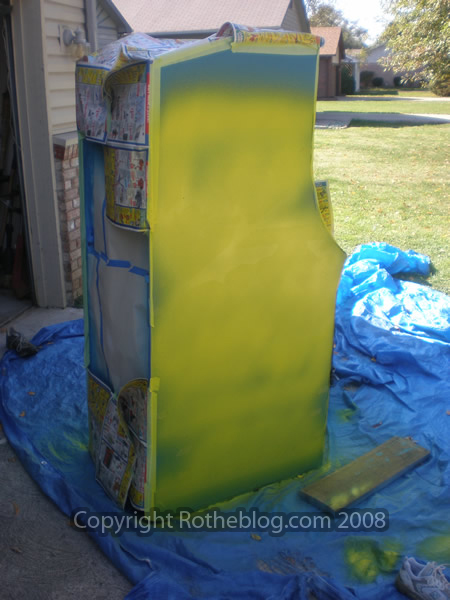
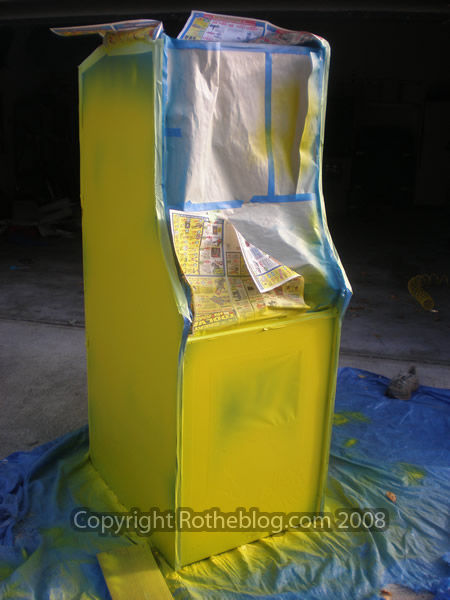
Due to the shear volume of paint, and the amount of time I let the yellow dry between applications (5-10 minutes) the total application time was around an hour, if memory serves me. Then, when I went to remove the stencil it wouldn’t come off with making a ripped edge on the artwork because the paint was sticking to it.
So, the tip in Brian’s stenciling tutorial about removing the vinyl when the paint is tacky is again so important. If you do a coat of primer, and then quickly switch to the yellow, you should be able to do fewed passes with the yellow and fewer passes total which is also important because it will keep the thickness of the paint lighter and won’t leave a ridge from the yellow underneath your pink and black stencil artwork.
What else was important?
You have already learned to make sure to mix your paint on what I would call ‘the runny side’. I think that maybe I still didn’t mix mine thin enough. A couple of people suggested a thinning product to mix with the paint, I don’t think that is necessary with a latex paint, just add plenty of water and only fill your gun cup 1/3 full. Then, if the paint really is too runny, you can always add more paint back and repeat until it’s right.
Also, make sure you use that tiny filter that is in your paint gun. I had some texture on my yellow coat that really hurt me later on as my other stencils wouldn’t stick to the cabinet. If your gun doesn’t have filters, hopefully you can purchase then at the store with the gun. Harbor Freight in Indianapolis had no idea what I was talking about when I asked about those filters. I shrugged it off and didn’t think it would be that big of a deal, but I think this is crucial looking back. Pick up a pack, and make sure to spend lots of time cleaning the filters between each coat. This will make your cabinet that much better than mine.
So to summarize. 1-2 passes of white primer, 1-2 passes with the yellow, let it set no more than 20 minutes, and then start to take the stencil off the cabinet while all of the paint is still tacky.
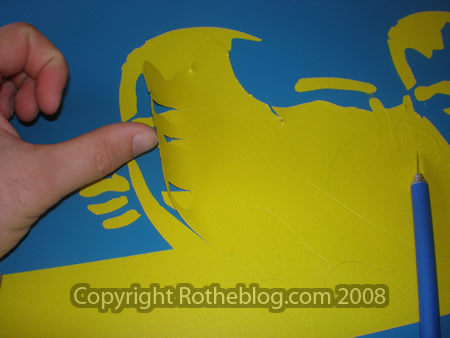
If you are unfortunate enough to experience what I did where the vinyl stencil is sticking to the paint, you can try what I did and use a brand new exacto blade and lightly cut out every piece of artwork. Here are some detail shots of the paint and cutting the shapes out;
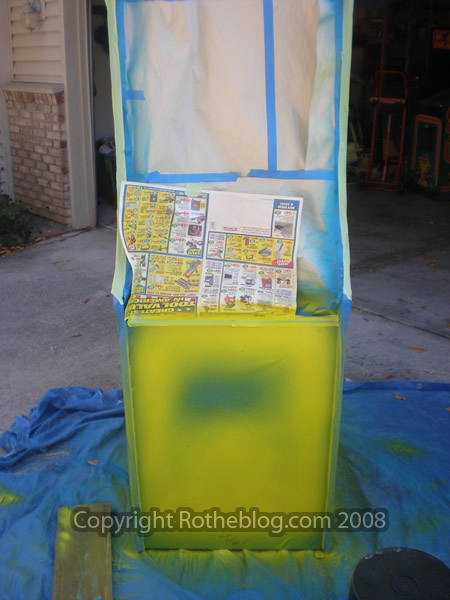
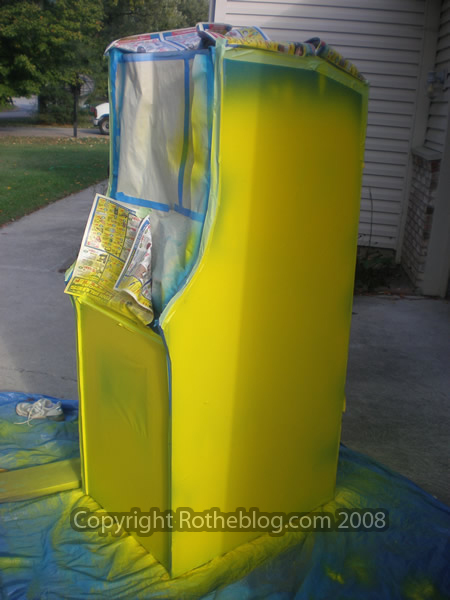
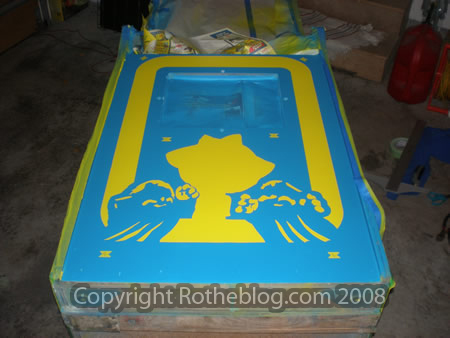
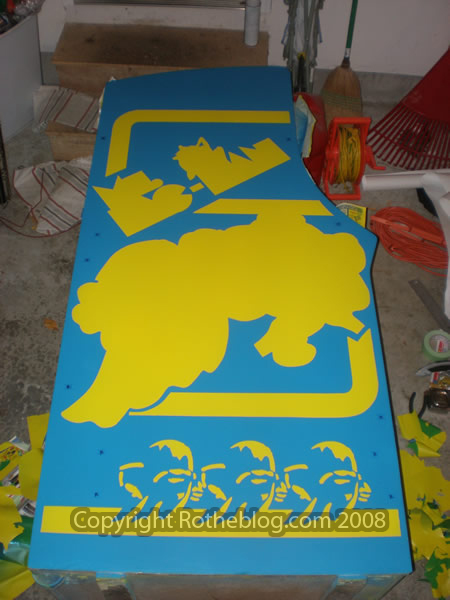
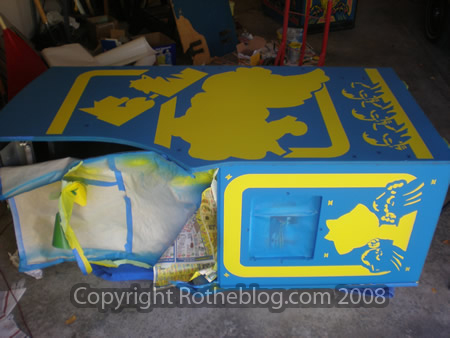
At that point your options are having a not so nice ridge, like the paint is a decal, or have a ripped edge trying to pull the stencil off. At least with the first option you have a chance that the pink and black will cover up those nasty looking edges. Here are some photos showing the cabinet with all of the yellow stenciled artwork;
Final Thoughts?
Maybe something I’ve missed? The format here for the yellow Ms. Pac-man artwork was less ‘do this, then that, then this’ and more about the mistakes I made and hopefully how that can save some of you some headache. My yellow artwork was my most troublesome layer, things got better from there on out.
Leave a comment if you have any questions on any details you want a little more explanation.
Part 8 will continue on and point out a little problem I found with the yellow Ms. Pac-man stencil and some suggestions on what to do to fix it.
Stenciling a Ms. Pac-man arcade cabinet Part 8
Here are some similar arcade posts
- Stenciling a Ms. Pac-man – Part 4
- Stenciling a Ms. Pac-man – Part 8
- Second stenciled Ms. Pac-man has left the building
- How Bally Stenciled Ms. Pac-man Cabinets
- Stenciling a Ms. Pac-man – Part 6
If you enjoyed this post, please consider to leave a comment or subscribe to the feed and get future articles delivered to your feed reader.
Comments
Part 8 for the stencil tutorial is about written. At the time, it was a bump in the road, because it was the part talking about the small error in the stencil file and the yellow hand. So I revised the yellow stencil layer and published it to localarcade.com. But I didn't finish up that piece, so let me see if I can do that, even today maybe.
Leave a comment
Your email address is never displayed and cannot be spammed. If your comments are excessively self-promotional you will be banned from commenting. Read our comment privacy policy.


September 1, 2009
So where is part 8? I'm really interested to see how you went about aligning the next layer. I'm at that stage now with my Pac-man stencils.