
Stenciling a Ms. Pac-man – Part 8
Finally, part 8 to the tutorial on how to re-stencil your Ms. Pac-man arcade game. Last time we sprayed the yellow on your Ms. Pac-man. This part is going to cover the piece of artwork that is missing from the joymonkey artwork file and the update I have made to the stencil file itself to make sure your Ms. Pac-man is as accurate as possible.
The ghosts hands should be yellow, right?
I was really glad that when I stenciled my first Ms. Pac-man, I had two cabinets in my possession, one to refer back to as needed. I noticed something, that the yellow in the lower ghost’s hands on the kickplate was missing.
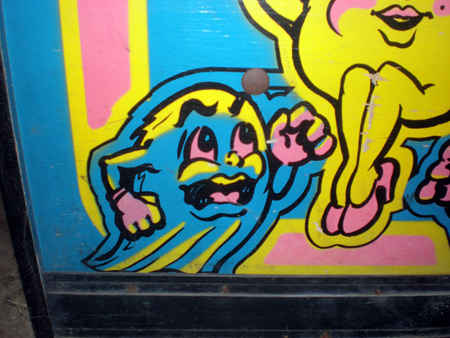
I thought, “Well, maybe that was an error made when the stencils were cut”. But I went back to the original file and found that, nope, no yellow on the hands. I go into more detail in my original post talking about this missing piece of artwork. That post has some images breaking down the stencil file, what was missing, a photo comparison, etc.
So, let’s say that you didn’t know. You are here, getting ready to apply your pink and you took the joymonkey Ms. Pac-man stencil file, had the stencils cut and want it to be as accurate as possible. I’ll show you what I did as one option, and give you another option after I’m finished.
Cut yourself a mini ghost hand stencil
Most of you won’t have a second Ms. Pac-man as a backup, so you will have no way to make an accurate homemade stencil to compensate for that yellow artwork.
The area in question is approximately 1.2″ x 1.5″, not quite square. I have made a separate file that looks just like this for the ghost fingers. Right click, save this jpg to your computer.
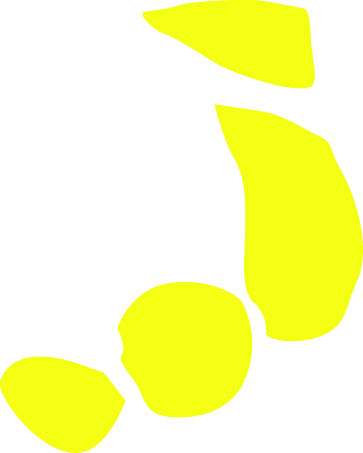
This image should be to scale. Print it out on your printer and check the measurements against what I have above. Then make your own homemade stencil. How do you make your homemade stencil?
Well, you can take a piece of the stencil material that is either currently extra, or cut off a portion of the top and then just do a little extra taping off. Here is what my little makeshift stencil looked like;
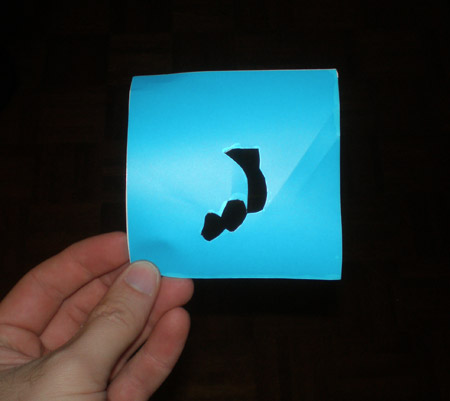
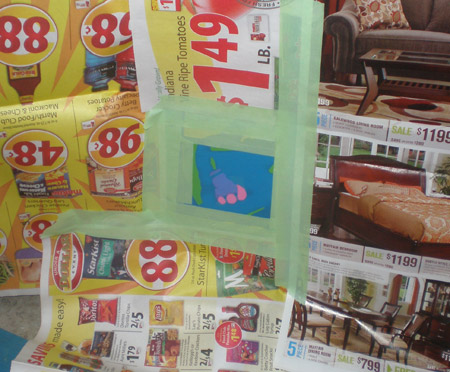
Ugly and rough, but it got the job done. Now, to position this piece correctly to paint, measure 3″ from the left, and 5.25″ from the bottom for the lower left corner of the image and that is where you should position your homemade stencil. And then tape off all of the artwork for that little space and spray your remaining yellow. Let it dry and remove.
A new Ms. Pac-man yellow stencil
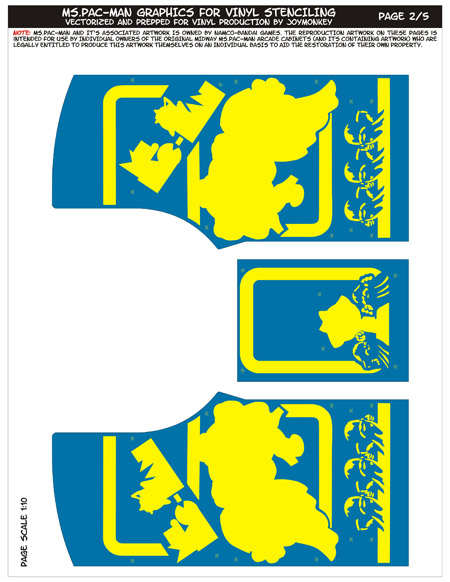
Maybe you are thinking of starting your project and have not had your stencils cut just yet. You are in luck. I took the original ms. Pac-man stencil file and revised the yellow (1:10 scale). Originally I made that yellow stencil available at local arcade (As of Nov. 2009, localarcade.com was still down 3+ months ) Hopefully that site will come back online sometime soon…I fear however, that it won’t. HHere is an image of what it looks like now, not that you can see the difference of those little hand glows at this size.
Final Notes
Either way, kind of a pain, and a really small detail that only the true Ms. Pac-man dorks would really care about. But I am guessing that if you are stenciling your cabinet instead of buying crappy inaccurate artwork from Two Bits, you really are a purist geek anyway and will care about this detail.
Finally. Onto the pink, the most iconic color that seems to always be faded. That will be in part 9 of the Ms. Pac-man stenciling tutorial series.
Here are some similar arcade posts
- Ms. Pac-man Stencil File Missing Artwork?
- How Bally Stenciled Ms. Pac-man Cabinets
- Breaking News: Joymonkey’s Ms. Pac-man Stencil files online at Local Arcade
- Stenciling a Ms. Pac-man – Part 4
- Stenciling a Ms. Pac-man – Part 7
If you enjoyed this post, please consider to leave a comment or subscribe to the feed and get future articles delivered to your feed reader.
Comments
This little artwork correction was for my Ms. Pac-man. I didn’t end up getting to it on the second one…
Where is the rest of your write up? It’s been long enough, I’m going to be redoing my Ms. PacMan soon would like to see how yours turned out. Thanks!
You mention “now on to pink” but to me it’s clear that the colouring of Ms Pacman is pure CMYK – probably chosen so that no special colours have to be mixed from the base colours. So that remaining colour is Magenta, not Pink. (and the Blue is not Blue but Cyan.)
regards
Graham
Leave a comment
Your email address is never displayed and cannot be spammed. If your comments are excessively self-promotional you will be banned from commenting. Read our comment privacy policy.


November 17, 2009
Great use of some spare material to complete the yellow stencil. With the effort you are putting into this cab and the attention to detail, it should look fantastic when done.