
Tetris
Wizard of Wor, Dig Dug and Tetris Sold!
For a month or so I had been responding to the common Craigslist ad looking to “buy” games. Usually people put out these ads looking for freebies, but I knew it couldn’t harm me any to try to sell some of my non working games. I wanted to try to reduce as many distractions as possible to focus on studying, and fixing up the Midway Wizard of Wor, Atari Dig Dug, and Dynamo cabinet Tetris were time suckers to say the least.
The Tetris was the only one I was seriously considering keeping in my game room, but the black cabinet was so ugly. The original intention was to resell these once they were working to help pay for gas, or take down the paid cost on one of my other games. But the motivation for selling a game to make a small amount of money waned for me. I got my holy grail, the Jr. Pac-man. I had originally wanted to use the money I made to help pay for my trip out to PA to pick it up. But thanks to DanOfEarth, that wasn’t an issue anymore.
Finally, last Tuesday I found some people who weren’t looking for free games, and were interested in the three I had to sell. I just wanted my itemized costs back in total for the games, and the price was more than fair, great if you intended to keep one of the games. Dig Dug is too slow of a pace for me, Wizard of Wor holds no interest for me other than the fact that it is a two player game, and Tetris, again, ugly cabinet with no sideart.
Here are some photos of the games being taken away.
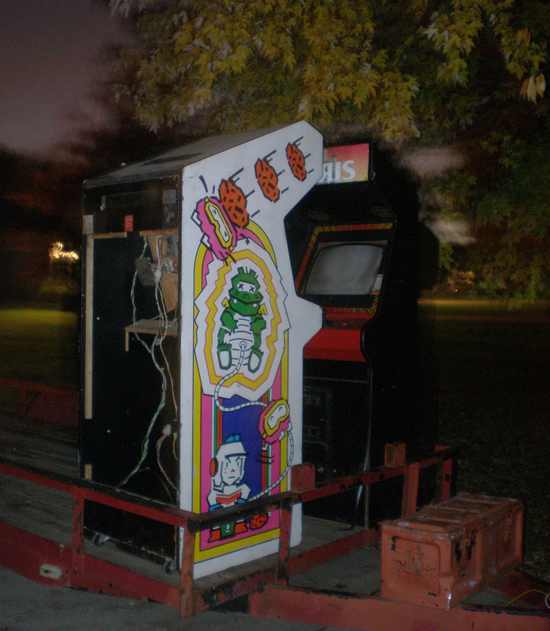

I made a whopping $10 on my sale after all of my costs were added up, but I learned a lot. I originally bought the Dig Dug as a Land Sea and Air Squad, painted solid black on the sides. It was my first game that I brought back from the brink of oblivion, and restored in some sense of the word. It was a lot of fun, bargaining for the deals, but it was a lot of work, and without knowing much about electronics, it was hard work for me to constantly figure out all of the problems I was having with any given game.
In the end things worked out great. I didn’t lose anything but time, and that is debatable when compared to what I learned and the contacts I made hunting down the arcade parts. The games found a good home where they should be reused in a family fun center, and I can park in my garage again:) Just in time for winter. Not to mention I can keep the other two cabs in case I need a fix, my empty Atari Food Fight and Atari Xevious.
Dynamo Cabinet 19″ Monitor Mount Board Dimensions
Last Saturday I mounted a 19″ monitor in my Tetris Dynamo cabinet. The cabinet is 25.5″ wide, so I don’t think it was meant to fit a 25″ monitor originally, the monitor opening is 22.25″ x 22.25″ square. Maybe it was meant for a 21″ monitor?
Either way, the opening was way too large for me to mount my 19″ monitor without some customization. A JAMMA cabinet, they are meant to be universal cabinet for any game. Probably an easy job for most guys with power tools. But I didn’t have any, so I called in a friend.
The night before I measured out the board we were cutting, and I thought I would share those dimensions here in case someone else could use the information.
I had a 3/4″ thick piece of plywood scrap that I got for free that I worked with. I think the thicker the better since the monitor is so heavy.
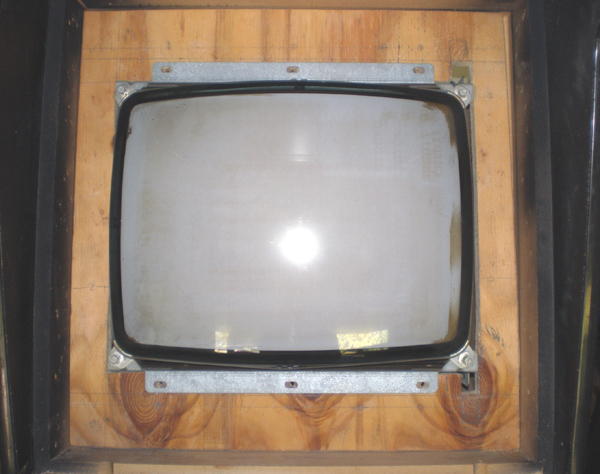
Here are photos of the monitor mounted in the cabinet;

And here is the dimensions for cutting a board to fit your dynamo cabinet and mount a smaller monitor.
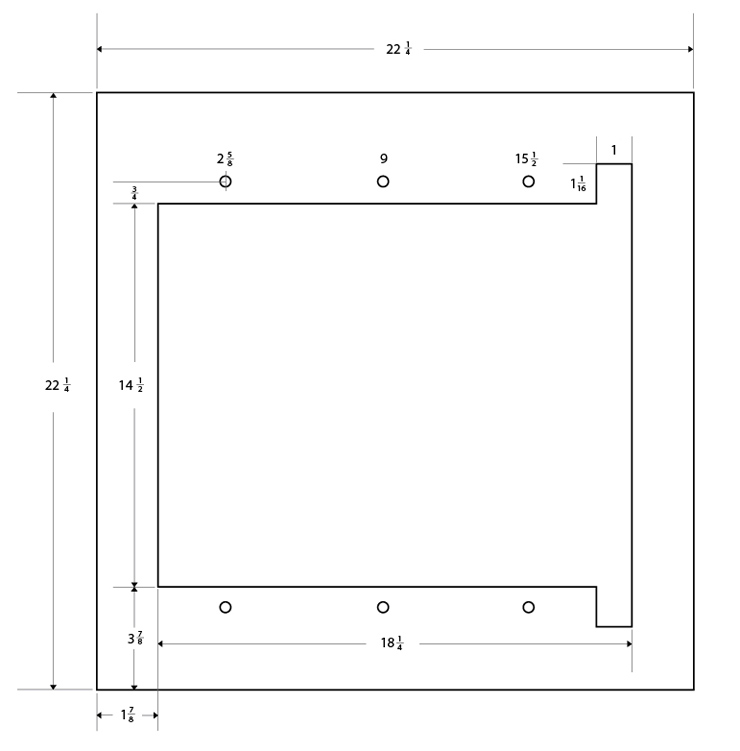
Notes: The holes that I drilled were 1/4″ for the mounting bolts. I made this drawing for a horizontally framed monitor. You will notice the slots to the side for the frame flaps to slide through.
The dimensions are as following (Converted to the decimal);
- Total Board Size – 22.25″ x 22.25″
- Inner Square Total Size – 14.5″ H x 18.25″ W
- Monitor Flap Slots – 1″ H x 1.0625″ W
- Space Horizontally around cutout – 1.875″
- Space Vertically around cutout – 3.875″
- Bolt Placement From The Left of Board (Top and Bottom) – 2.625″, 9″, 15.5″
- Space to center of holes – 75″
Hope I described that clearly. Like I said above, I had to make the opening a little taller than 14.5″ to fit the 19″ Electrohome monitor screws.
Tetris PCB has arrived
I won the Tetris arcade PCB over a week ago off ebay, so after having to wait to transfer paypal payment to my account (why does that take so stinking long?), I paid for it and it was waiting for me at home on my doorstep today.
It said JAMMA in the auction, and that it worked. I don’t see “JAMMA” by the edge connector, but maybe that isn’t on every board. Either way, hope to try it out this weekend when Paul comes over to help me finally saw that board and soon after, mount the monitor.
Got new Diodes for the G07
I got another sample from Allied Electronics, 5 of them to be exact. I had gone to Meunier downtown to pick up pretty much the same part a couple of weeks back, but was confused. The replacement part I got was rated the same, but it was physically twice the size of the diode I pulled off of the chassis. So, I waited.
I called Allied, and they gave me the information about the rating so I just had them send me a few. I assume they will work just fine. I have to figure out the polarity on the board and I should be good to go. The original part number was(_), and the equivalent replacement today is a 1N5404.

Dynamo Cabinet Push Buttons – How to disassemble?
I was dinking around with my Tetris Dynamo cabinet this morning, and I got on a kick to clean the buttons. They have all the dirt and the grim on the sides that make it so they hardly work.
However, after I took the buttons off, they didn’t have the typical bottom where you would have a micro-switch, and I could not for the life of me figure out how to take them apart.
Here are some photos;
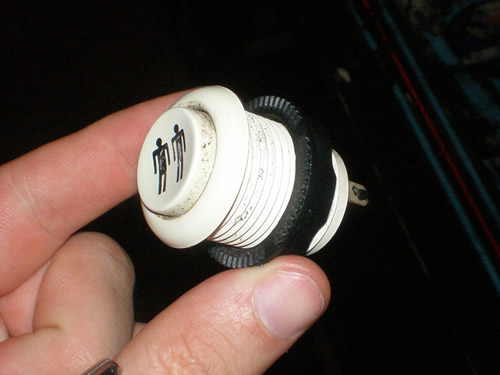
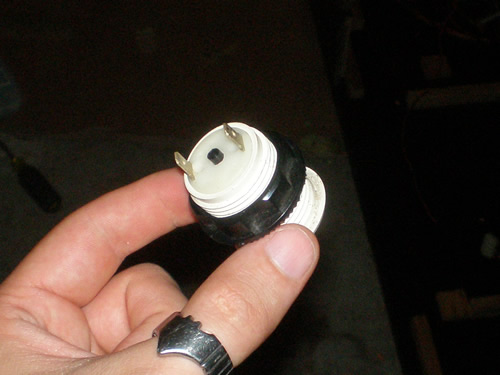
Does anyone know what types of buttons these are? They have an “IL” printed on them. I would like to take them apart to clean the buttons up easier.
Removed Diodes from G07
Figured out during the day today what I need to replace them, and the part number.
Will call or stop at Meunier tomorrow hopefully to see if they have replacements, along with the fuse. I did notice that the diodes symbol points different directions on the bottom of the chassis. You can tell how much I know. That is good that I noticed that, so they are directional. But the D401-404 are all the same so that makes it easy.

