
Discovering Q*bert 7-11 Version by Mike Doyle
About a week ago I got some insight from Mike into how he discovered the 7-Eleven version of Q-bert. It’s a weird little story if you haven’t heard it already, there was a lot of luck involved, some might even say it was divine intervention that this rare game version even made it onto the multi Q*bert game that was mailed out yesterday. (more…)
New Multi Q*Bert Shirts are @!#?-ing Awesome!
Back in July Mike Doyle and I had been writing emails back and forth and he had told mentioned some sparse details about the 7-11 Q*Bert discovery. We did some email back and forth but Mike is a busy guy and I never got the details of his story. But, he did remembered me as he and Dave teamed up again to release another round of the 6 in 1 Q*Bert kits (Now 7 in 1 with the 7-Eleven version). They’ve got a new T-Shirt with the fun little multi game and I think it is a cooler revision to the original Q*Bert Multikit t-shirt.
Installing the 96 in 1 Multi Pac – Part 2
One of the most popular and rich arcade game kits for most collectors is Dave Widel / Mike Doyle’s 96 in 1 Multi Pac-man kit. Easy to install, this kit adds a lot of depth and fun to your gameroom.
In the first part of this installation tutorial, we took a look at the multi-pac kit as it looks after it arrives at your house, as well as removing EPROMs at 6J, 6H, 6F, 6E and the Z-80 processor and resocketing it in the new 96 in 1 pcb.
In part two of Installing the 96 in 1 Multi Pac kit, we are going to look at removing EPROMs 5E and 5F as well as adjusting the dip switches to start setting your preferences for sweet, rich mapley Pac-man gameplay.
Back to the Multi Pac Instructions
Ok, we left off on “Step 3.” of the printed instructions you get for installing your Pac-man kit from Mike Doyle. Here is what step 3 says;
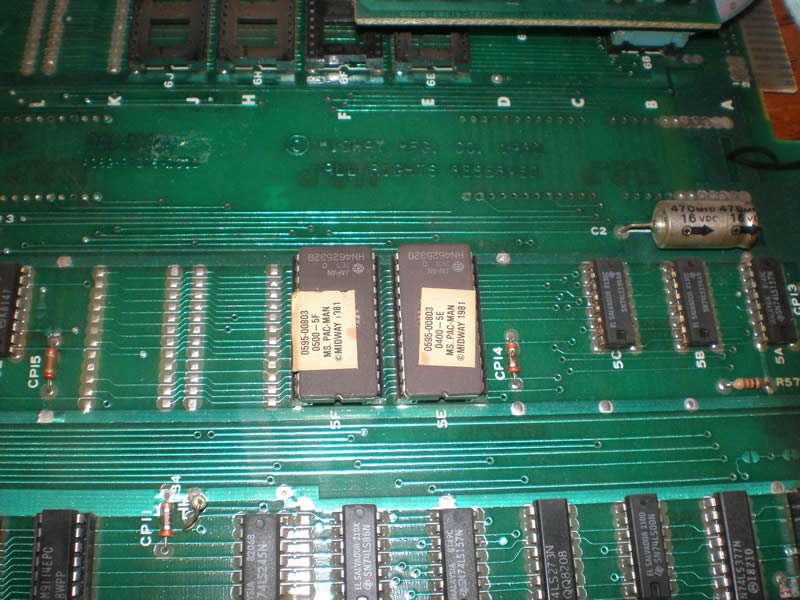
Step 3. Carefully remove your 5E and 5F ROMs. The small graphics board is plugged into 5E with the notch in the same direction as the other chips on the main PCB.
Here is a photo of the two ROMs in question on the Ms. Pac-man board, with a little 5E and 5F printed on the PCB just below them.
Again, from the first article, just use a very small flat head screwdriver to wiggle those chips out, and set them aside pressed into a piece of dense foam and store them in a static free electronics bag.
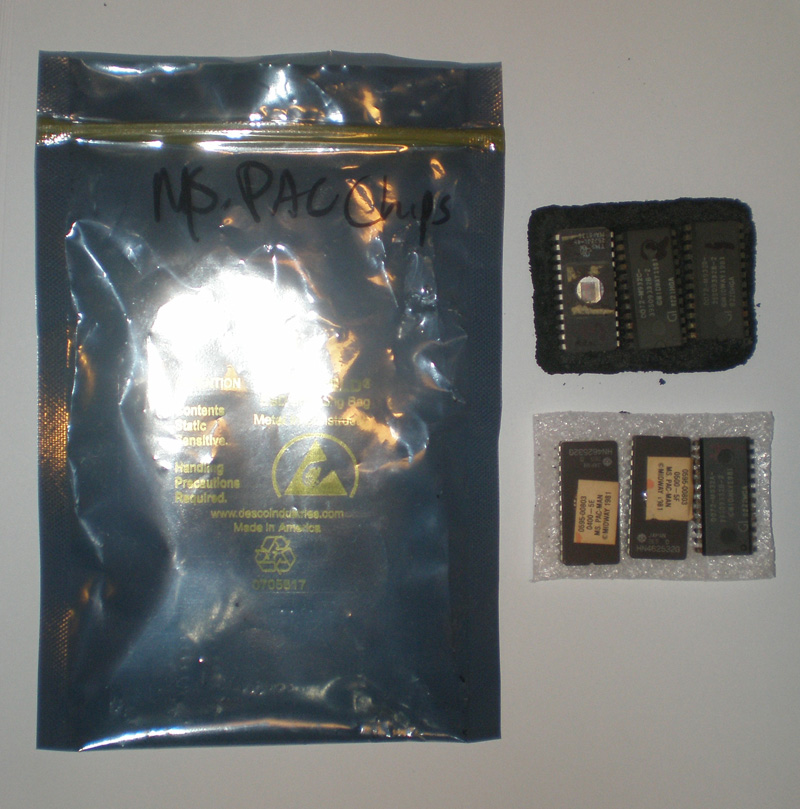
(Check out that hand writing. Think I’m one vowel away from rubber walls? Like I always say, you can’t make an omelet without breaking a few eggs.)
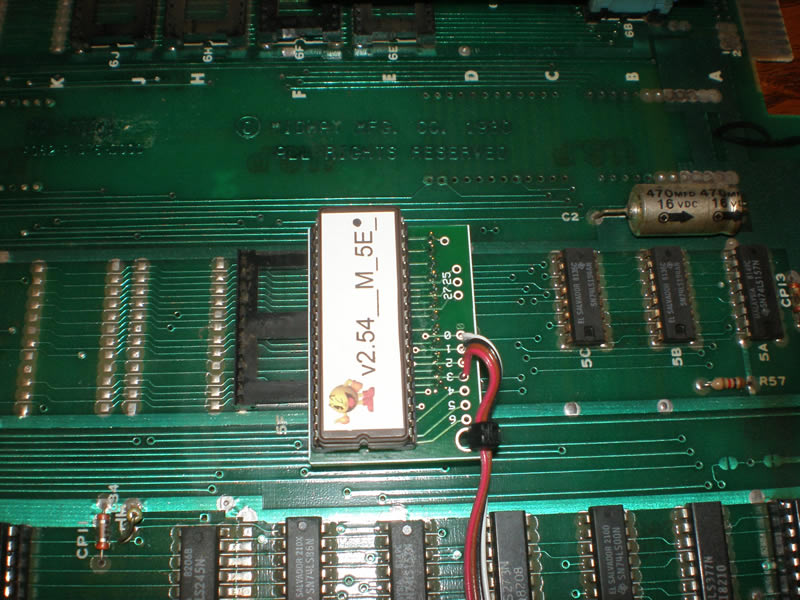
The instructions say to plug the small graphics board with the Mr. Neato thumbs up Pac-man sticker into the 5E socket, making sure again to match up the direction of the half moon on the chip going in the same direction as the half moon on the socket. This is not a chip from the Ms. pac-man board, but it gives you of the “half moon” I have been talking about;
This is how the small graphics board should look after you’ve plugged it into 5E on the Ms. pac-man PCB.
Most kits with newer socketed chips developed by Dave Widel and other designers today have stronger, tubular pins vs. the old flat plate metal pins. It may feel like you are putting a lot of pressure on the chip to get it to press into the socket, but can push fairly hard and still be good.
Another awesome sidebar about the graphics board is that Dave and Mike added strain relief to the sub ribbon cable going to 5E which should prevent any pulled wires from rough handling. So if you gots the fat man digits with no real feel of how to work those things, the 96 in 1 Multi Pac kit is ready for you, just don’t go sky diving from the 16 ga. wires.
Ok, onto step 4, where we will check our work.
Step 4. Review your work to be sure that the Z-80 chip has its notch in the right orientation (it should match the other 3 small chips near the top of the Multi board). Check the sub-board at 5E to ensure its notch is oriented the same as the other chips on the main PCB. Check for any bent pins.
Mike’s telling you what you need to look for to make sure you have the Multi Pac kit installed without causing any damage or future errors. First, check the chip orientation on the boards. You can look at those half moons in the chips like I have been mentioning.
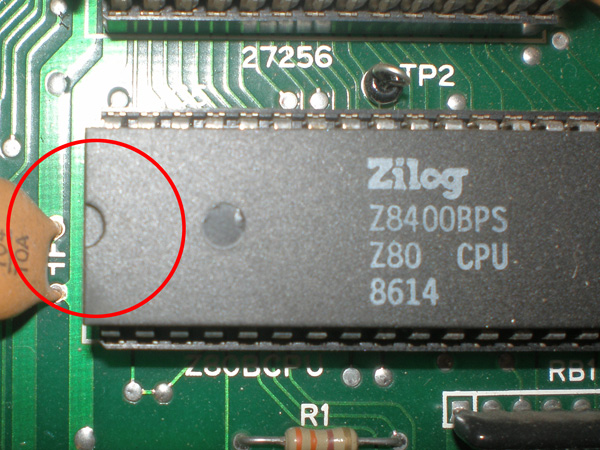
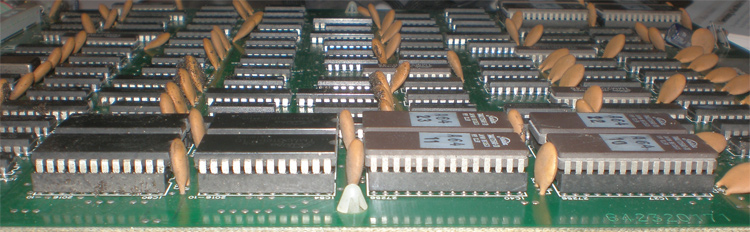
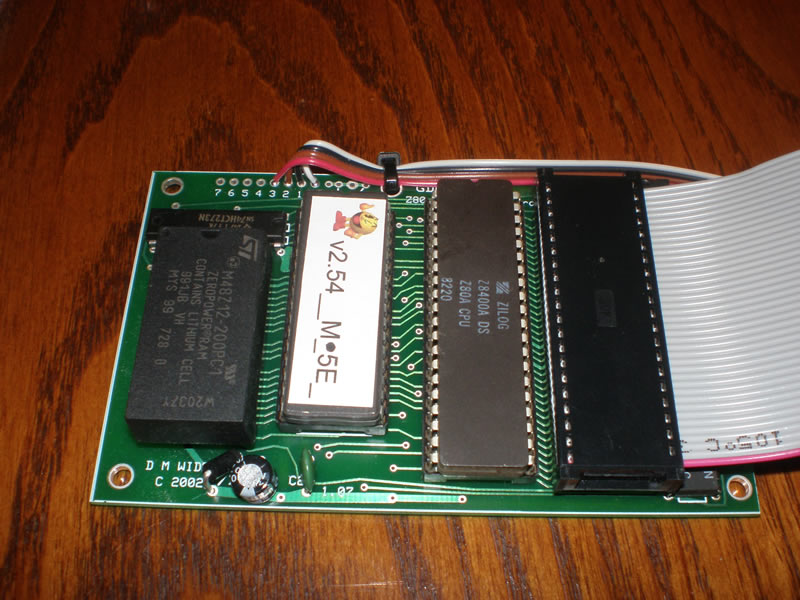
I will admit, other than looking at the profile of a chip, I don’t know how to check for bent pins once the chip is socketed. So, just look at the side of your mini graphics board that we put in 5E as well as the Z-80 processor that you re-socketed and make sure none of the pins are crooked or look bent in the socket. Your processor and other chips for your Pac multi kit should look something like this. (Not the Ms. Pac-man PCB, just a demonstration of straight pins.)
Configuring your Multi Pac settings
Looking back at Mike’s configuration instructions;
Once installed, the Multi-Pac is ready to configure to your favorite settings. The non-volatile RAM will save all settings and high scores even when the unit is unplugged. To do this:
- Set all DIP-switches 1-8 to OFF.
- Set DIP #6 to ON, this brings up the administrator menus when a game is selected.
- After you’re done, power up game
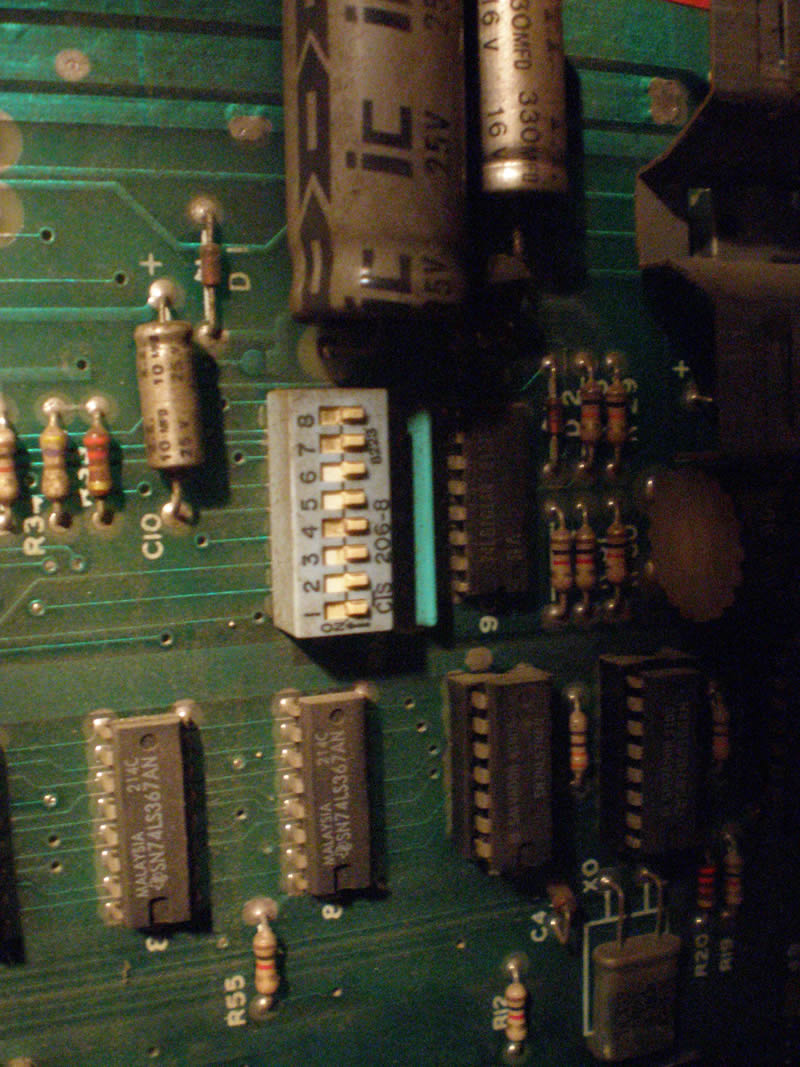
Don’t power up your machine just yet, we’ll do that soon enough. In order to set your DIP switches take off the back door of your machine and let’s get access to the PCB. We are looking for the block of DIP switches to initially setup your Multi Pac configurations. Those DIP switches look something like this (This photo I took was after I had configured my Multi Pac kit. So you see all of the dip switches are “off”. Make sure to flip #6 the other direction to “on”, otherwise you wont’ see your config screen.);
Now, you have checked all of your chips and feel as confident as possible that you have everything installed correctly and have set your DIP switches, let’s get to powering up your Pac-man or Ms. Pac-man. Heck, it might even be your bum-fungled machine that is in a Firefox cabinet with a Midway harness with a Sly Spy marquee! Whatever works for ya.
I hope you know where your power switch is to your arcade game. If you don’t, you probably aren’t quite there padawan, to be even attempting this multi kit upgrade. Just to re-iterate, if you have having issues playing your Pac-man of choice before this kit, I can’t help you troubleshoot those problems in this tutorial. The upgrade may fix your problems since you removed 8 chips from your board, but like Mike Doyle said, there are no guarantees for a newly working Ms. Pac-man PCB.
Hit the power, and you should see this screen!
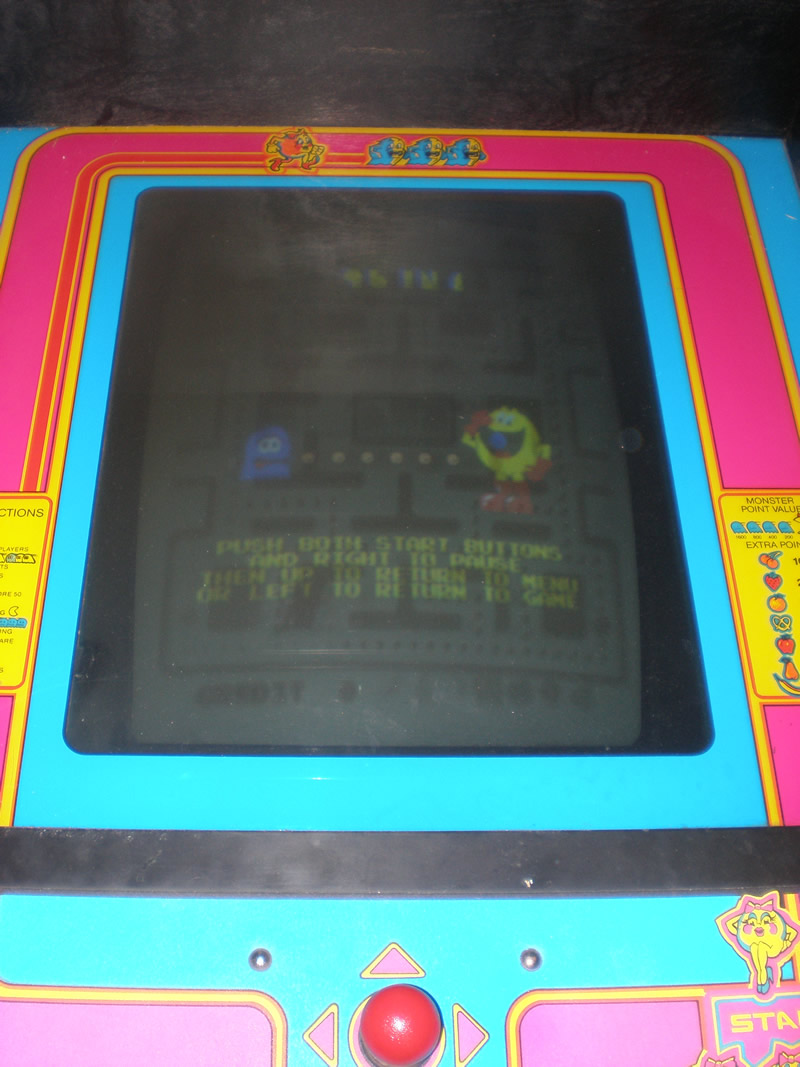
The welcome screen to the 96 in 1 kit says;
Then up to return to menu
Or left to return to game
If you don’t see this screen when you power up, immediately shut the machine off and review step 4 and double check all of your connections. The kit is fairly forgiving, so if you didn’t fully press a chip down, you may be ok. If you get stuck, you will probably want to email Mike Doyle (Kilkeeslps@aol.com) with questions about why your Multi Pac kit isn’t working.
Installation Part 3 – Working with your settings
Mike provides a lot of instructions for configuring the settings for your Multi Pac. I am going to continue this installation of the kit in part there, where we get more in depth into all of those options. So make sure to tune back for part 3 of “Installing the 96 in 1 Multi Pac”
Installing the 96 in 1 Multi Pac – Part 1
One of the most popular and rich arcade game kits for most collectors is Dave Widel / Mike Doyle’s 96 in 1 Multi Pac-man kit. With just a few simple changes in the chips on your Ms. Pac-man PCB you can play 96 different games, including many different mazes for Pac-man, Ms. Pac-man, and Pac-man Plus as well as Pengo, Space Invaders, Eyes and more!
I found that purchasing the Multi Pac kit was an awesome experience. I emailed Mike Doyle, sent him money via paypal, and in a couple of days my kit arrived at my house, ready to roll. I had special circumstances because I wanted to have the kit at my house by Thursday night because I was having a party where I wanted to be able to show off my newly upgraded Ms. Pac-man machine. I ordered the kit on a Monday and I had it by that Thursday, on time to the T. Mike gave excellent communication throughout the short transaction.
Here is what you get;
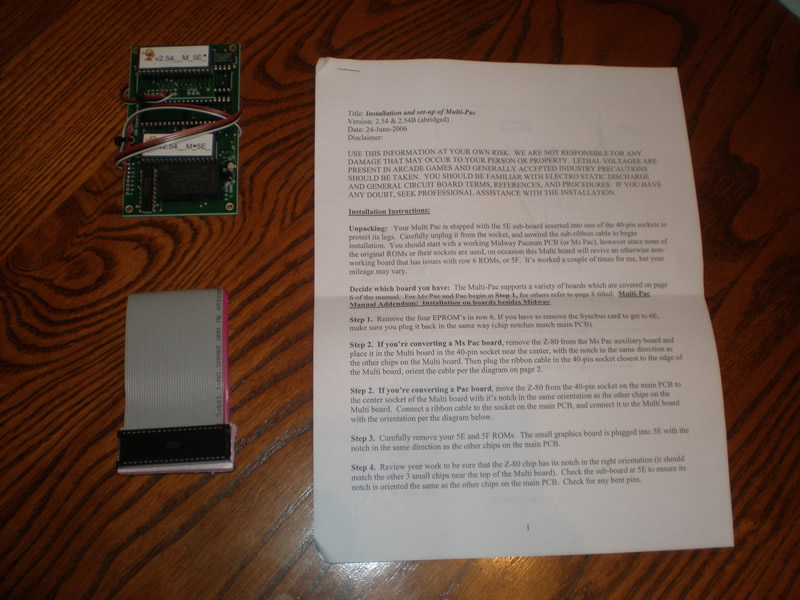
A set of printed instructions (PDF), a small pcb and a ribbon cable.
The instructions are written simply, and to the point. I am going to include snippets of them here to help explain the installation. Here are the general installation instructions;
Installation Instructions
Unpacking: Your Multi Pac is shipped with the 5E sub-board inserted into one of the 40-pin sockets to protect its legs. Carefully unplug it from the socket, and unwind the sub-ribbon cable to begin installation. You should start with a working Midway pacman PCB (or Ms Pac), however since none of the original ROMs or their sockets are used, on occasion this Multi board will revive an otherwise non-working board that has issues with row 6 ROMSs, or 5f. It’s worked a couple of times for me, but your mileage may vary.
Decide which board you have: The Multi-Pac supports a variety of boards which are covered on page 6 of the manual. For Ms Pac and Pac begin at Step 1, for others refer to page 8 titled: Multi-Pac Manual Addendum: Installation on boards besides Midway.
I will be upgrading my Ms. Pac-man board, so that is the PCB I will be using for this photorial. If you are still bootleggin’ like it’s nineteen eighty three, Shaft say you be outta luck in dis tutorial. But seriously, I am sure making the swap on most any PCB is pretty easy. Back to the instructions provided;
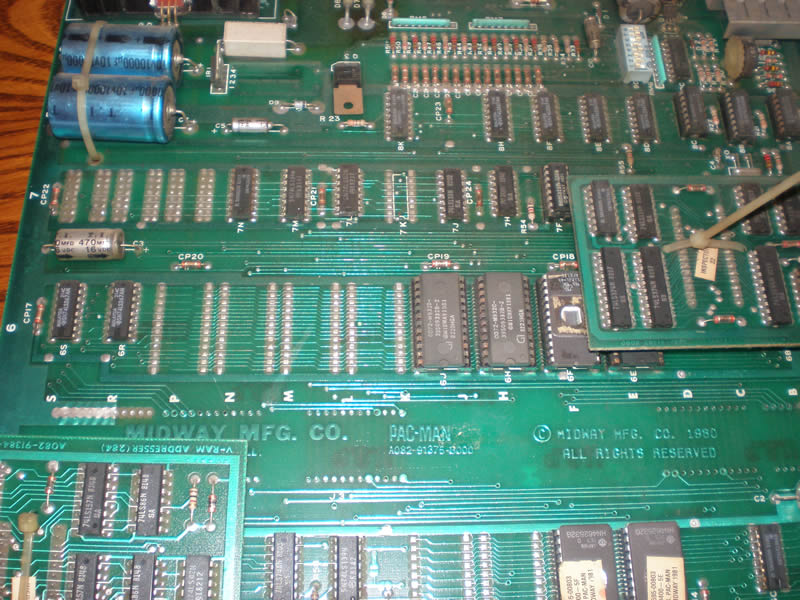
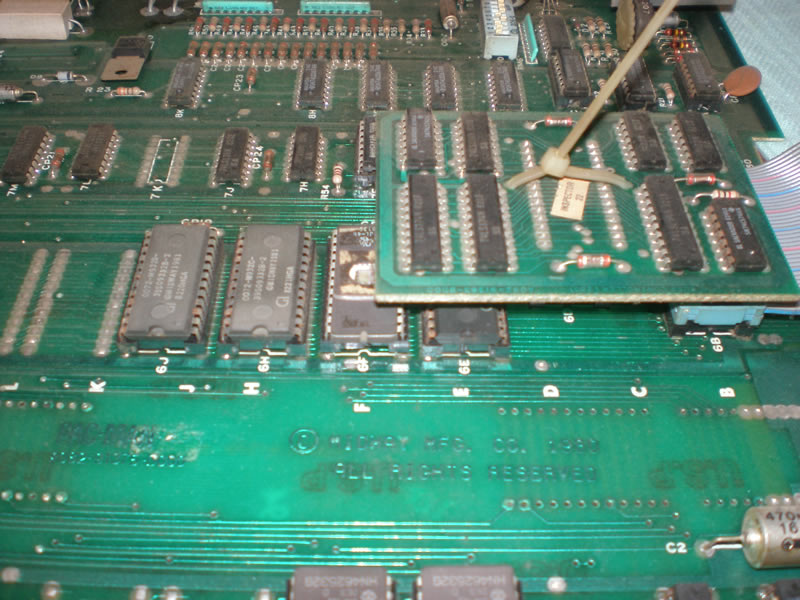
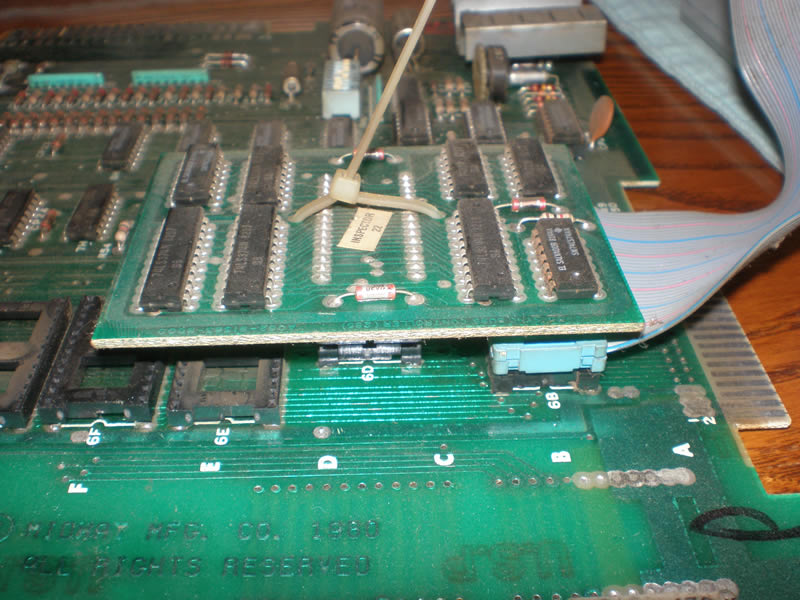
Step 1: Remove the four EPROM’s in row 6. If you have to remove the Syncbus card to get to 6E, make sure you plug it back in the same way (chip notches match main PCB).
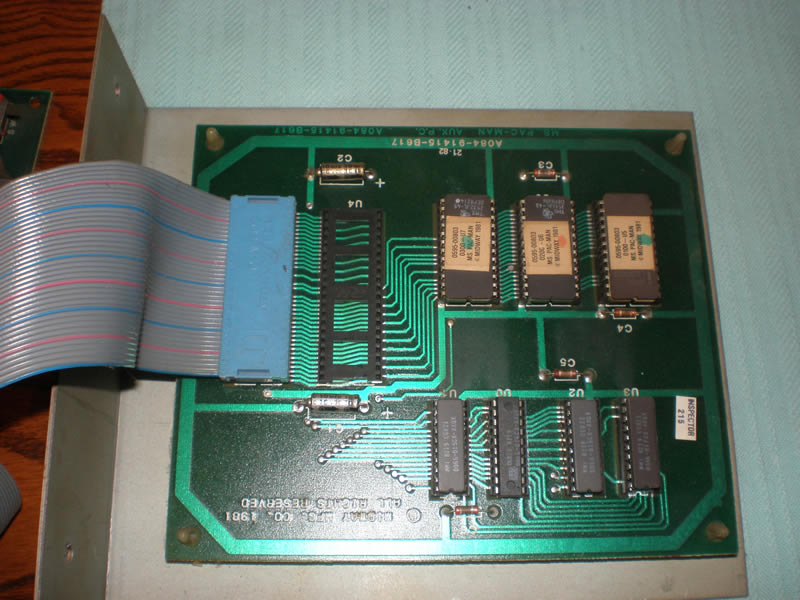
Here are some photos showing the section of the PCB that the instructions are referring to. In the first two photos you can see the EPROMs at 6J, 6H, 6F, 6E. The Syncbus card is the elevated mini PCB with the dusty 20 year old zip tie:)
Here is a photo showing those four EPROM’s removed from the Ms. pac-man board. Removing chips is really easy, and this is something you’ll want to do a lot. Even your grandma approves, she says practicing this activity won’t make you go blind. So do a little less of that “other thing” you do in the dark and more playing with your circuit board.
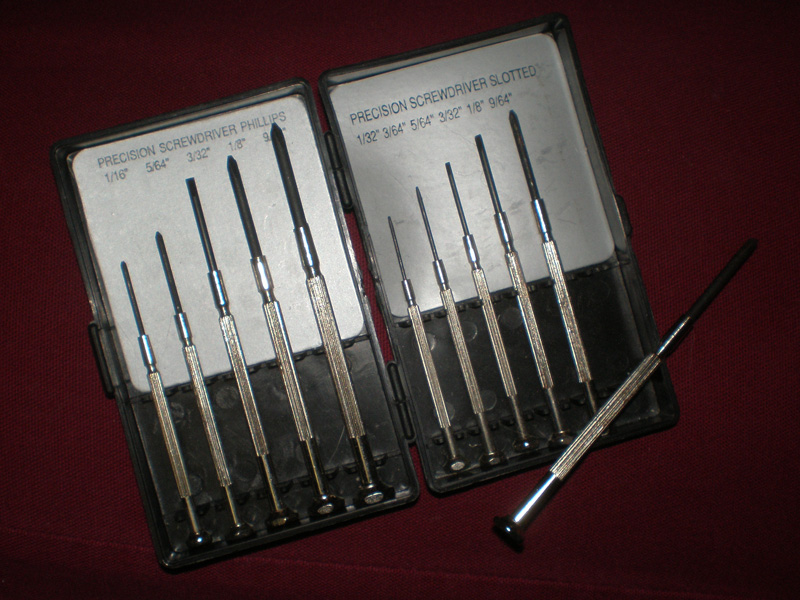
There are chip pullers you can try and can purchase one at most any major arcade dealer like HAPP, or probably even from Bob Roberts. The main idea is to make sure you remove the EPROM, processor, or whatever else without bending the legs. A small screwdriver will usually do the trick and a little Patience, yeah, yeaaaahhhh. Just a little Patience. Here is the set of mini screwdrivers I use constantly.
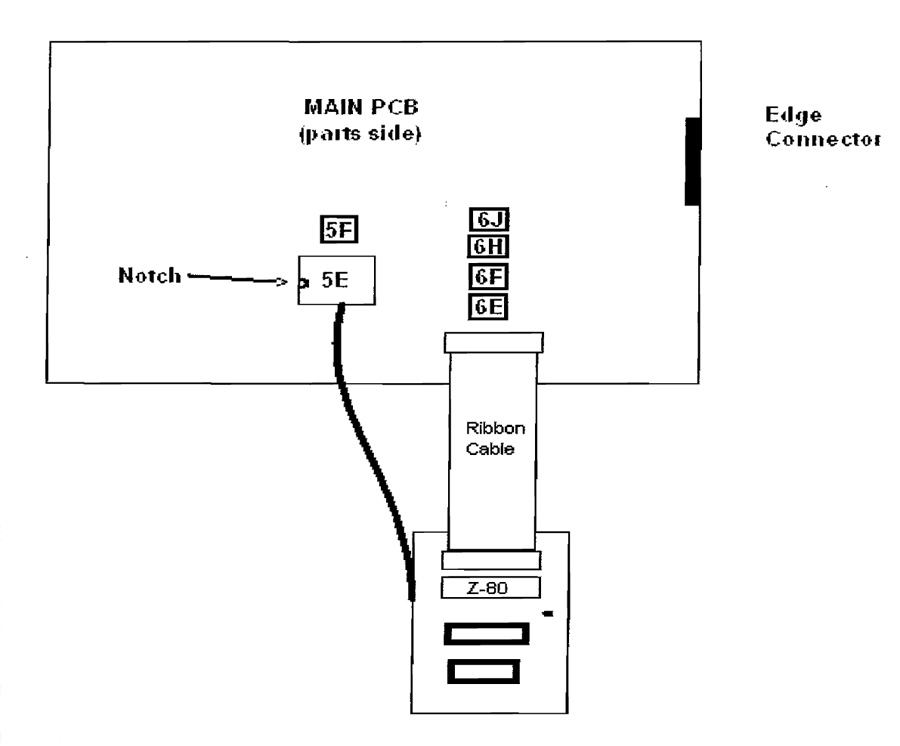
Step 2: If you’re converting a Ms Pac board, remove the Z-80 from the Ms Pac auxiliary board and place it in the Multi board in the 40-pin socket near the center, with the notch in the same direction as the other chips on the Multi board. Then plug the ribbon cable in the 40-pin socket closest to the edge of the Multi board, orient the cable per the diagram on page 2.
Here’s that diagram showing where you plug in the ribbon cable straight from the multi pac kit instructions;
I apparently didn’t get a photo of the Ms. Pac-man auxiliary board with the Z-80 processor still secured but here’s a photo after I removed the processor. Just like the chips, you will need a very small flat head screw driver and gently work the chip upwards, twisting the driver back and forth until the chip comes out.
Now put that Z-80 processor in the Multi Pac-man board in the open socket. Make sure to orient the chips correctly as the instructions warn. You can destroy your Z-80 processor if you power it up with the chip incorrectly socketed. But fortunately, you would just destroy the processor and not the board, and if the angels shine highly on you, you may not even trash the processor. I personally don’t like electronic risk, but if that does it for ya. Go right ahead. Just look at the half moon inset on the chip to make sure you line those moons up with the socket in the right direction. As a general rule of thumb, you can look at the direction of the half moons on the chips around the one you are pulling, but that is not a hard and fast rule. Take note of the direction when pulling an EPROM and just make sure you put it back where you found it.
Ok. We’re pretty far along here, there aren’t too many steps left before you have your Multi-Pac kit up and running. Check back for Installing the 96 in 1 Multi Pac – Part 2 where we’ll pull 5E and 5F and finish up installing the small graphics board and mounting the multi kit in your cabinet. And of course, enjoying your 96 different versions of Pac-man, you yellow pizza freak!
Go to Installing the 96 in 1 Multi Pac – Part 2
Purchased a 96 in 1 Multi Pac Kit
There was a reason, that I can’t disclose right now, that I wanted to get Mike Doyle’s 96 in 1 Multi Pac kit for my Ms. Pac-man. I have been wanting this for a number of months because although I love Ms. Pac-man, it was always been one of my favorite arcade games, I need to breathe some new life into the gameplay.
The 96 in 1 Multi Pac Kit is just the way to do it. A lot of collectors get multi-kits for their coin-op games because it gives you some variety in gameplay. Most arcade game collectors don’t seem to like MAME either, and this is a way to get around having a MAME machine.
This particular kit comes with every darn possible variety of the Pac-man maze style arcade game you can imagine. Most are variations on the originals, Ms. Pac-man, Pac-man, etc. etc. But there are some video games on the kit that you wouldn’t expect and are completely unrelated.
- Ms Pac
- Ms Pac Plus
- Ms Pac Attack
- Piranha
- Mr. & Mrs. Pacman (new!)
- Pengo
- Pac Junior1-4
- Pac Baby1-2
And the game list goes on and on. 96 total variations and games. But probably the coolest part are the features of the multi pac kit. I will list the kit features I am most interested in;
- High Score save in NVRAM
- Selectable Speed
- Start on any level
- Difficulty
- Screen Saver
I love the high score feature, and I can’t wait to use the start on any level feature on some of the games, especially Jr. Pac-man. I have only beaten level 6 in my dedicated Jr. Pac-man once, and could use the practice on the last three levels.
Plus, I know a lot of people who play the games will want to set the difficulty and change the speed of gameplay.
The 96 in 1 Multi Pac kit should arrive hopefully sometime on Thursday or Friday and I hope to get it installed in my Ms. Pac-man right away. Thanks Mike Doyle.

