
Archive for February, 2008
Pengo High Score!
I was taking a break from reading my economics tonight, playing my favorite game Pengo and trying to decide what my blog entry for tonight would be. I have a list of items I want to write about, but before I realized it, I had made it to level 14 in Pengo without dying and I was racking up quite a score and I knew what my topic would be.
I swore when I played Sega’s Pengo in Mame, that the levels and the difficulty rolled over at some point back to level 1. I was thinking Pengo rolled over at level 14, but as you can see below I had proven this wasn’t the case. Tonight I beat level 16 and got a nice surprise, I was back at level one, with the less aggressive and lesser quantities of Sno-Bees and all sorts of opportunities to easily line up the diamond blocks. By the time I was done, I had trashed my previous high score with a score of 226,610! Check out my high scores list;
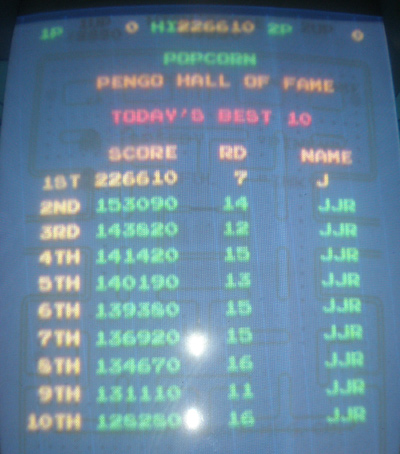
Before that point, I had given up on returning to easy levels, and couldn’t fathom how all of the top Pengo players on Twin Galaxies lasted long enough to get scores higher than 400,000, 600,000 and even a score of over 1,000,000 (Rodney Day). My Pengo score in theory would put me at 11th place! I was hoping I cracked the top 10, but now I know to concentrate harder on beating level 16 to really run up that score.
I checked my dip switch settings (set for freeplay on Jrok’s Pengo enhancement pack), here’s my configuration;
Switch Bank 1
- 1 – On
- 2 – On
- 3 – On
- 4 – On
- 5 – Off
- 6 – Off
- 7 – Off
- 8 – On
Switch Bank 2
- 1 – Off
- 2 – Off
- 3 – Off
- 4 – Off
- 5 – On
- 6 – On
- 7 – Off
- 8 – Off
According to my switches, I am playing Pengo on the “hard” setting, and I am setup for three lives. The settings for Twin Galaxies Tournament Settings are for medium difficulty with five lives. I don’t want to erase my Pengo scores and start over, but I know for sure that I would do that much better with more lives and an easier difficulty.
Can anybody out there informally challenge my high score? Meaning, a higher score played on an actual Pengo machine? A score not submitted to Twin Galaxies because it’s a little self indulgent and because it can be difficult to submit.
Agent X Color Screens
This week, Rich at This Old Game gave me a few moments of his time and sent me some photos of the screen printing process of the in progress Atari Agent X sideart. A short history here, back in September of 2007, This Old Game announced that they would be producing a full kit of artwork including cabinet plans to build authentic artwork covered Atari Agent X cabinets. Well known arcade enthusiast Rick Ford was the catalyst, wanting a cabinet for himself, and making arrangements with both Scott Evans to get the original Atari films and me to remake the kickplate as a vector artwork file.
Fast forward to today, February 2008. Rich is in the process of printing the sideart, paying close attention to costing. Side art is challenging to reproduce and still be competitive in the small industry that is the arcade reproduction artwork business. There are a number of reasons why reproduction artwork is costly, mostly dealing with demand in relation to cost of production and cost of technology to print oversize films.
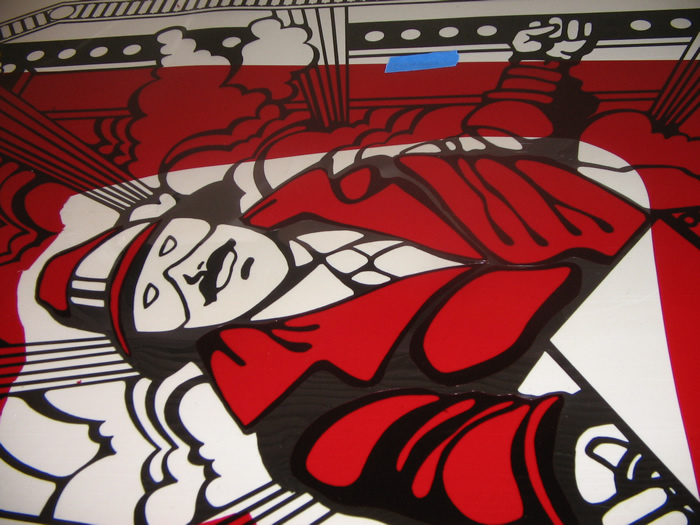
Here we see a couple of photos of the detailed Agent X side artwork. (Click on the photos for larger views)
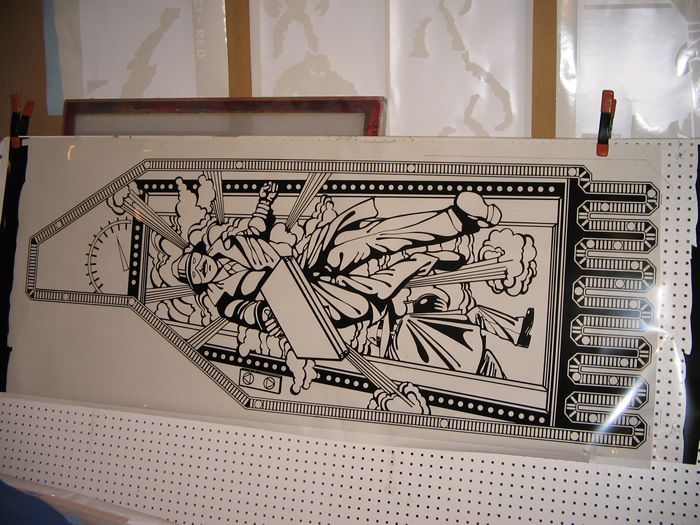
The first is a photo of the Agent X sideart film from Scott Evans, you can see the blacks look like they are printed on a clear acetate. This negative image film will be used to burn screens to print the different colors. Now, keep in mind, there are six colors in total (green, orange, blue, yellow, grey & of course black) that would be printed on a white vinyl. The films here are scaled down to 11 x 17, effectively one fourth the actual size. They will then be blown up to full size sideart at a height of six feet.
Each of the five Agent X films would have cost at least $100 to burn at those dimensions, not to mention, there are some discrepancies between the original film and the final artwork that was printed on the limited existing Agent X machines. Here is a PDF demonstrating some of those inconsistencies in color, and here is the topic on Klov with some of the members talking about whether to leave the film original or correct the color errors. The final machines indicated that Atari would have had made adjustments to the film to change the colors midway through production.
In an effort to keep the artwork more affordable, the two Rich’s decided to not burn individual films and instead implement some masking with Rubylith. What is Rubylith you ask? Well, I actually asked that myself.
Rubylith was started originally as a brand of masking film, invented and trademarked by Ulano Corporation. But over time the brand became so generalized it became synonymous with masking, much like Kleenex are to tissues. Here is how Wikipedia explains Rubylith;
Rubylith consists of two films sandwiched together. The bottom layer is a clear polyester backing sheet. The top layer is a translucent, red coloured, self adhesive, emulsion. It is designed to be both easy to cut with a knife and light safe for use with orthochromatic films.
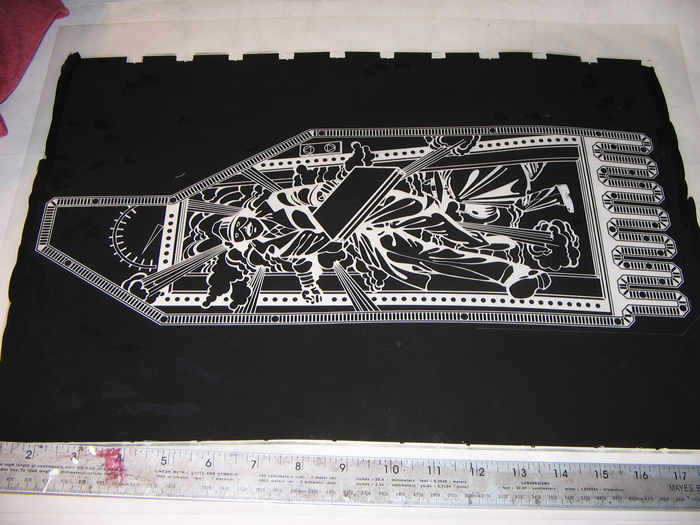
Instead of making films for each color, Rich will apply each color individually, masking off the one full size film for each run of the six colors. Take a look at the two photos below for a demonstration.
First he covers the whole film in the Rubylith, and then he uses a pattern to identify which sections to retain for the color he is printing and which sections to cut and remove. In this case, he is making the film for the green. (This is a test piece, if it was the real film, could you identify a incorrectly cut away piece of rubylith based on the sideart colors?) The film with the clear acetate is then placed on a screen, covered in light sensitive emulsion and any area that is not covered in rubylith is exposed and burned into the screen. The areas with Rubylith are blocked and the emulsion just washes away.
All of the pre-ordered artwork will be printed in this way. One color is printed on all of the vinyl pieces, then clean off the film and start all over again with a full covering of rubylith, remove and retain pieces of mask to achieve each of the other four colors other than black.
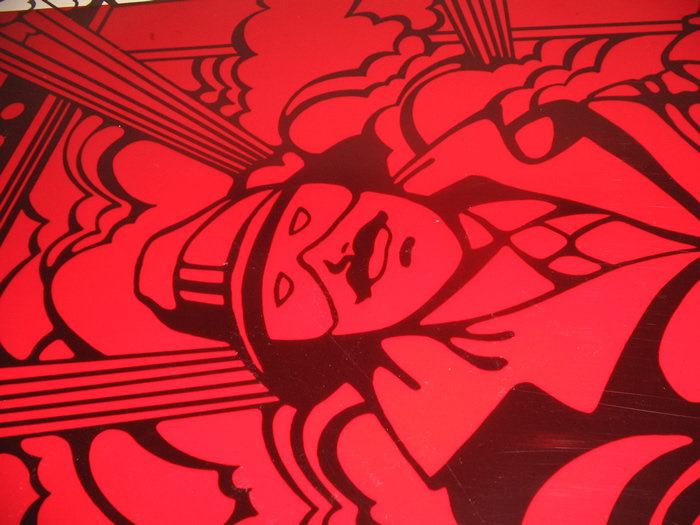
Rubylith can also be implemented for spot fixes and spot colors. Using it’s masking abilities and sensitivities to particular spectrums of light (Red, Green, and Blue), you can go back to already printed artwork and add back in missing colors or fix errors in the print. Here are a couple of examples.
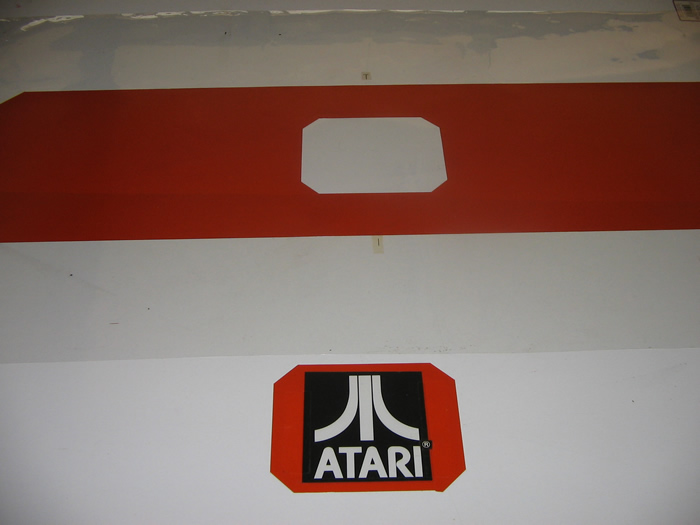
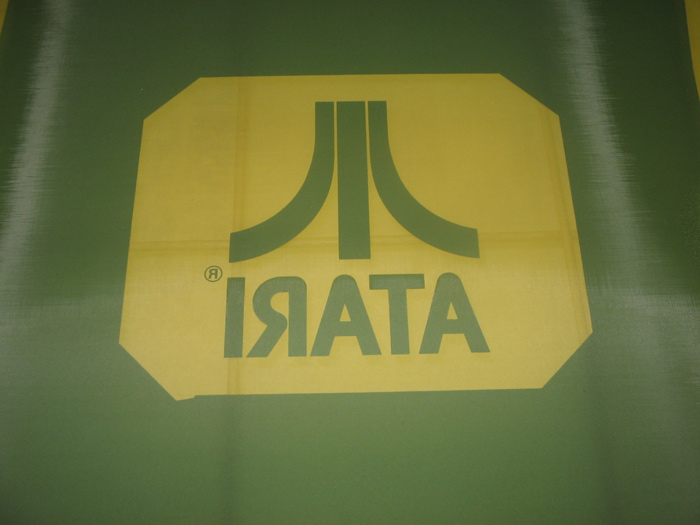
Here we see the speaker grill rubylith cutout with the Atari logo. Neither the rubylith or the black will be exposed on the screen. This is the screen for the middle red of the speaker grill overlay.
Here is the exposed film. Cut by hand, you can see the little bump in the lower left corner that can be easily fixed with a liquid filler or even a piece of tape to get a straight – but angled edge.
Again, thanks to Rich for an insight into the printing process. Hopefully he’ll continue to have a few minutes here and there to provide more information to those of us that are interested about the progress of all of his printing jobs.
So, remember, if you don’t have a printer yet for your arcade reproductions, you will want to look up Rich at Thisoldgame.com
You got it here first, exclusive content about the Atari Agent X / Cloak and Dagger artwork films and printing progress at Rotheblog.com.
Gaming Console Icons for Mame
One of the most time consuming aspects of building any Mame machine is collecting all of the “necessary” files. A short list of the digital files would include working game roms, bezels, cabinet photos, marquees and of course character art. The coolest Mame machines have all of the classic arcade artwork including icons of the different gaming console systems that will be used in the menus for selecting different emulators.
I came across a topic on the Arcade Controls forums (BYOAC) where a user had a collection of these icons that he had been editing on an on-going basis. I thought I would download the zip and take a gander at what I expected to be amateurish looking graphics. I was pleasantly surprised, check out a few of the icons of the consoles below;
I don’t know where the console images came from, maybe they came from an include with a front end or maybe they were generated from photos. Source doesn’t matter, there are a ton of console icons in this archive and here is the complete list of the gaming systems. All of the icons are at a fair resolution with transparent backgrounds (PNG files), great for use in Mame or even in a design for a website about video game news. You can download the icon collection here.
- Amiga CD32
- Atari 2600 Jr.
- Atari 2600
- Atari 5200
- Atari 7800
- Atari Jaguar
- Atari Jaguar CD
- Atari Lynx
- FM Towns Marty
- NEC PCFX
- NEC TurboDuo
- NEC TurboGrafx CD
- Nintendo DS
- Nintendo Game Boy Advance
- Nintendo Game Boy Color
- Nintendo Game Boy
- Nintendo GameCube
- Nintendo N64
- Nintendo NES3
- Nintendo SNES2
- Panasonic 3DO
- Philips CDi 450
- Sega CD
- Sega CDX
- Sega Dreamcast
- Sega Game Gear
- Sega Master System II
- Sega MegaDrive II
- Sega Saturn
- SNK Neo-Geo CDZ
- SNK Neo-Geo
- Sony PS2
- Sony PSone
Related Gaming Console Icon Links
These console icons are all over the place, but the quality lacks in comparison. A quick 5 minute search turned up a couple of websites for vector based icons of video gaming systems. These links contain a variety of images, from more modern systems like Playstation to consoles of the last 5-8 years like Game Cube, as well as some icons for game controllers and handheld gaming systems.
But again, someone created these icons with Illustrator or another vector package instead of using real photos. These are low res web images that would take some reworking, like cutting out backgrounds or re-drawing, to incorporate into your Mame system, ever more increasing your appreciation for the above icons.
- Max Themes
- Icon Archive – Consoles 1
- Icon Archive – Consoles 2
- Icon Archive – Handhelds and Controllers
- Shopping.com Consoles
Have any more websites with gaming console icon images with similar quality and preparation as the ones listed above? Did you generate images for your own Mame system of the individual consoles, or did they come with your front end? Did you find the original topic thread and can give me the link since I must have not bookmarked it? Leave a comment.
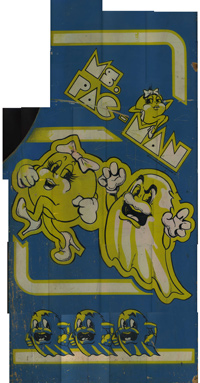
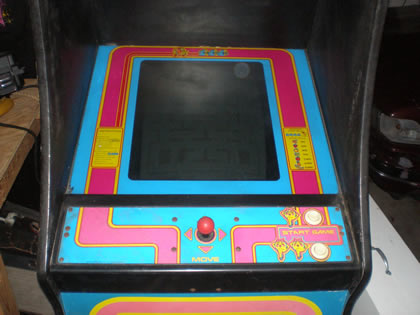
Scans of Ms. Pac-man Sideart
I love little surprises like this.
I had a visitor (Kevin T.) stumble on my post about the Ms. Pac-man stencils that Joymonkey was working on last fall. I haven’t heard anything from Joymonkey, but some BYOAC members have reported that they got their stencils and are just waiting for nicer weather to use them. Kevin was looking for a set because his Ms. Pac-man artwork has the typical fade where there is no longer any pink, only yellow.
I know that many members over the years have probably scanned in the Ms. Pac-man cabinet artwork, and I know Joymonkey scanned it in from scratch when he remade the vector file for the stencils. But as far as I know, there aren’t any websites out there that have the scanned Ms. Pac-man available to download at this time. If you know of any other websites with a good Ms. Pac-man artwork scan, leave a comment and let’s start a list here. Joymonkey said he’d release his Ms. Pac-man vector file, maybe his sideart scan, once his stencils are done. But I don’t know if and when that might be.
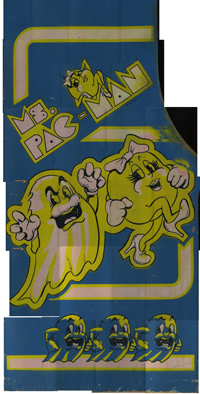
Kevin spent a lot of time working on these scans, I mean a ton of time scanning in the Ms. Pac-man cabinet. But anyone who has attempted scanning arcade artwork before, knows how time consuming scanning can be. And not only do I have the composite files of the artwork, I have the individual pieces, all in two zip files. If you get a chance, leave a comment here and thank him for his time. I’ll make sure he gets the thank you. It sounds like he may attempt to also scan the Ms. Pac-man kickplate artwork, so let’s keep our fingers crossed.
The other note I should mention, Kevin expressed to me that these are a touch inaccurate in that some of the lines don’t align correctly. But, at first glance the artwork composite looks good, and if you don’t like the composite, you can remake your own full Ms. Pac-man sideart with the scan pieces. He shared a link on where with me on where the files are hosted, so just click on the images below for start downloading the zip files.
I am posting this brand new today, and don’t know how long it will be online, so get the files while you can. I am sure I may get some sort of nasty email from a nasty company who make a shoddy poor product with someone who would gladly take your money for an incorrect product (read dishonesty) for a President. But for a short while, you’ll have the artwork files available to you at least to do with them as you please.
Has anyone else used MediaFire to host files? It says there isn’t a time limit for hosting, but if the files aren’t downloaded frequently enough, will they remove them? I was able to successfully download the files, is anyone having any problems downloading the zips?
~Edit – In case you have issues downloading the scans of the Ms. Pac-man artwork from the links above at Mediafire, you can try to download them from this website mirror.
Craigslist Pac-man Cocktail Deal
It was about 11:30 last night, and I checked my feeds for Craigslist. As anyone who hunts Craigslist for classic arcade games knows, and I have experienced this first hand with my Ms. Pac-man win in Michigan, 99% of the time it’s junk and spammers but that 1% of the arcade findings are a great deal, and then it all comes down to timing.
Somehow I totally missed a post for northern Indianapolis at about 1:10 (I can’t remember what I was doing other than working at that time of day);
Moving and must sell many items. Antiques include; Armoire, buffet, secretary, marbletop end table, marbletop corner table, marbletop hall piece, carved walnut pedestal and Louis side chair. Reproduction queen ann desk, chippendale bench, and federal table. Old Pac Mac arcade table, needs repair. Do not want to download all the photos. Please call to set appointment to see if you are interested. Location NW side if Indy between Carmel and Zionsville.
I emailed late last night, figuring some other collector or worse in Indianapolis got to the pac-man cocktail first. Sure enough, it was gone. (more…)
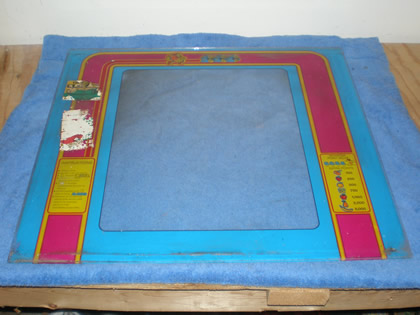
Removing Plastic Stickers on Bezels
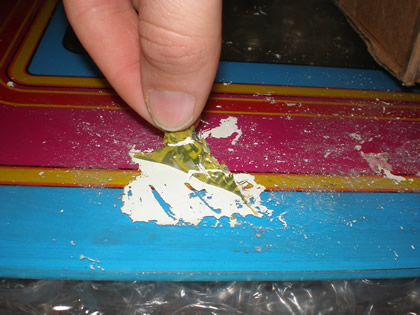
When I first saw my Ms. Pac-man in MI, I noticed right away two sets of thick overlaid stickers, probably 4-5 stickers on top of one another. They were some sort of license sticker for the Ms. Pac-man to legally be placed in different states. Darn tootin’, that’s authentic. But a little too authentic for me, they’ve got to go, and I had a dickens of a time getting them off.
I tried some Goo Gone on the plastic stickers while the machine was still in MI, and that did squat. So I turned to researching on the collecting newsgroups. I found very little, but I also don’t like to look through more than about two pages of results. I decided I would turn to an old favorite – Goof Off.
After I setup a protected area on my workbench, I put the Ms. Pac-man bezel down, and propped it up on a slight angle. Having worked with Goof Off in the past when striping acrylic paint off of cabs, I was concerned that some would run over the edge and ruin the printed Pac artwork on the backside.
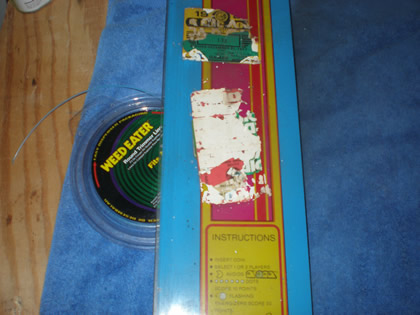
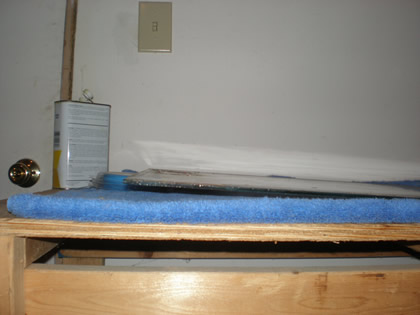
On an angle, I could more easily control where the liquid went. I just poured the Goof Off on, and put the rag down so that I could let it sit on the bezel overnight.

But, one application;
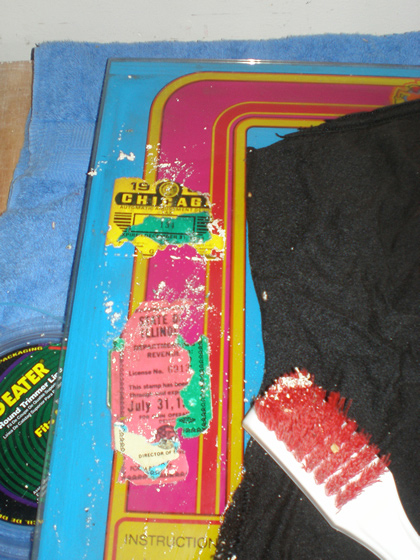
Then, two applications later I had had it with the Goof Off.
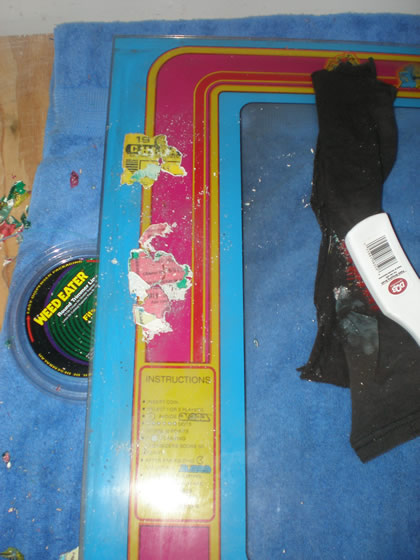
It seemed to be working, especially on eating off the white sticker residue, but it wasn’t disintegrating the stickers fast enough. I was lucky enough to have a plastic wire brush to work at the stickers otherwise I may not have been as successful. I even turned to picking it off with my fingers which was killer and I was concerned about absorbing it in my skin.
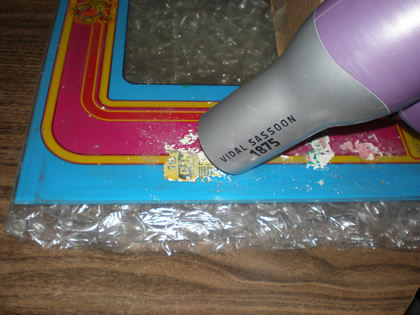
Originally I had read that that heat is the best way to get resistant stickers off of arcade game glass and plexiglass pieces like the marquee, bezel and control panels. I just assumed that a hair dryer wasn’t going to get hot enough to make a difference and I would need to borrow a heat gun to get the sticker remnants of the Ms. Pac-man bezel. I was wrong. I propped the hair dryer up, left it for five minutes, came back, and the sticker(s) peeled right off.
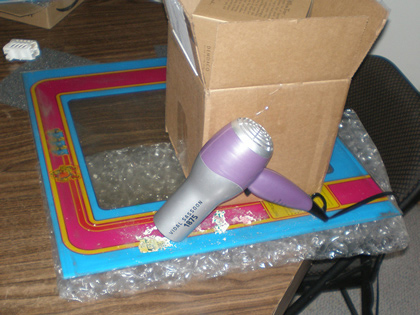
I wish I had started with this method, and this is why I am writing so that someone else learns from my lost time.
At that point, I knew the Goof Off would take the remaining residue right off, so I let it sit for 5 minutes and do it’s thing. You can kind of see by the photo below the white residue is eaten up and lifting off the glass.
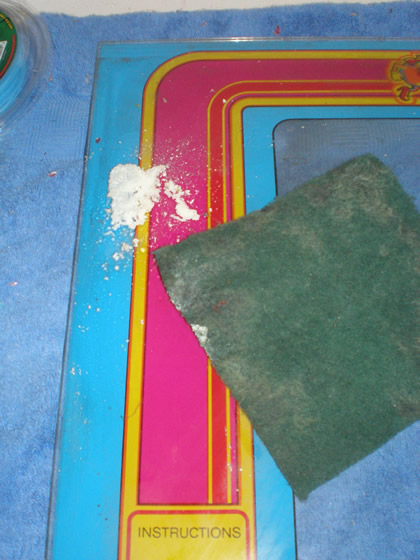
A good scrubbing with a scotch brite pad and a thorough cleaning to get off all of the residue particles (dampened one rag with the Goof Off and one with water) it looks great (minus the flaking in the lower left corner).
I’m not sure it can get more simple than heating the stickers. Anyone else have a better method or some additional suggestions of other things I could have tried?
Wanna see the twins?
Common question on the set of any Brad Pitt movie I am sure, but in this case, my two Vision Pro monitors arrived from Happ on Monday.
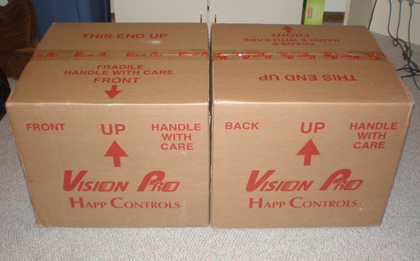
I got two monitors in the mail on Monday (one’s for a friend). Where’s the original arcade related information you ask? This post is specifically for any other collectors here in Indianapolis, Indiana to gauge how much shipping and tax would be to buy your very own Happ 19″ Vision Pro while they are still on sale this month. It isn’t a knock ’em sock ’em robots deal, but it’s better than usual. Here’s the breakdown shipped to 46227.
- Flat Monitor Cost – $270
- Shipping – $36.99
- Tax – $18.42
Oh, and I should mention I put in my order on Friday, and my monitors shipped that afternoon and arrived at my home residence on Monday afternoon! Granted, I believe Happ has a distribution center in Chicago, but I was very happy with the expediency and thrilled the monitors arrived free of damage.

