
Archive for March, 2008
Commenting not working
For now, it appears as if the commenting feature isn’t working on the blog. I have spent a ton of time, more than I care to think about, trying to figure the problem out.
When a comment is attempted, you will get an error page with a message that says “Sorry, comments are closed for this item”. Some of the fixes I have attempted;
- Validating my pages, fixing validation errors
- Tested in Safari, IE, Opera and Firefox. IE gives me an error page, no message
- Checking commenting for the whole site
- Checked commenting on a per post basis
- Checked my website error logs and general logs, couldn’t identify any problems
- Searched WordPress Forums – No posts at this writing about comments broken
- Searched the Web
- Upgraded all plugins that needed it, deleted unnecessary plugins
- Reverted back to the default theme
- Upgraded testing environment to WordPress 2.5 final, but can’t replicate the problem
- De-activated any comment type plugins for subscribing, etc.
The only step I see left is to try to deactivate all of my plugins and see if one of them is the cause. I thought that WordPress 2.5 was supposed to have a “re-activate all” function, but apparently I misread that somewhere.
I wish I could get this problem to show up on my testing environment, it would make it easier to isolate the plugins without frogging around live. But at this point, the changes in validation and restructuring of some of my html has been enough work to make me go crazy.
I hope to have this issue fixed in the next day or two. Please remember your comments until then.
Thanks.
Jeff
~Edit: Comment error in WordPress 2.5 fixed.
Big thanks to Jamie. In my wp-includes/comment-template.php file my code stopped at line 327 with the function comments_popup_link. But in the new WordPress install, that file went to line 768! So, I replaced that whole wp-includes directory again, and my problem appears to be fixed. I may have been able to just overwrite that one comment-template.php file to get rid of the “Sorry, comments closed” error, but I decided to be safe.
Winter Indianapolis USAmusements Auction March 2008
The USAmusements auction had a much better showing for games this March than it appeared to have in January. We had a number of classics, including two Ms. Pac-man’s and a Galaga, but for me the main attractions were a really nice looking Williams Moon Patrol, complete but not working and a Super Pac-man Cocktail. (more…)
Popeye and Super Mario Brothers – A lucky score!
Late last week I had a voicemail from a guy who had seen one of my listings and said he had two games in his garage that he wanted to sell. He said he had a Popeye and what he called a “dual chip” Top Gun. He wasn’t able to provide photos unfortunately, so sight unseen I arranged for a truck and headed up to the northside of Indianapolis to see what he had. (more…)
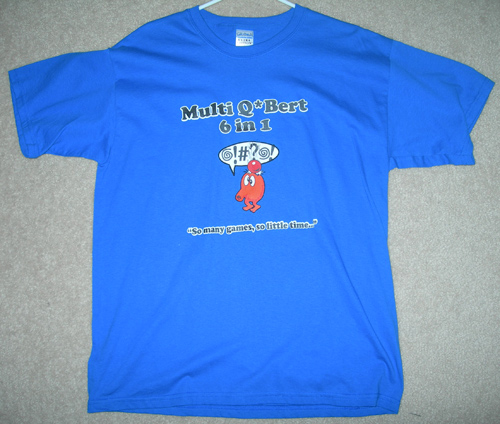
Multi Q-Bert Kit T-Shirt
Mike Fox, a collector in Chicago is offering his Q*bert Multi Kit (developed by Dave Widel) for sale to RGVAC before auctioning it on ebay. He also mentioned that he would include the promotional Multi Q*bert t-shirt that came with his order when he originally got the kit. A quick search on Google didn’t turn up anything about the Q*bert shirt, so I asked for a photo.
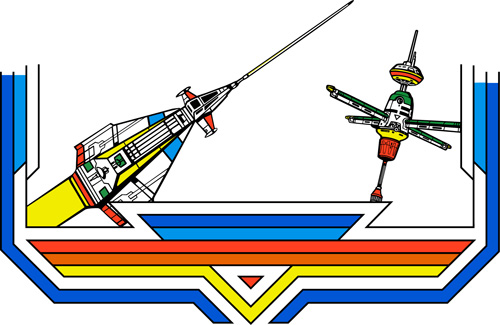
Atari’s Space Duel Sideart
Every once in awhile I get an email out of the blue about an arcade project that really makes my day. Last week, I got an email from Eric (Vector Zorg). Eric has started tracing Atari’s Space Duel sideart from some great scans he pieced together. Eric posted the Space Duel sideart scans he is working with on his website if you want to check them out.
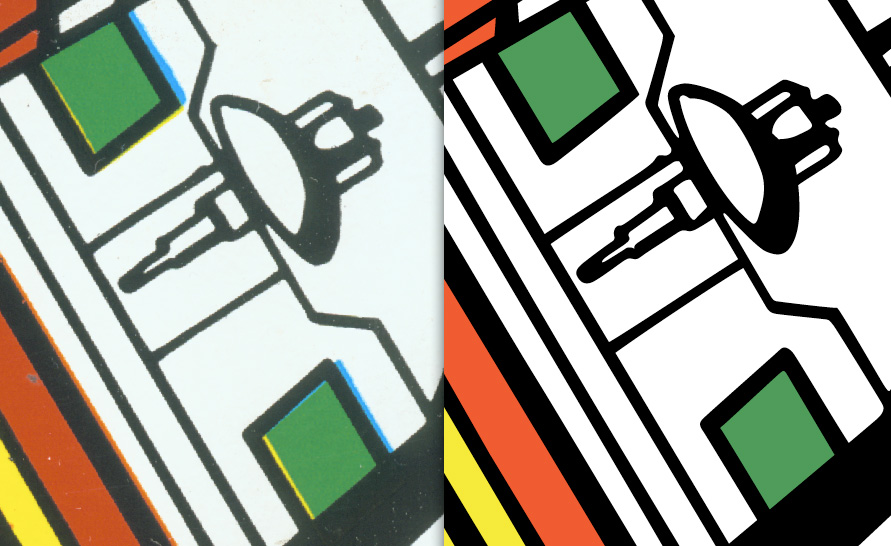
As you can see in the photo on the right, he has his work cut out for him on Space Duel. The Space Duel artwork is beautiful and complex and would take a ton of time to vectorize.
Eric has started a bunch of projects, and from my experience he is like most artists, they take on more than they can realistically handle. (It’s hard to be passionate and talented, give us a break. We want to be involved in everything when it comes to arcade game artwork.) Check out Eric’s vector projects in progress that at some point will make it onto localarcade.com. Most of the marquees, bezels, and side art he has vectorized look complete. I am not actually sure what the artwork pieces need to be finalized, if it is color matching or something else, but the list of artwork he has worked on is a who’s who list of classic arcade games. Some of this artwork has been reproduced over the years, but my guess would be that Eric’s goal is to make the vector files freely available and accurate to all collectors to do with as they please;
- Burgertime
- Jr. Pac-man
- Xevious
- Mario Brothers
- Donkey Kong Jr.
- Donkey Kong
- Robotron
- I, Robot
- Galaga
- Punchout
- Popeye
- Crystal Castles
- Marble Madness
- Puckman
- And the list goes on and on…
The start of the Space Duel Sideart
Here is a small snapshot of what Eric has finished so far. Coming along nicely with two of the detailed side art ships finished and ready to roll.
Here are two small snapshots showing the quality of Eric vector tracing work. A closeup detail of the ship on the left;
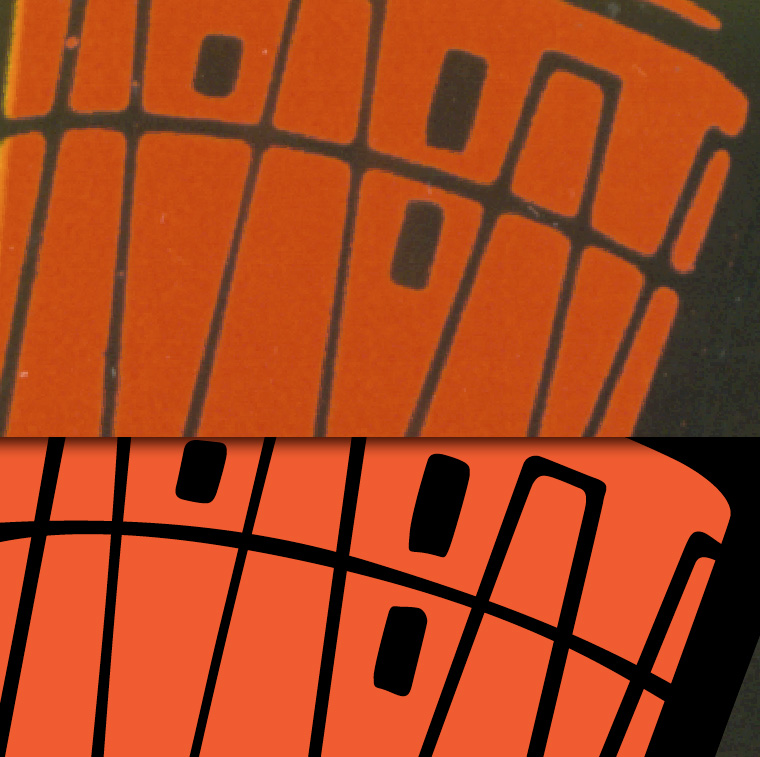
And a detail image of the ship on the right. Eric asked my opinion, for what’s it worth. But opinions are like buttholes as they say, I have my fair share of ideas about buttholes, and, well, other stuff.
Looking at the original scan, I would have actually kept the polygon shape edges rounded, at a distance they will appear square which was the original intent. This is a nice scan of some fine detail of the Space Duel sideart, so I would have to go with what I see. Sometimes when you trace arcade artwork, you have to make a best judgement call. But after I gave him my opinion, he agreed and went back and changed this portion.
Silkscreened Space Duel sideart in the future?
We’ll have to see. Not only is Eric vectorizing Atari’s Space Duel artwork, he is also separating his colors properly as he goes (which is smart, a difficult process once the artwork is complete) and is talking about having Rich at This Old Game do a small run. Will it happen? I don’t know, that is anyone’s guess. I would say not for a long time. But the fact that there may be Space Duel sideart available to collectors in the next year is promising enough.
Additional Information
Want to contact Eric about his progress? (Be thoughtful, he is a family man) You can email him at vectorzorg@gmail.com about his other great vectorization projects and progress on the Space Duel artwork.
Don’t forget, all of Eric’s work in progress projects are located on his website. The site is in French, but it is still easy to navigate, here is the direct link to any updated images of the Atari Space Duel side artwork.
Of course, check back here and as I am informed I will do my best to add any progress on the Atari Space Duel cabinet artwork.
Installing the 96 in 1 Multi Pac – Part 2
One of the most popular and rich arcade game kits for most collectors is Dave Widel / Mike Doyle’s 96 in 1 Multi Pac-man kit. Easy to install, this kit adds a lot of depth and fun to your gameroom.
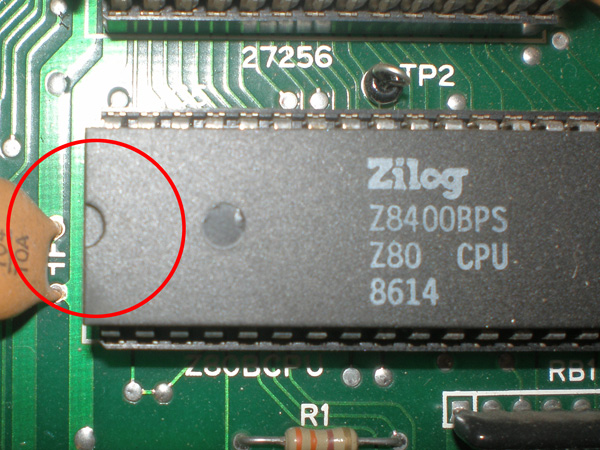
In the first part of this installation tutorial, we took a look at the multi-pac kit as it looks after it arrives at your house, as well as removing EPROMs at 6J, 6H, 6F, 6E and the Z-80 processor and resocketing it in the new 96 in 1 pcb.
In part two of Installing the 96 in 1 Multi Pac kit, we are going to look at removing EPROMs 5E and 5F as well as adjusting the dip switches to start setting your preferences for sweet, rich mapley Pac-man gameplay.
Back to the Multi Pac Instructions
Ok, we left off on “Step 3.” of the printed instructions you get for installing your Pac-man kit from Mike Doyle. Here is what step 3 says;
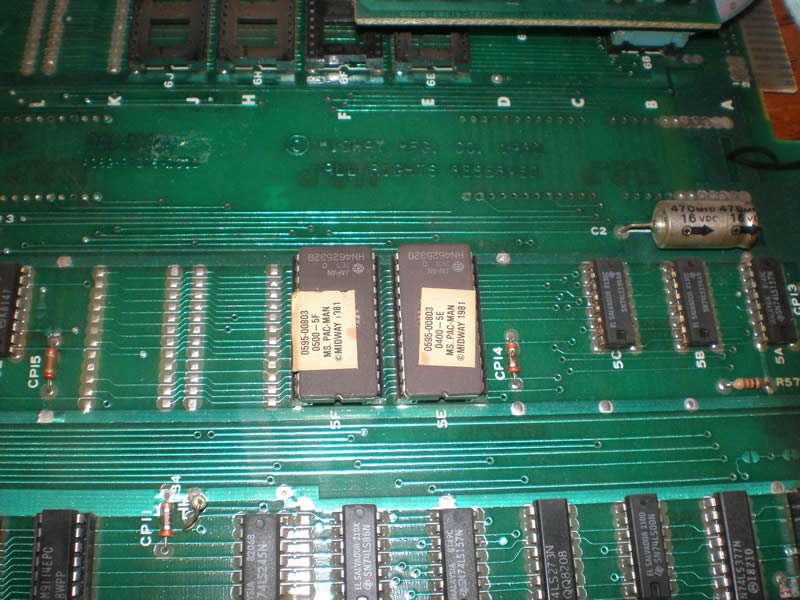
Step 3. Carefully remove your 5E and 5F ROMs. The small graphics board is plugged into 5E with the notch in the same direction as the other chips on the main PCB.
Here is a photo of the two ROMs in question on the Ms. Pac-man board, with a little 5E and 5F printed on the PCB just below them.
Again, from the first article, just use a very small flat head screwdriver to wiggle those chips out, and set them aside pressed into a piece of dense foam and store them in a static free electronics bag.
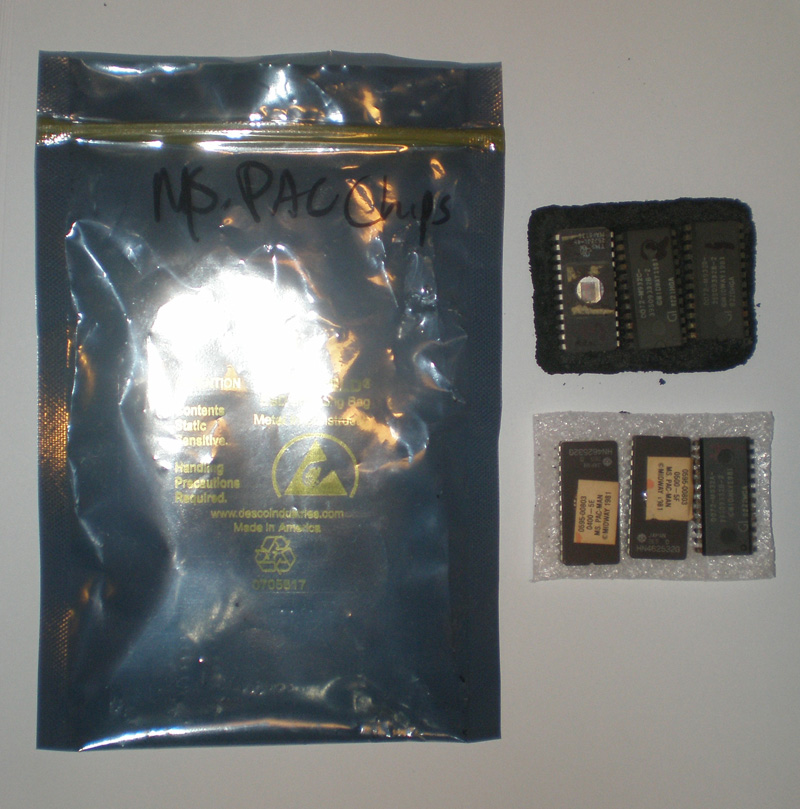
(Check out that hand writing. Think I’m one vowel away from rubber walls? Like I always say, you can’t make an omelet without breaking a few eggs.)
The instructions say to plug the small graphics board with the Mr. Neato thumbs up Pac-man sticker into the 5E socket, making sure again to match up the direction of the half moon on the chip going in the same direction as the half moon on the socket. This is not a chip from the Ms. pac-man board, but it gives you of the “half moon” I have been talking about;
This is how the small graphics board should look after you’ve plugged it into 5E on the Ms. pac-man PCB.
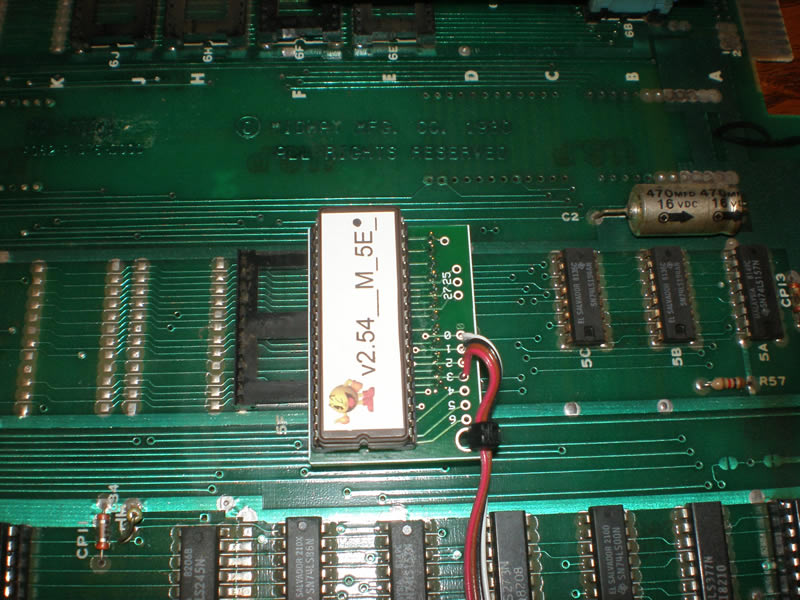
Most kits with newer socketed chips developed by Dave Widel and other designers today have stronger, tubular pins vs. the old flat plate metal pins. It may feel like you are putting a lot of pressure on the chip to get it to press into the socket, but can push fairly hard and still be good.
Another awesome sidebar about the graphics board is that Dave and Mike added strain relief to the sub ribbon cable going to 5E which should prevent any pulled wires from rough handling. So if you gots the fat man digits with no real feel of how to work those things, the 96 in 1 Multi Pac kit is ready for you, just don’t go sky diving from the 16 ga. wires.
Ok, onto step 4, where we will check our work.
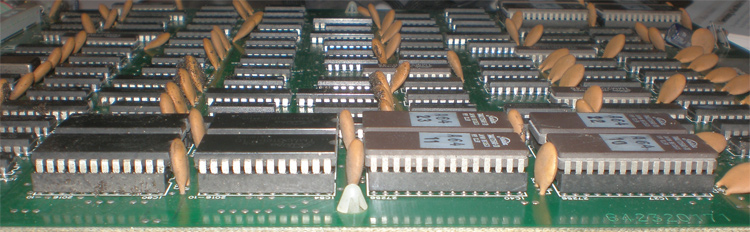
Step 4. Review your work to be sure that the Z-80 chip has its notch in the right orientation (it should match the other 3 small chips near the top of the Multi board). Check the sub-board at 5E to ensure its notch is oriented the same as the other chips on the main PCB. Check for any bent pins.
Mike’s telling you what you need to look for to make sure you have the Multi Pac kit installed without causing any damage or future errors. First, check the chip orientation on the boards. You can look at those half moons in the chips like I have been mentioning.
I will admit, other than looking at the profile of a chip, I don’t know how to check for bent pins once the chip is socketed. So, just look at the side of your mini graphics board that we put in 5E as well as the Z-80 processor that you re-socketed and make sure none of the pins are crooked or look bent in the socket. Your processor and other chips for your Pac multi kit should look something like this. (Not the Ms. Pac-man PCB, just a demonstration of straight pins.)
Configuring your Multi Pac settings
Looking back at Mike’s configuration instructions;
Once installed, the Multi-Pac is ready to configure to your favorite settings. The non-volatile RAM will save all settings and high scores even when the unit is unplugged. To do this:
- Set all DIP-switches 1-8 to OFF.
- Set DIP #6 to ON, this brings up the administrator menus when a game is selected.
- After you’re done, power up game
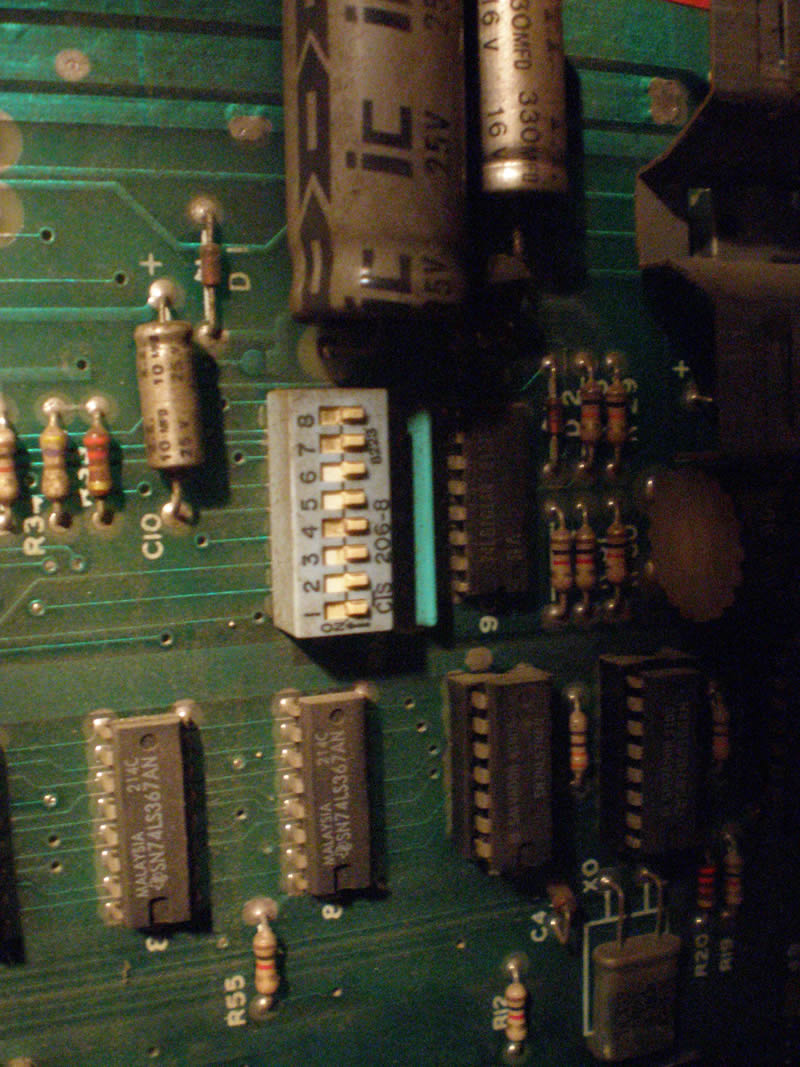
Don’t power up your machine just yet, we’ll do that soon enough. In order to set your DIP switches take off the back door of your machine and let’s get access to the PCB. We are looking for the block of DIP switches to initially setup your Multi Pac configurations. Those DIP switches look something like this (This photo I took was after I had configured my Multi Pac kit. So you see all of the dip switches are “off”. Make sure to flip #6 the other direction to “on”, otherwise you wont’ see your config screen.);
Now, you have checked all of your chips and feel as confident as possible that you have everything installed correctly and have set your DIP switches, let’s get to powering up your Pac-man or Ms. Pac-man. Heck, it might even be your bum-fungled machine that is in a Firefox cabinet with a Midway harness with a Sly Spy marquee! Whatever works for ya.
I hope you know where your power switch is to your arcade game. If you don’t, you probably aren’t quite there padawan, to be even attempting this multi kit upgrade. Just to re-iterate, if you have having issues playing your Pac-man of choice before this kit, I can’t help you troubleshoot those problems in this tutorial. The upgrade may fix your problems since you removed 8 chips from your board, but like Mike Doyle said, there are no guarantees for a newly working Ms. Pac-man PCB.
Hit the power, and you should see this screen!
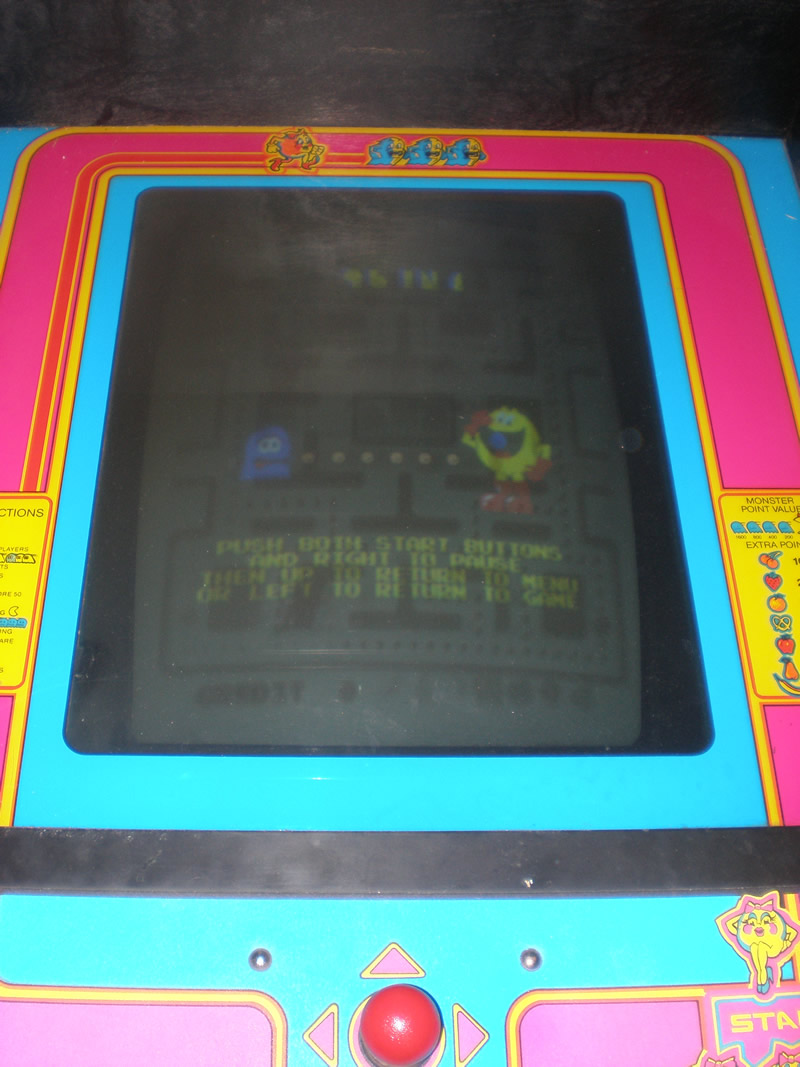
The welcome screen to the 96 in 1 kit says;
Then up to return to menu
Or left to return to game
If you don’t see this screen when you power up, immediately shut the machine off and review step 4 and double check all of your connections. The kit is fairly forgiving, so if you didn’t fully press a chip down, you may be ok. If you get stuck, you will probably want to email Mike Doyle (Kilkeeslps@aol.com) with questions about why your Multi Pac kit isn’t working.
Installation Part 3 – Working with your settings
Mike provides a lot of instructions for configuring the settings for your Multi Pac. I am going to continue this installation of the kit in part there, where we get more in depth into all of those options. So make sure to tune back for part 3 of “Installing the 96 in 1 Multi Pac”

