
Arcade Projects
Xevious Cabinet
The second of four cabinets I got today.
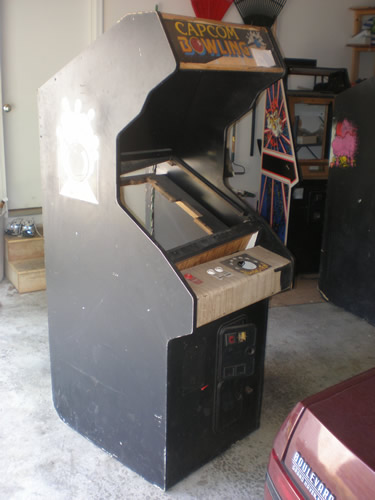
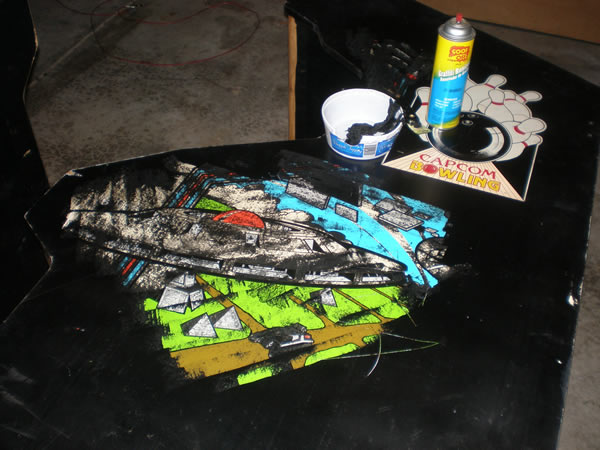
It was the same story with this cabinet. As you can see, it was converted a while back into the loathsome Capcom Bowling and Tim said it was mine if I came and got it, but the cost of getting there with a truck or something else that isn’t mine always outweighed the worth.
Here are some photos of the cab.
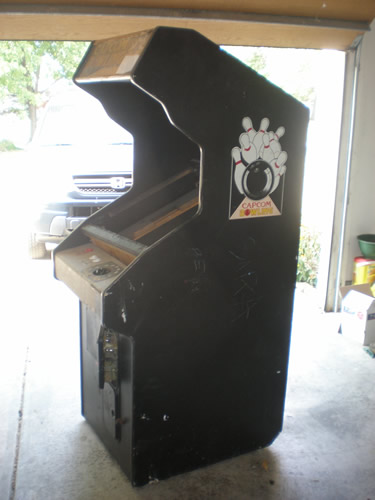
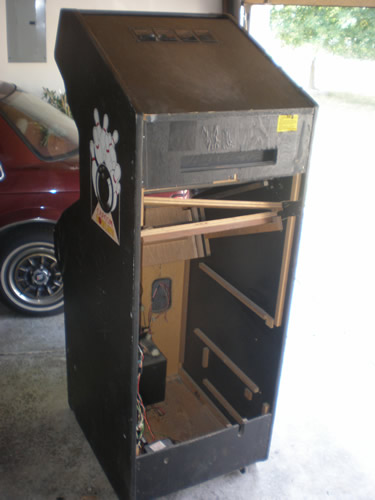
It has some cross beams that will be refastened, but it isn’t in bad condition. The question is, will I have the same luck removing the latex black paints on the sides that I did with the Dig Dug restore? It is the classic Atari latex sideart, so I am hoping so. But for the value of the game, I can’t do too much with it. If it doesn’t come off nicely, I will just have to wait for an Xevious that comes closer to me. They all seem to come up in Florida.
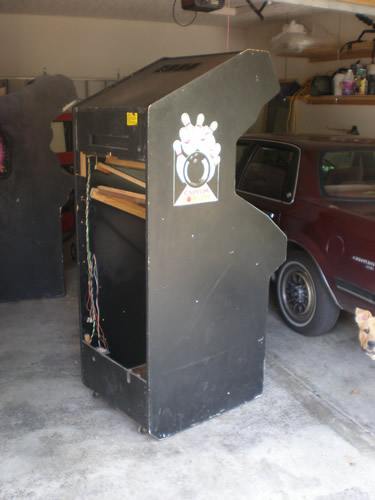
~Edit – I tried some Goof Off on the cabinet. The whites are always a problem, they may be even more so on this one. But you have to love that Atari sideart. Such great opportunities for restores. This is about 20 minutes of work, most of it waiting.
Tempest Arcade Cabinet
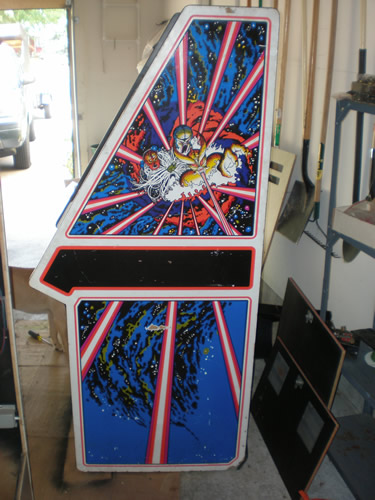
This Tempest cabinet is one of four I got today in my Frenzy trade.
Ever since I first met Tim Hill last December, we have been emailing about this Tempest cabinet. He said it was mine if I came and got it, but the cost of getting there with a borrowed truck or other transportation always outweighs the worth. It was empty, and just sitting around taking up space for him. So, we finally worked out this deal where I would trade him a non working but complete Stern Frenzy for Tetris, Tempest, Food Fight and Xevious cabinets. Hopefully it was a good deal for both of us but I think for me it is yet to be seen. However, he has been so helpful since I met him, and I got him a game he really wanted, so that makes me happy.
Here are some photos of the Tempest cab.

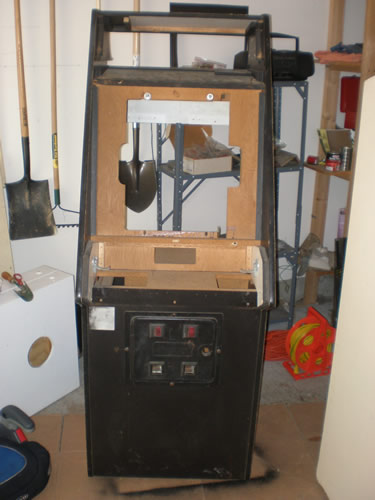
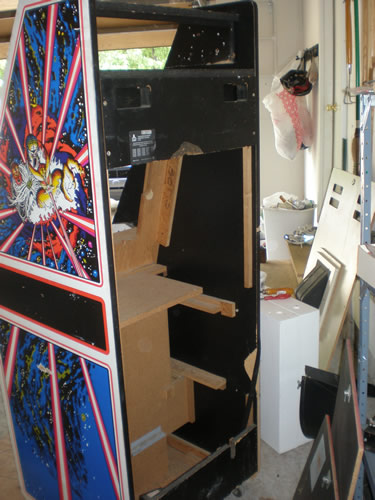
I decided on the way home today that I think I am going to sell it. The weight of having 7 cabs in my garage currently, and then the idea of tracking down all the parts for a game that I don’t feel strongly about got to me. Plus, it is the one cab that I hope can make back some of my travel costs.
G07 Blowing a F902 Fuse
I got this monitor last year in October. I bought a bowling game that worked completely for $150 and this monitor was thrown into the deal. I immediately sold the bowling cab and everything in it for $50, keeping the monitor that worked and the one that was bad.
The one that was “bad”, worked fine the original owner said, until he did something early one morning maybe before it had warmed up, or just without thinking.
There was a blown fuse that needed to be replaced, so that is what I did. I powered the monitor up and it blew the fuse again. So the monitor sat.
Now, with the possibility that I might need it for the Xevious game, or another game, the timing was perfect when I read a thread on KLOV about what to look for to repair a G07 that is blowing the F902 Fuse. The post said that a bad Flyback and HOT (Horizontal Output Transistor – Had to have someone help me with that acronym) can cause this to happen. Usually when the flyback goes bad it takes the HOT with it. Bob Roberts has a kit that includes caps for the chassis for all of this stuff for most monitors for around $40.
I emailed him and asked him if this sounded correct. What he told me sounded more accurate. Remember the previous owner made a mistake when working with the monitor, maybe he plugged it in without a isolation transformer. Here is Bob’s email
When F902 blows it is 95% due to a shorted diode D901 thru 904 commonly
shorted by someone plugging them in without an isolation, but they can short from a simple voltage surge, as well.
When F901 blows it is 95% of the time due to a shorted flyback with the remaining 5% delegated to the HOT or other HV compent shorting.
I wish I would have emailed him about this a long time ago, or posted on the KLOV forums. Sounds like something I can test easy, figure out where those diodes are, do a continuity test and go from there. But it may be a cheap fix to just replace the diodes, and I thought $40 to repair and get a working monitor wasn’t too bad if it was a sure fix.
If it really is F901 that is blowing, then a flyback, HOT & fuses would be $30.50 making buying the kit more economical. There are no holders made to fit the mis-aligned G07 chassis… the reason that pigtail fuses are needed.
Frenzy – Going to trade it this weekend
The plan is right now that I am going to trade the Frenzy this weekend to another good friend collector for a handful of other cabs and projects.
I knew Tim really wanted a Frenzy, and this one was in good condition minus the ZPU-1001 board. He was close enough and he has been so helpful in the past that although I could have tested the market to see what it would have sold not working, I decided this was the better route to take. I don’t like the game enough to go out and buy a Berzerk Frenzy combo board, so I wasn’t going to keep it.
19K4635 Wells Gardner Monitor – Difficult to do a cap kit
It was cool outside last night, and I was feeling motivated, so I started the cap kit on the Wells Gardner 19K4600 model monitor.
Let me tell you, I thought doing a cap kit on this monitor was for an advanced user, not for the faint of heart.
I had the hardest time figuring out how to get at the bottom of the chassis board. I finally figured out that you need to unscrew the cross beams from both sides of the frame. Then, pull the sides apart and get the chassis out. There are a number of different connectors that you need to unplug, one or two from the neckboard, and a couple from the 19K4635 chassis. But even unplugging them all doesn’t matter.
Underneath the chassis board is a metal plate, held on by four screws. You have to take those screws off and then you have the plate hanging off the chassis board. There is some sort of discharge? copper spool that is soldered from the plate to the chassis board that unless you want to solder it all, you can’t take it off.
So, it was on big balancing act. Most of the caps are on the cards that plug into the chassis. One large cap, a 1000 u 35V? on the one card, and a ton of caps on the other card.
I found that on this monitor, most of the time, the size of the caps were downgraded significantly. I don’t know if this indicates how long it has been since a cap kit has been done or not, but there was a ton of dust on the chassis so I don’t think it has been for awhile.
I had found my cap kit list for this 19K4635 Wells Gardner monitor at Ionpool, and chose the Zanen Kit #201A. I don’t know why I chose this one over the WICO, I don’t know the difference. But I am glad I did, the Zanen version had more caps.
But I did find that I needed three other caps that I will have to go back for. Those three are;
- 1000u 35V
- 4.7u 25V
- 22u 16V
Re-attached harness connector to Dig Dug
Since my brother in law was down this weekend, I took the initiative to have him help me look at the edge connector for the Dig Dug in the garage.
I had unplugged the Dig Dug harness to solder on that new finger and forgotten which was the connector went back on. I knew that if I put it on wrong I could fry the board, so I had delayed figuring it out. But I had an idea. I should be able to test voltages in the connector, and compare them to a pinout to check and see which direction it should go.
Like the other Dig Dug, the pinouts seemed to be very inaccurate and we were having problems pinpointing a direction. Then, we noticed that printed very tiny on the connectors, were the letters and the numbers for solder and component sides of the board. I had no idea. If you look very close to the connector on the back where the wires go in, you can see the raised printing. Fortunately the Dig Dug PCB had letter and number markings on it as well.
So, even though I had solder the finger board replacement upside down, I was able to easily figure out which way the harness was supposed to go. We powered it up, crossed our fingers….
And it worked fine. So, the plan is to list it on ebay. I have my costs, they were higher than I wanted, and I worked really hard to keep them down.
I just need to wait to make sure the demand is still there. I may wait a month or so before listing it.
Removed Wells Gardner 19K4635 from the Wizard Of Wor
After we got home last night, I got around to taking the Wells Gardner monitor out of the Wizard Of Wor. I took some photos, and labeled the one hook up in particular. Still no expert, I need to help remind myself.
It has been over 95 consistently the past week, so I am not sure when I will get the motivation to go out into a sticky garage, heat up an iron, and switch out the caps. But, hopefully soon. It would be good to get on with the simple task and onto figuring out any sound issues with the game so I can sell it.

