
Arcade Resources
Zookeeper Sideart Stencils
 There was a topic recently on klov about someone wanting to get the sideart from the Taito arcade game Zookeeper vectorized so that they could make stencils.
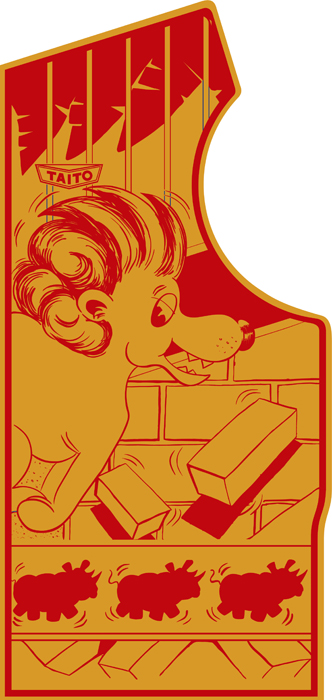
I posted on the Zookeeper Stencils topic, mentioning that I could do the vectors, but I wanted to see the sideart scan to see how complex the artwork was. The Zookeeper artwork is very complex, with all of the little splatters, and the irregular line work. I posted on the topic asking how bad the party wanted the vector tracing of the sideart, but I never heard back.
I was surfing the other night and came across VectorZorg’s artwork again, and noticed that he had about 70% of the Zookeeper artwork already vectorized. The only part he didn’t have finished was the splatters on the sideart.
So I emailed him and started a dialog to see if I could get a copy of the file that he had and finish the remaining splatter effects. He emailed me back asking who was interested in the Taito Zookeeper Stencils, and I sent him a link to the thread.
You can see a larger version of the Zookeeper sideart if you click the thumbnail. I just took this from VectorZorg’s website. I’ll post any updates if I get them here first.
Update Nov. 18, 2008
Due to some unforseen health issues, Brian Jones has some time on his hands and it appears as if he is about one hour or two into finishing up this piece of vector artwork. All that was left were all the little textured blobs on the bricks, moon and everywhere else.
My guess is that stencils for re-painting Zookeeper artwork will be available sometime in late January of 2008 if not sooner. Will keep you posted as I find out more.
Jr. Pac-man vector marquee progress
Taken me longer than I thought, but I got through another vector piece of the oversize Jr. Pac-man marquee. I was going to go to the billboard behind Jr. Pac, but decided to Jr. himself.
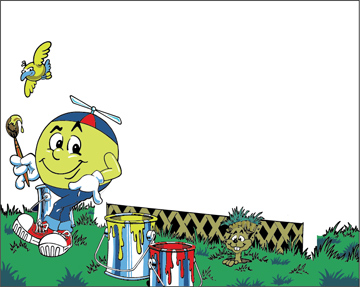
The next piece of the vectorization process for the Jr. Pac-man marquee header will probably be the lamps, or something simple, like the blue ghost. The detail on Jr. was about what I figured, it wasn’t a breeze, but it wasn’t too hard to trace the lines either. It just took time.
I still hope to be the one person to have a whole set of artwork and produce it as a Jr. Pac-man kit to make your own machine, specifically for converting a Mappy into a Jr. Pac-man. But only time will tell.
Tron & Battlezone 3D Animations
Surfing tonight to find a cool piece of coin-op arcade related information to post on the blog. Then I re-visited Peter Hirschberg’s website, which always sticks out in my mind as one of the better arcade collecting related designed websites. Peter works for AOL in VA and clearly has some money put into the video game collecting hobby.
He also has a desire to work in special effects in Hollywood. Here is a video from YouTube showing some amazing computer models of the classic arcade games Battlezone by Atari and Tron by Bally Midway. He does a flythrough of the details on these games, and it is pretty phenomenal if you have any familiarity with them.
Pac Gentlemen Custom Arcade Toy
Saw this on the KLOV forum the other day and I couldn’t resist trying to share it with a larger audience.
Here is a custom made piece of coin-op toy / art as a tribute to Pac-man, one of the pioneering video arcade games of the 80’s.
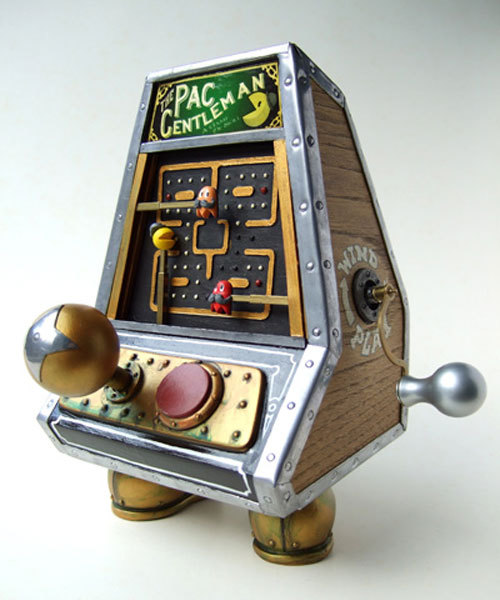
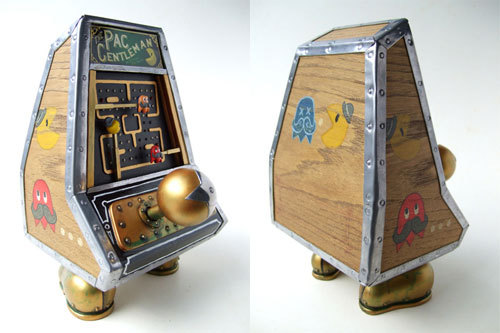
I didn’t think the joystick detail in particular added anything to the classic arcade game tribute to Pac-man, but I did like a number of ideas about it. The artwork on the side is kind of a low tech way of expressing turn of the century illustration, although the style may not fit. But the little mini “Pac-Gentlemen” marquee did show a little bit of that, with some Art Noveau influences in the intricate detail.
I like the wood finish arcade cabinet, with the metal framing and bolts, giving it that hand crafted feel and the idea of a crank to power the coin-operated machine. A cool little piece of art, reminded me a little bit of my ceramic Pac-man project I did in college, but this one was crafted by an expert.
I left a short little comment on the Urban Retro website about the Pac-man art.
Mr. Do! History Topic on KLOV
Interesting topic going on right now on the klov forums. One user was looking at the Mr. Do! entry on klov.com, and wondering which of the three versions there was the original dedicated. The correct answer is that there is more than one Mr. Do! that is “factory” dedicated, but only one directly from Universal.
Here is an exerpt from one user;
The other “dedicated” units were done by ops who wanted the games to look as good as possible. I have an old Play Meter article that talks about a lot of vending companies going out of their way to make Mr. Do! kits look like dedicated games… some even making cabinets just for them.
Lost in the collecting world is the fact that, in 1983, Mr. Do! was one of the biggest hits. 7th highest earning game that year, meaning only 6 dedicated games in 1983 out-earned Do!. 30,000 legal Mr. Do! kits were sold, roughly 10 times more than most Golden Tee kits sold nowadays. Only about 2,000 dedicated Do’s were sold.
Opinion or not, pretty interesting information of how many Universal Mr. Do! units were sold vs. conversion kits. Even more interesting is a quote from another member here in Indiana (Shacklefurd) that actually investigated into my coveted White Mr. Do! cabinet with clown artwork;
A had series of E-mails with the former CEO of universal from the 80’s a while back and here is what he said. The white one with the red yellow and orange strips came from Japan. The wood grain and the white with the clown side art were factory built by smaller companies on the east and west coast that bought the rights to release Mr. Do and other Universal games. So they are all “Dedicated”, but the Universal from Japan is the one collectors think of as dedicated.
I should get in touch with Shackle and see if he has the CEO’s information still and try to track down the company that made the White Mr. Do!
Until this forum thread surfaced, I had posted here that I was thinking it was a company by the name of Gleeb who made the cabinets and that Gleeb was also based out of Japan, not here in the USA.
Update: July 2013 I now have photos from inside two different Ladybug machines, machines that have very similar painted illustrated artwork to the white Mr. Do!, that show Universal serial numbers. Check out this post on two different factory Mr. Do!s.
Dig Dug Slot Machine
One of my friends and fellow local collectors here in Indianapolis, IN has a (Atari’s) Dig Dug slot machine. It is pretty wild, all of the colors, the whole presentation is like “BAM!” You can imagine seeing it in person, it plays little automated clips as well as the classic
coin operated Dig Dug music.
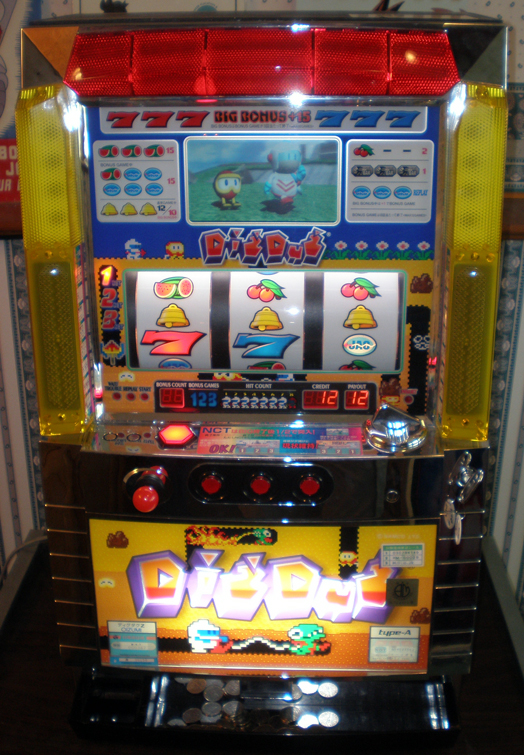
I was looking for something arcade related to post about today, and came across this photo I took in April. I imagine these Dig Dug slot machines aren’t too common, and that is what sparked the idea to post this photo.
I would say this is the first in the series of “Collector Meetups – My Favorite Games“. Granted, this may or may not be a game. But it seems that with each video game, or arcade game collector I meet I learn about a classic game I had never heard before. Or in this case, some other rare arcade game oddity.
I may never post another one of these again. But who knows, if I need another idea, at least I have this arcade topic to turn to.
Dynamo Cabinet 19″ Monitor Mount Board Dimensions
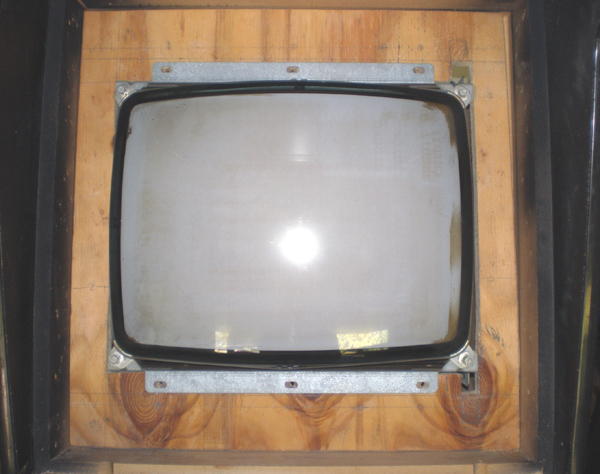
Last Saturday I mounted a 19″ monitor in my Tetris Dynamo cabinet. The cabinet is 25.5″ wide, so I don’t think it was meant to fit a 25″ monitor originally, the monitor opening is 22.25″ x 22.25″ square. Maybe it was meant for a 21″ monitor?
Either way, the opening was way too large for me to mount my 19″ monitor without some customization. A JAMMA cabinet, they are meant to be universal cabinet for any game. Probably an easy job for most guys with power tools. But I didn’t have any, so I called in a friend.
The night before I measured out the board we were cutting, and I thought I would share those dimensions here in case someone else could use the information.
I had a 3/4″ thick piece of plywood scrap that I got for free that I worked with. I think the thicker the better since the monitor is so heavy.
Here are photos of the monitor mounted in the cabinet;

And here is the dimensions for cutting a board to fit your dynamo cabinet and mount a smaller monitor.
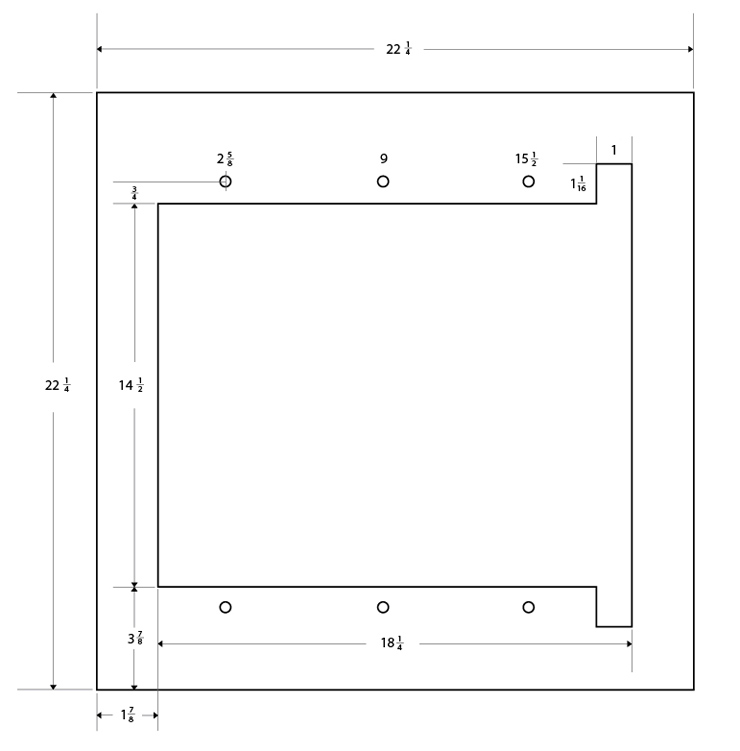
Notes: The holes that I drilled were 1/4″ for the mounting bolts. I made this drawing for a horizontally framed monitor. You will notice the slots to the side for the frame flaps to slide through.
The dimensions are as following (Converted to the decimal);
- Total Board Size – 22.25″ x 22.25″
- Inner Square Total Size – 14.5″ H x 18.25″ W
- Monitor Flap Slots – 1″ H x 1.0625″ W
- Space Horizontally around cutout – 1.875″
- Space Vertically around cutout – 3.875″
- Bolt Placement From The Left of Board (Top and Bottom) – 2.625″, 9″, 15.5″
- Space to center of holes – 75″
Hope I described that clearly. Like I said above, I had to make the opening a little taller than 14.5″ to fit the 19″ Electrohome monitor screws.

