
Arcade Resources
Listed Dig Dug (Second machine) on ebay
Well, even though I hadn’t mentioned it here because it is a different machine, I thought it made sense to now. I listed my other, nicer Dig Dug machine on ebay last week. Well, it didn’t turn on. So after a lot of stress and troubleshooting I figured out why. I knew the game board was not getting power, but I was sure that the main power supply was fine. Maybe the audio / power supply went bad. I swapped the audio board I had for this project into the now non working Dig Dug inside. Well, a resistor caught fire, what a fun little surprise.
Come to find out with some major help from a friend, that a bad connection can put too much stress on the resistors on that board and cause them to burn up. Sure enough, my main PCB looks great, except one finger on the main connector is fried over half way down. This probably caused the issue, I don’t know yet. I just know I took the working PCB and Audio board from this project, put it into the cab in the house and everything works fine.
So, now, I am back to a non working game in the garage. What I am going to have to do is buy a new edge connector from Bob Roberts and solder it on. I want to finish this up still, but it probably won’t be this next week. We shall see. Bums me out, but I had to sell the other Dig Dug game and I think this all worked out how it was supposed to.
Pengo cabinet inside has a fun design
Got in back of the cab last night and tried to figure out how to get at the Sound Control. I want to be able to take it off so I can work on it, take photos as needed, but I can’t figure out how. It feels as though it is riveted to the back of the coin box inside, so I thought I might be able to get at it in back.
I loosed the four bolts holding the huge particle board “L” that contains the Power Supply and PCB. I pulled it out a little bit to see that there is still a board in my way of getting at it through there unless I remove that little board. Doesn’t seem like it has much of a purpose, but I hate to go ripping apart the game if I don’t have to.
Who is the artist for the Bally Jr. Pac-man machine?
Talked with Rick last night, told him the only artwork piece I told have for a Jr. Pac-man machine is the original oversize, or small sized version, marquee. Hopefully he can take some photos of that with the flash off and I can see if I can trace it.
During the last month I have been debating about tracking down the original creators of the Jr. Pac-man artwork who would have worked for Bally. Joe said that after about 1984, most games had credits, so that is a great place to start. However, in the limited searching I have done so far, I haven’t been able to find credits for the Jr. Pac-man game. I don’t know if there is an arcade site out there that collects this information or not, it would be a good site for sure, but if anyone has any information about this please shoot me an email.
Identifying Well Gardner Monitor
Dug around in the bottom of the cabinet tonight a little more, found some more trash, but found a lot of labels including one that I hope goes to this monitor. I knew it was a Wells Gardner, but the label says 19K4635. I emailed Bob Roberts to see if he could help me identify the monitor and make sure that is correct.
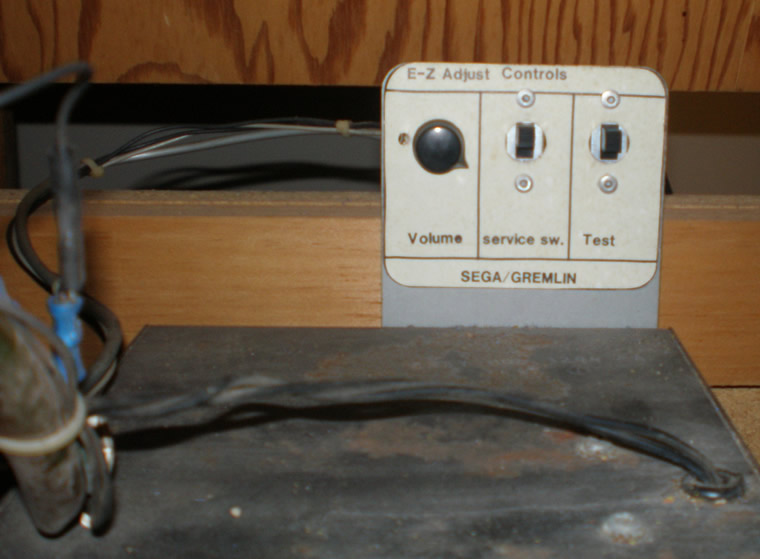
Pengo sound controls inside coin door.
After talking to Rick the other night, I decided to just send him my Pengo PCB to have his tech friend take a look at it. I think Rick is really smart and knowledgeable and really trust him and anyone in his network. So, hopefully he can easily figure out what it is, if it is a RAM or processor issue or what. Hopefully it is an easy fix and I can get it working really soon with that high score save kit.
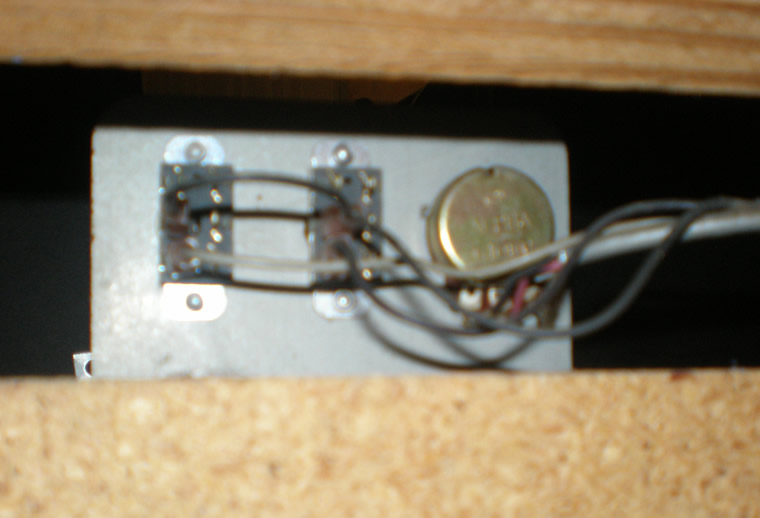
But since the Pengo PCB is now in the mail, I thought it might be time to look also into getting the volume pot replaced. Thinking I might need to place an order this week with Bob Roberts, might as well combine it all. Here are some photos of the front and a crappy one of the back of the pot I think I need to replace.
(Around page 37 of the Pengo operator’s manual it says I need a 10K pot Car Pnlmt, part no. 475-0007. I don’t know what “Car Pnlmt” means, but I think all Bob needs is the 10k portion. I don’t actually know what part in this assembly is the pot, I will have to take it out and take a closer look I guess. It looks like from the manual that the gold piece on the right is a little AMP, so the pot must be back in that wiring somewhere.)
I think I have mentioned it here, but from talking with Tim in MI, who also has this same problem, and Bob it sounds like all of the static we are getting from moving the coin door is from a bad Pot on the sound. I also turn the knob when I played the game and it wouldn’t adjust anything, just leaving the sound at the deafening high level it was at.
Visually Damaged Components
Figured out which pads I need, just basically those green scrubby pads that you can buy any off brand for. Supposedly they are great for these edge connectors, I tried it briefly last night and my jury is still out. Seems like it would be damaging, but everyone says “it seems it would be bad, but it isn’t”. What do I know?
I figured out how to get the little door open at the base of the front of the machine last night. I took out the first board I saw and lo and behold, there were some things going on. Looks like one small capacitor is blown, one resistor has a broken leg, and it almost looks like one resistor was purposefully clipped off, but should be there.
I looked at the schematic, not nearly as nice as Dig Dug from Atari, with a parts list. I don’t know yet how to identify what exact parts I need from the schematic. I am debating on just taking the board into the electronics store and having them loook and tell me based on similar looking parts on the board. But that seems like a best guess scenario.
Rick saw the Agent X kickplate finalized
Rick and I finally caught up last night, and he got to see the kickplate art for the first time. He was really impressed, which is great. I talked to him about the circles at the top and how they were right at the dimension edge for the top. He said he didn’t feel like it was that big of a detail to sweat about. He originally said to leave them and depending on sizing they may not be cut at all. He asked what I would do, and to me, even if you lined up this art side by side with the original you might notice the circle placement off a little, I would just move them down a hair so you knew they would fit within the dimensions.
He trusted my judgement and told me to go ahead. That is what I like, when someone trusts my opinion, because I do a good job and I try to make the best decision for the person who wants it. But he also made a good point that every cab could vary in size, placement, etc. etc., so not every cab is alike anyway even in color because of fading and whatnot.
So, next step, he is sending over a sample of the Cloak and Dagger art so I can color match and we’ll go from there.

