
My Gameroom
Humpty Dumpty..Ms. Pac-man back together again
Finally, after a couple of weeks after moving her into the basement on Nov. 8th, I took a break today from design and online work to put my Ms. Pac-man back together. A thank you goes out to Chris Moore for the new t-molding. (more…)
Mr. Do! Roadtrip to Chicago
It’s been about six weeks since I finally acquired my Mr. Do! arcade game in Chicago. Having looked for just over two years for this game only now can I laugh when I remember what Joe Magiera said when I first met him in the fall of 2006. (more…)
Universal Mr. Do! is finally mine!
It was a crazy week, an exam and two papers and then the July 4th holiday weekend and a fun time with family. But at the end, I knew that I would be traveling to finally pick up my own, original, Universal Mr. Do! arcade game. (more…)
Bally Mappy Cabinet Project
Did a little swaperoo last Friday with another member on the board, good to meet ya Jeff. Have I told you I think your parents were brilliant in naming you? Jeff had a Mappy cabinet that was converted into a Kicker, which he says is a terrible game (I’ll take his word and not waste my time). (more…)
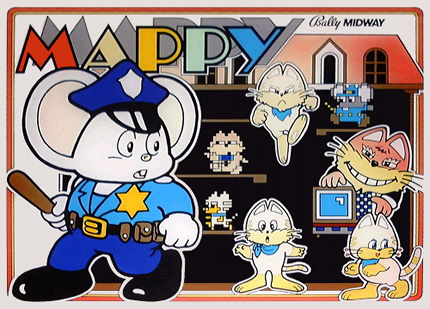
Currently I have a Mappy cabinet that was converted to a Kicker. The marquee box was sawed in half and needs to be reconstructed. This is a long term project, and as of this writing (Jan, 2009) the cabinet sits in the corner awaiting a restoration to probably a brand new Jr. Pac-man.
Installing the 96 in 1 Multi Pac – Part 1
One of the most popular and rich arcade game kits for most collectors is Dave Widel / Mike Doyle’s 96 in 1 Multi Pac-man kit. With just a few simple changes in the chips on your Ms. Pac-man PCB you can play 96 different games, including many different mazes for Pac-man, Ms. Pac-man, and Pac-man Plus as well as Pengo, Space Invaders, Eyes and more!
I found that purchasing the Multi Pac kit was an awesome experience. I emailed Mike Doyle, sent him money via paypal, and in a couple of days my kit arrived at my house, ready to roll. I had special circumstances because I wanted to have the kit at my house by Thursday night because I was having a party where I wanted to be able to show off my newly upgraded Ms. Pac-man machine. I ordered the kit on a Monday and I had it by that Thursday, on time to the T. Mike gave excellent communication throughout the short transaction.
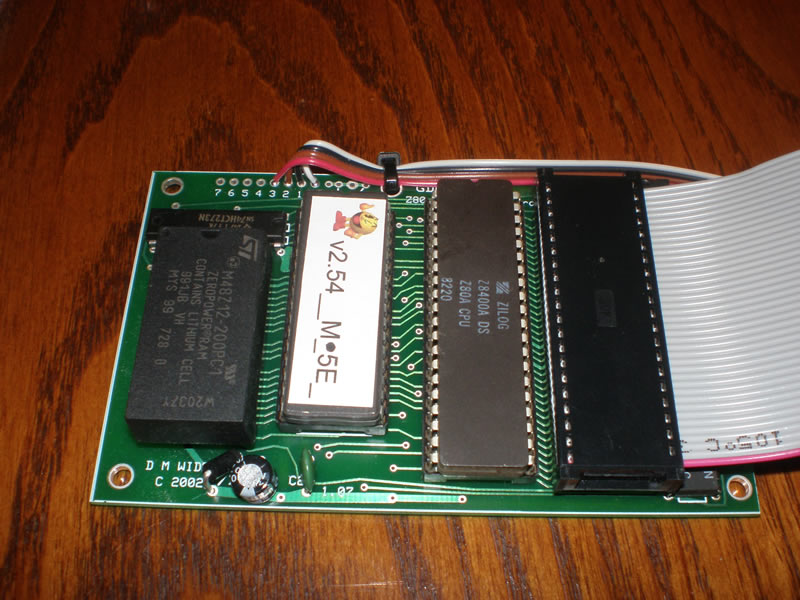
Here is what you get;
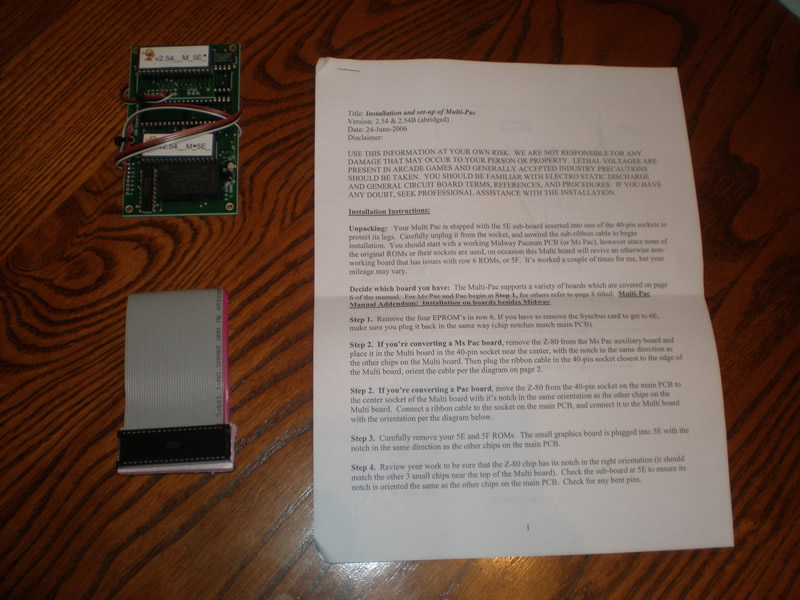
A set of printed instructions (PDF), a small pcb and a ribbon cable.
The instructions are written simply, and to the point. I am going to include snippets of them here to help explain the installation. Here are the general installation instructions;
Installation Instructions
Unpacking: Your Multi Pac is shipped with the 5E sub-board inserted into one of the 40-pin sockets to protect its legs. Carefully unplug it from the socket, and unwind the sub-ribbon cable to begin installation. You should start with a working Midway pacman PCB (or Ms Pac), however since none of the original ROMs or their sockets are used, on occasion this Multi board will revive an otherwise non-working board that has issues with row 6 ROMSs, or 5f. It’s worked a couple of times for me, but your mileage may vary.
Decide which board you have: The Multi-Pac supports a variety of boards which are covered on page 6 of the manual. For Ms Pac and Pac begin at Step 1, for others refer to page 8 titled: Multi-Pac Manual Addendum: Installation on boards besides Midway.
I will be upgrading my Ms. Pac-man board, so that is the PCB I will be using for this photorial. If you are still bootleggin’ like it’s nineteen eighty three, Shaft say you be outta luck in dis tutorial. But seriously, I am sure making the swap on most any PCB is pretty easy. Back to the instructions provided;
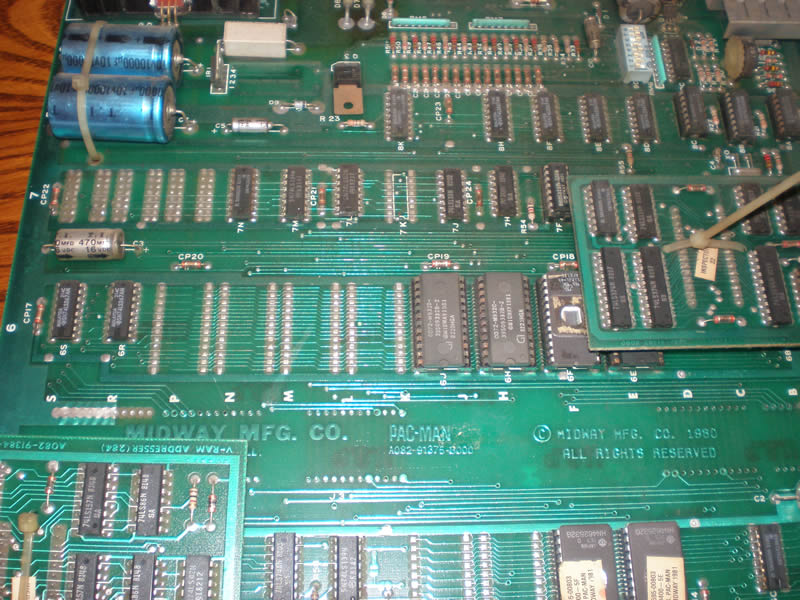
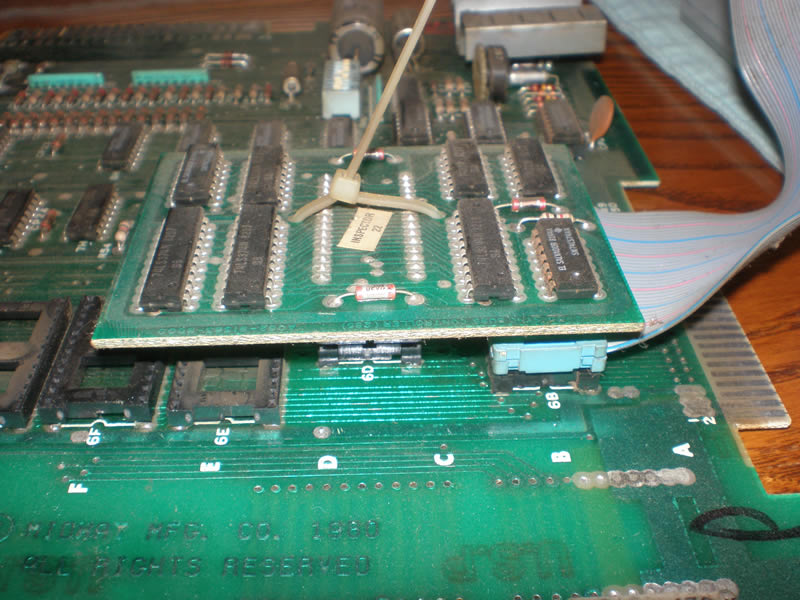
Step 1: Remove the four EPROM’s in row 6. If you have to remove the Syncbus card to get to 6E, make sure you plug it back in the same way (chip notches match main PCB).
Here are some photos showing the section of the PCB that the instructions are referring to. In the first two photos you can see the EPROMs at 6J, 6H, 6F, 6E. The Syncbus card is the elevated mini PCB with the dusty 20 year old zip tie:)
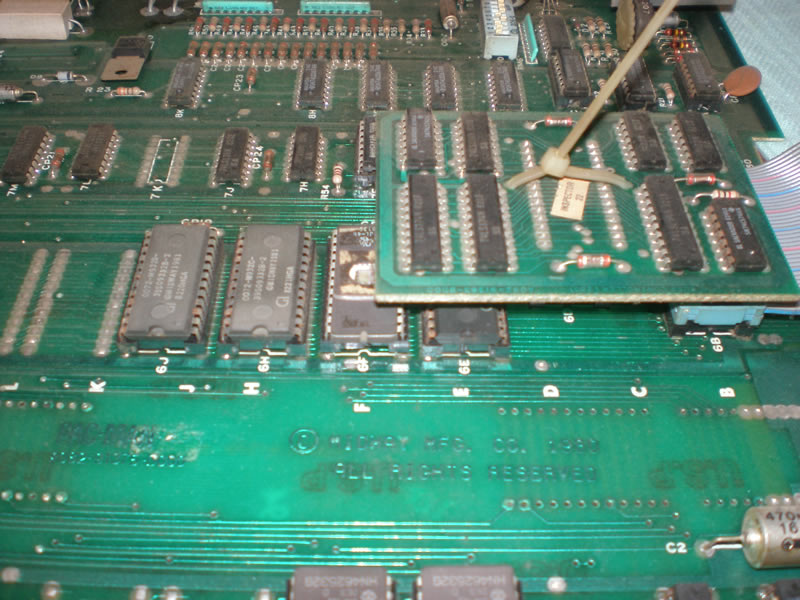
Here is a photo showing those four EPROM’s removed from the Ms. pac-man board. Removing chips is really easy, and this is something you’ll want to do a lot. Even your grandma approves, she says practicing this activity won’t make you go blind. So do a little less of that “other thing” you do in the dark and more playing with your circuit board.
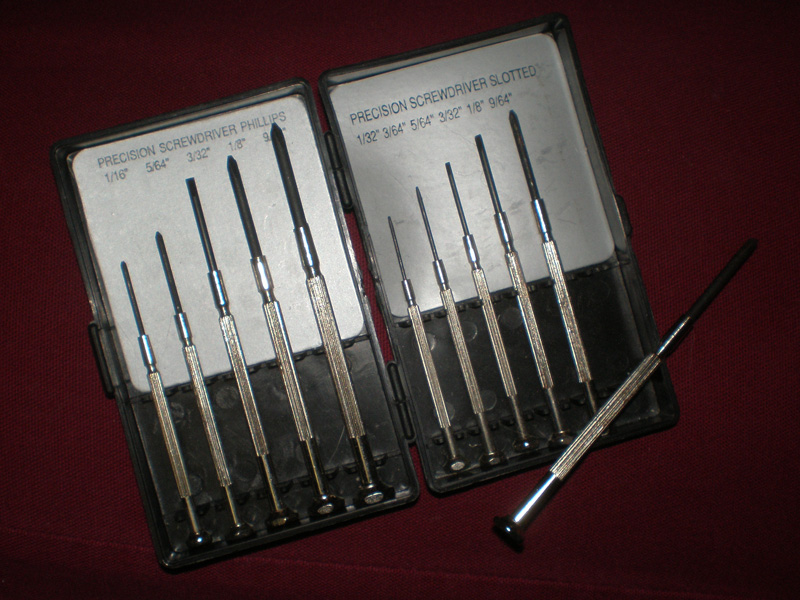
There are chip pullers you can try and can purchase one at most any major arcade dealer like HAPP, or probably even from Bob Roberts. The main idea is to make sure you remove the EPROM, processor, or whatever else without bending the legs. A small screwdriver will usually do the trick and a little Patience, yeah, yeaaaahhhh. Just a little Patience. Here is the set of mini screwdrivers I use constantly.
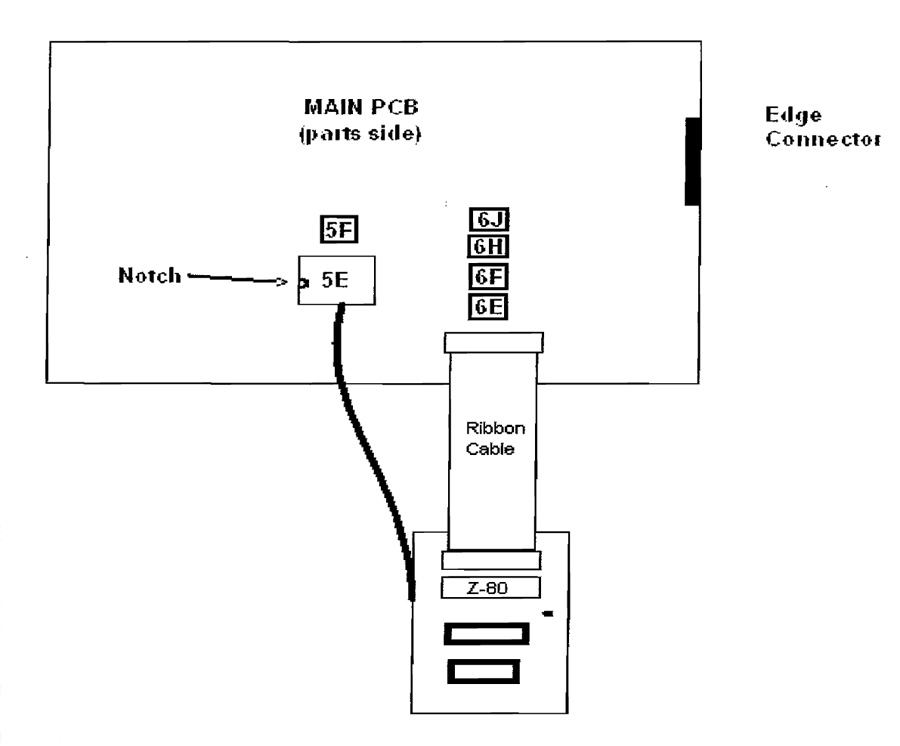
Step 2: If you’re converting a Ms Pac board, remove the Z-80 from the Ms Pac auxiliary board and place it in the Multi board in the 40-pin socket near the center, with the notch in the same direction as the other chips on the Multi board. Then plug the ribbon cable in the 40-pin socket closest to the edge of the Multi board, orient the cable per the diagram on page 2.
Here’s that diagram showing where you plug in the ribbon cable straight from the multi pac kit instructions;
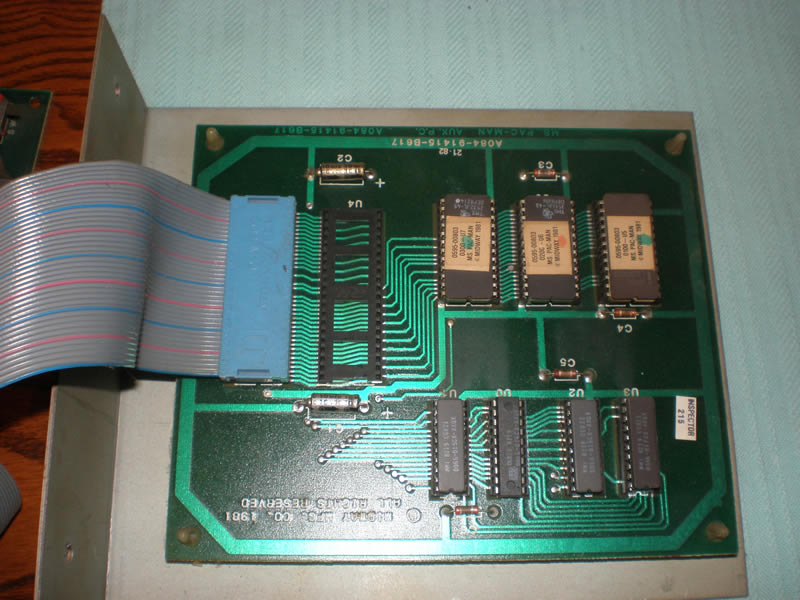
I apparently didn’t get a photo of the Ms. Pac-man auxiliary board with the Z-80 processor still secured but here’s a photo after I removed the processor. Just like the chips, you will need a very small flat head screw driver and gently work the chip upwards, twisting the driver back and forth until the chip comes out.
Now put that Z-80 processor in the Multi Pac-man board in the open socket. Make sure to orient the chips correctly as the instructions warn. You can destroy your Z-80 processor if you power it up with the chip incorrectly socketed. But fortunately, you would just destroy the processor and not the board, and if the angels shine highly on you, you may not even trash the processor. I personally don’t like electronic risk, but if that does it for ya. Go right ahead. Just look at the half moon inset on the chip to make sure you line those moons up with the socket in the right direction. As a general rule of thumb, you can look at the direction of the half moons on the chips around the one you are pulling, but that is not a hard and fast rule. Take note of the direction when pulling an EPROM and just make sure you put it back where you found it.
Ok. We’re pretty far along here, there aren’t too many steps left before you have your Multi-Pac kit up and running. Check back for Installing the 96 in 1 Multi Pac – Part 2 where we’ll pull 5E and 5F and finish up installing the small graphics board and mounting the multi kit in your cabinet. And of course, enjoying your 96 different versions of Pac-man, you yellow pizza freak!
Go to Installing the 96 in 1 Multi Pac – Part 2
Removing Plastic Stickers on Bezels
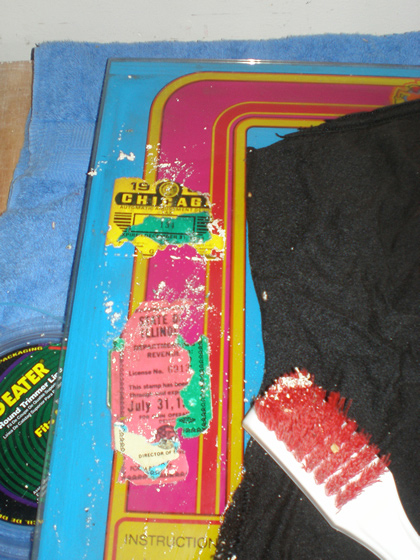
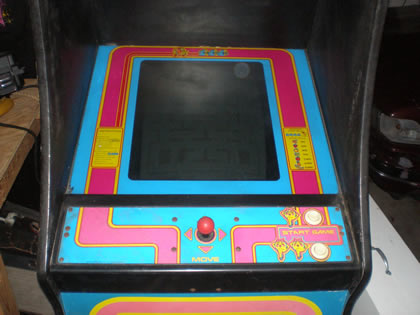
When I first saw my Ms. Pac-man in MI, I noticed right away two sets of thick overlaid stickers, probably 4-5 stickers on top of one another. They were some sort of license sticker for the Ms. Pac-man to legally be placed in different states. Darn tootin’, that’s authentic. But a little too authentic for me, they’ve got to go, and I had a dickens of a time getting them off.
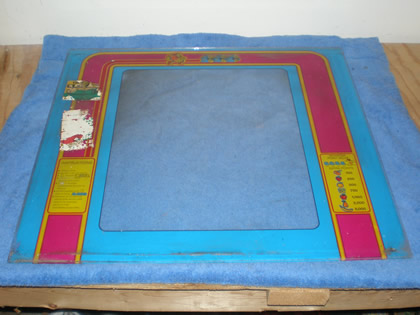
I tried some Goo Gone on the plastic stickers while the machine was still in MI, and that did squat. So I turned to researching on the collecting newsgroups. I found very little, but I also don’t like to look through more than about two pages of results. I decided I would turn to an old favorite – Goof Off.
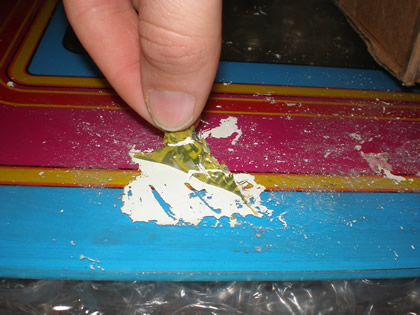
After I setup a protected area on my workbench, I put the Ms. Pac-man bezel down, and propped it up on a slight angle. Having worked with Goof Off in the past when striping acrylic paint off of cabs, I was concerned that some would run over the edge and ruin the printed Pac artwork on the backside.
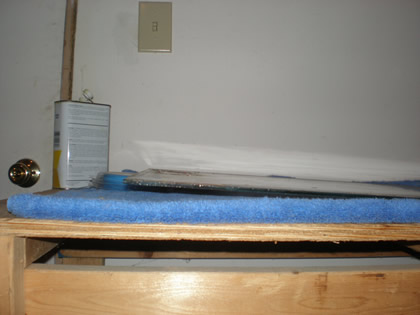
On an angle, I could more easily control where the liquid went. I just poured the Goof Off on, and put the rag down so that I could let it sit on the bezel overnight.

But, one application;
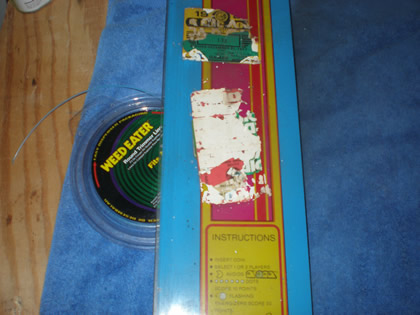
Then, two applications later I had had it with the Goof Off.
It seemed to be working, especially on eating off the white sticker residue, but it wasn’t disintegrating the stickers fast enough. I was lucky enough to have a plastic wire brush to work at the stickers otherwise I may not have been as successful. I even turned to picking it off with my fingers which was killer and I was concerned about absorbing it in my skin.
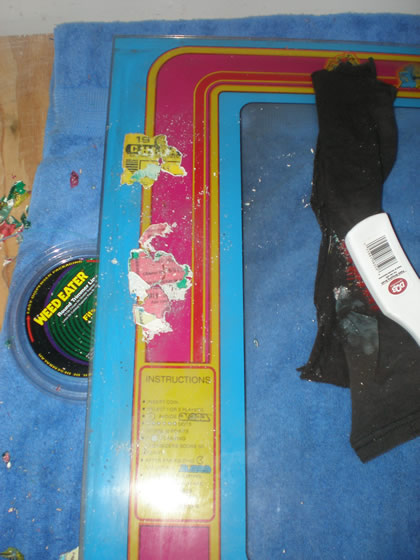
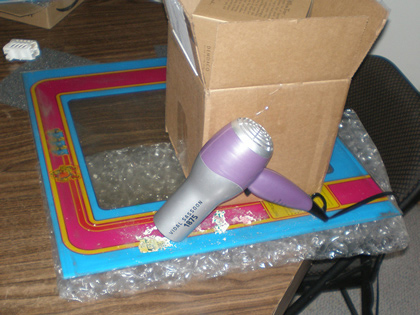
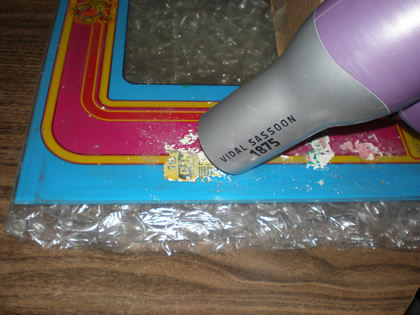
Originally I had read that that heat is the best way to get resistant stickers off of arcade game glass and plexiglass pieces like the marquee, bezel and control panels. I just assumed that a hair dryer wasn’t going to get hot enough to make a difference and I would need to borrow a heat gun to get the sticker remnants of the Ms. Pac-man bezel. I was wrong. I propped the hair dryer up, left it for five minutes, came back, and the sticker(s) peeled right off.
I wish I had started with this method, and this is why I am writing so that someone else learns from my lost time.
At that point, I knew the Goof Off would take the remaining residue right off, so I let it sit for 5 minutes and do it’s thing. You can kind of see by the photo below the white residue is eaten up and lifting off the glass.
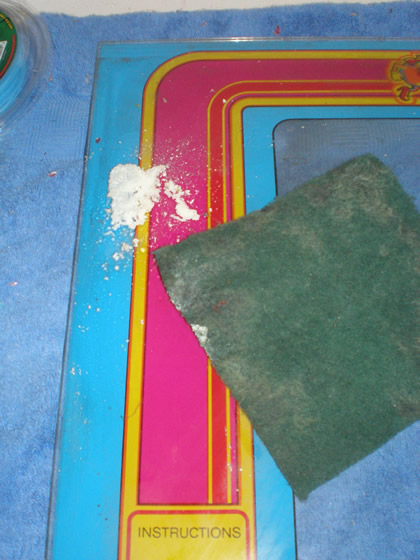
A good scrubbing with a scotch brite pad and a thorough cleaning to get off all of the residue particles (dampened one rag with the Goof Off and one with water) it looks great (minus the flaking in the lower left corner).
I’m not sure it can get more simple than heating the stickers. Anyone else have a better method or some additional suggestions of other things I could have tried?

