
Pengo
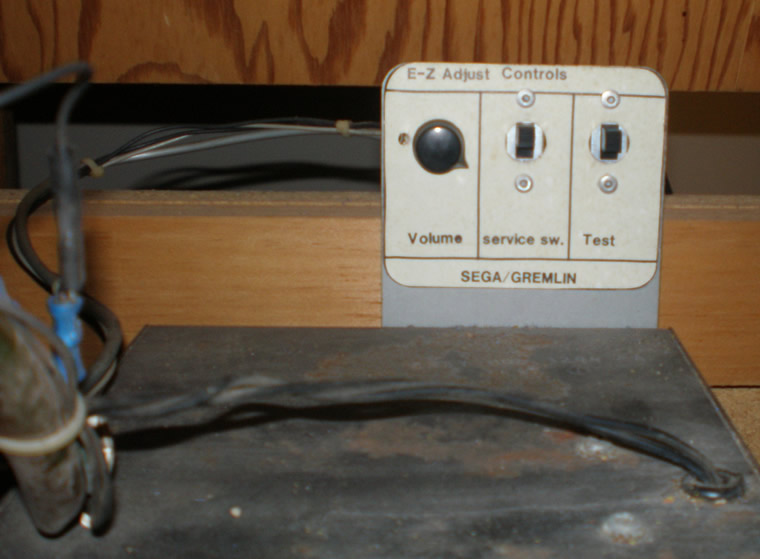
Pengo sound controls inside coin door.
After talking to Rick the other night, I decided to just send him my Pengo PCB to have his tech friend take a look at it. I think Rick is really smart and knowledgeable and really trust him and anyone in his network. So, hopefully he can easily figure out what it is, if it is a RAM or processor issue or what. Hopefully it is an easy fix and I can get it working really soon with that high score save kit.
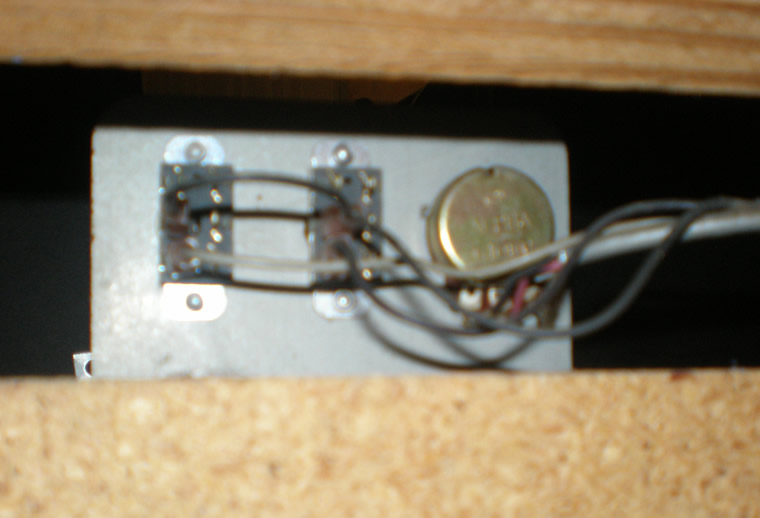
But since the Pengo PCB is now in the mail, I thought it might be time to look also into getting the volume pot replaced. Thinking I might need to place an order this week with Bob Roberts, might as well combine it all. Here are some photos of the front and a crappy one of the back of the pot I think I need to replace.
(Around page 37 of the Pengo operator’s manual it says I need a 10K pot Car Pnlmt, part no. 475-0007. I don’t know what “Car Pnlmt” means, but I think all Bob needs is the 10k portion. I don’t actually know what part in this assembly is the pot, I will have to take it out and take a closer look I guess. It looks like from the manual that the gold piece on the right is a little AMP, so the pot must be back in that wiring somewhere.)
I think I have mentioned it here, but from talking with Tim in MI, who also has this same problem, and Bob it sounds like all of the static we are getting from moving the coin door is from a bad Pot on the sound. I also turn the knob when I played the game and it wouldn’t adjust anything, just leaving the sound at the deafening high level it was at.
Troubleshooting Pengo Power Supply
Spent a couple of hours tonight looking at the Pengo game and trying to do some troubleshooting, mostly on the liner power supply.
As you see in the photo below, this is what a Sega/Gremlin Linear Power Supply looks like fromt the front, with the PCB board mounted on the inside of the humongous heatsink.
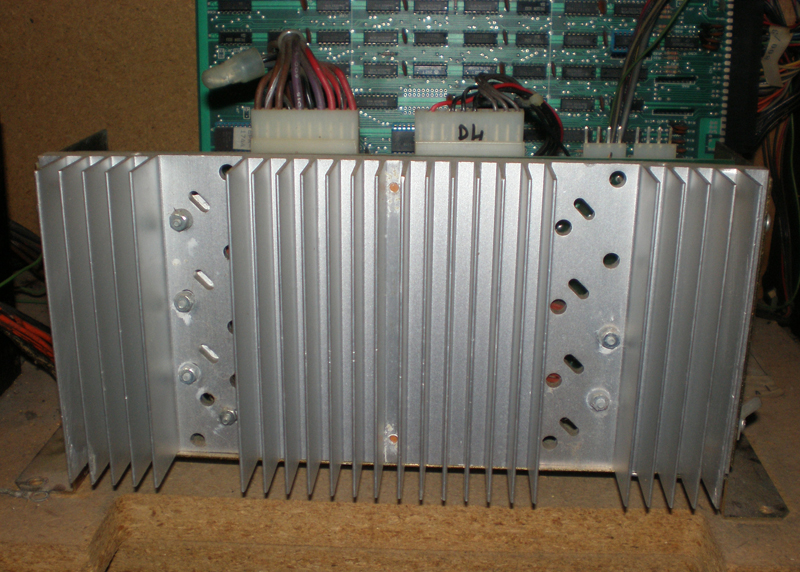
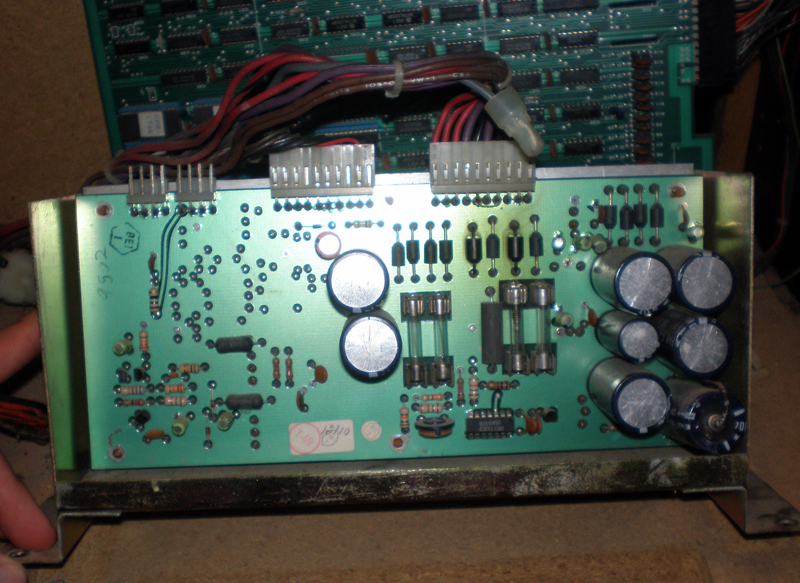
I had made contact with two different people who said to start by testing the Power Supply Voltages. The Power Supply in this machine is mounted awkwardly, so I just decided to unscrew it and get rid of some of zip ties. Most collectors like their games to be perfect and neat, right now, I just want to understand them and care little about that.
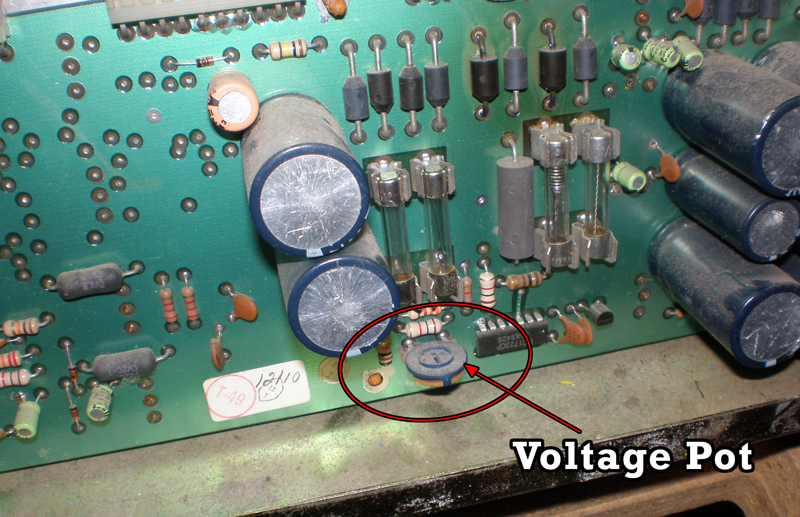
I took out the first two fuses and checked for continuity, and those seemed to be ok. (Those are the fuses on the left in the photo, just above where I indicated where the pot for controlling the voltages is at.) So, now time to check the voltages.
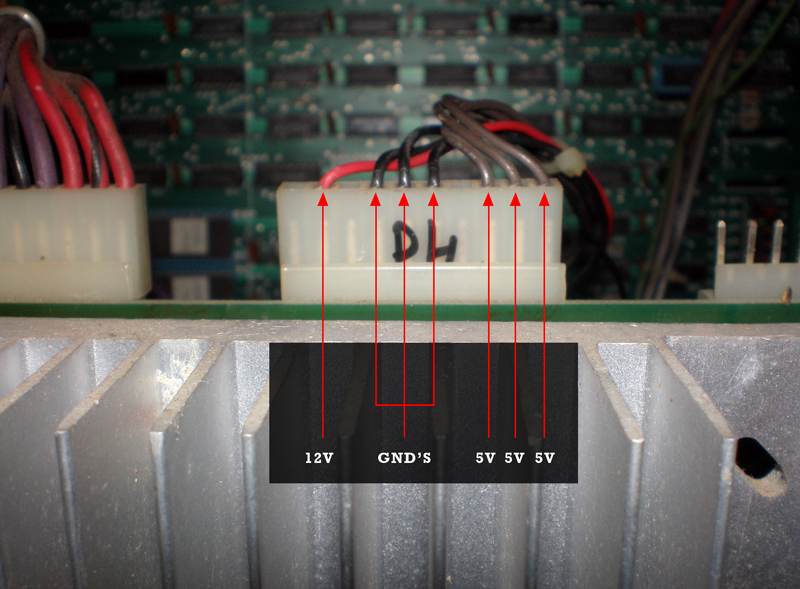
These second two photos above show the power connection for the 12V, 5V and Ground connections that supply the PCB. The 12V would be for the audio, and the 5V for the game board. I stuck my black lead into one of the ground, set my meter to 20V, and put my positive lead into each of the 5V and 12V connections, four tests in all.
For each 5V I read 5V exactly, and the same with the 12V, I read 12V exactly. So know that voltages can be dropped on the way to the board, I checked the voltages in the connector. Same thing, all of them right on the money which is weird, they usually fluctuate about .2 a volt. So, I decided to test right on the traces for the edge connector. I am going to point those places below, as well as the pinouts for this 44 (22×2) pin connector for the Pengo.
Jrok Pengo High Score Save Kit Released!
I was surfing last night and I saw that Jrok finally finished his Pengo High Score Saver kit back in late May. I am pretty excited about this, it has high score saving with extended tables, freeplay, attract mode, it can determine how fast the draw is of the blocks in the beginning, and you can choose which soundtrack you want. The last two options are paramount for me because I hate the soundtrack the game has now, probably a lot because I am used to playing it on Mame. (Say what you will).
The thing is, do I get the pack and have it sit until I get the game working? I think not. I don’t think I should plug it in to see if it fixes something either because what if the short blows this processor? So, it will probably have to wait, but maybe I will have to make this more of a priority fix as well. Hell I could take it out to Wagner Games considering I don’t have any money into the game so far in theory.
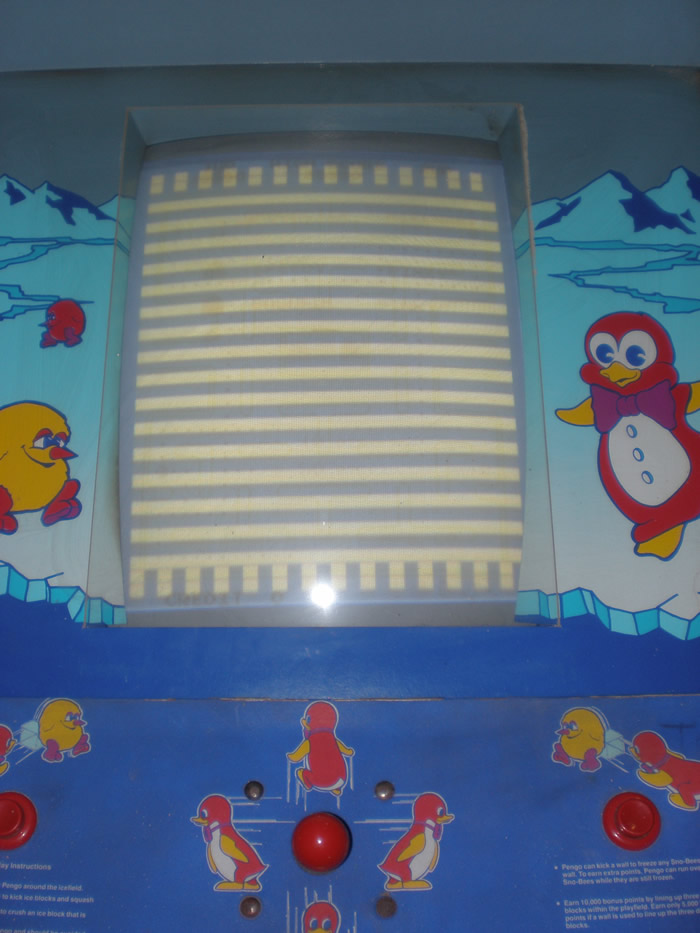
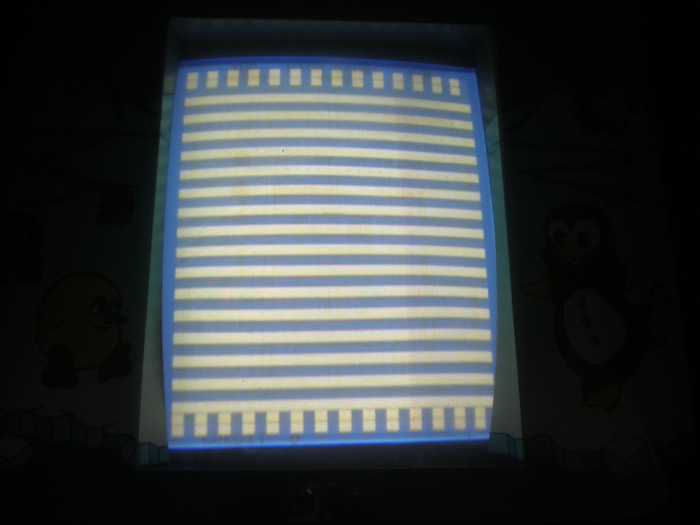
Pengo PCB problem – Thick Yellow Horizontal Bars
Alex emailed me back and said that the board is not something he would work on. He gave me that name of someone else who might be able to, John Robertson. I emailed him, and he let me know that he could, but is two months behind on the boards he has to currently repair. So, I don’t think that is not a very good option.
On a related note, in less than a month, Tim has bought two Pengo’s for really good deals. The one seems to play blind, so he may have two working boards. I don’t know if he will sell me one or not, but we shall see.
I tried to figure some things out about the PCB today online. I research the sound a lot, seems the bad pot that causes the static on the game is very common. I don’t know if the symptons of the sound caused the PCB problems or not (even though I doubt it), but the other thing I read was that the power supply does seem to go back fairly easy. The original Pengo power supply will under or over supply voltage on a regular basis, so that made me think that maybe I should just try to put in a switcher and see what that does.
Looking into Pengo PCB Repair
Was in communication today with a guy Alex Yeckley recommended that could possibly repair my Pengo board. In anticipation of that, I thought I would finally get those photos online tonight what I was seeing on screen.
Pengo at Bidding At Auction in Grand Rapids
I haven’t done a lot with this game since I had problems with it over a month ago. I got the game working for the most part, but it was really loud. No matter what I did, I couldn’t get the volume turned down low enough so that it didn’t hurt my ears.
But, when I would move the coin door, I would get some static noise. The next time I turned the game on, I got garbage on the screen.
So this week, I was looking at an auction site in Grand Rapids, and they have a working Pengo! I was pretty pumped about that. It doesn’t have the sideart, and plays the same stupid soundtrack mine does (Justin went and checked it out), but it would be sweet to get it for cheap and combine the two to get one working one without having to troubleshoot mine. But I also know a good friend of mine wants one too, and he is not too far away, so he may just bid on it as well.
So, I went downstairs and took some photos of the screen I am seeing. I also did some checking with Elektron Forge and Alex to see if he would repair a board, if that was what the problem is. He said he doesn’t work on those boards, so I will have to look somewhere else I guess.
With the auction going down tomorrow, and I without any news answers for my game, and the potential costs to fix it, I will just have to play it by ear. There are a ton of great trade game auctions on ebay right now, and an original Jr. Pac, so I have to just be smart and see if it makes sense.
Pengo Updates from July 2006 – March 2007
I did a couple of minor things to my Pengo after I got it in July of 2006. I cleaned the outside of the cabinet, gave it a pretty good scrubbing down and vacuumed out some of the junk in the back underneath the pcb shelf and behind the coin door before moving Pengo into the house.
I knew when I got Pengo that the monitor had a broken neck, let me tell you, it was a fun sight to see and hear when turned on. So, I swapped that out into one of the cabs I resold and for awhile it sat without a monitor.
I finally recapped the G07 that I had gotten from my first machine, the Pac-man and planned on putting that in the Pengo. Only problem, horizontal frame and horizontally oriented. So, I had the take the tube and chassis and swap them into the frame from another vertically oriented monitor. I also had to drill some new holes in the frame so the ground lines could have something to screw into. It was a chore, but I got it done.
Then, there was the remounting. It was a pain taking the old monitor out, but it was busted so I didn’t care. But putting in a working one, I did care very much. So, Sarah had to help me screw it in as I held it in place. But, we did get it put back together.
The connectors didn’t match, so I had to use a different connection and cut the wire on the G07 for the power. That bummed me out, but wanting a working game was a higher motivator.
So, that took me into March of 2007, when the game was working with the terrible sound.

