
Installing the 96 in 1 Multi Pac – Part 1
One of the most popular and rich arcade game kits for most collectors is Dave Widel / Mike Doyle’s 96 in 1 Multi Pac-man kit. With just a few simple changes in the chips on your Ms. Pac-man PCB you can play 96 different games, including many different mazes for Pac-man, Ms. Pac-man, and Pac-man Plus as well as Pengo, Space Invaders, Eyes and more!
I found that purchasing the Multi Pac kit was an awesome experience. I emailed Mike Doyle, sent him money via paypal, and in a couple of days my kit arrived at my house, ready to roll. I had special circumstances because I wanted to have the kit at my house by Thursday night because I was having a party where I wanted to be able to show off my newly upgraded Ms. Pac-man machine. I ordered the kit on a Monday and I had it by that Thursday, on time to the T. Mike gave excellent communication throughout the short transaction.
Here is what you get;
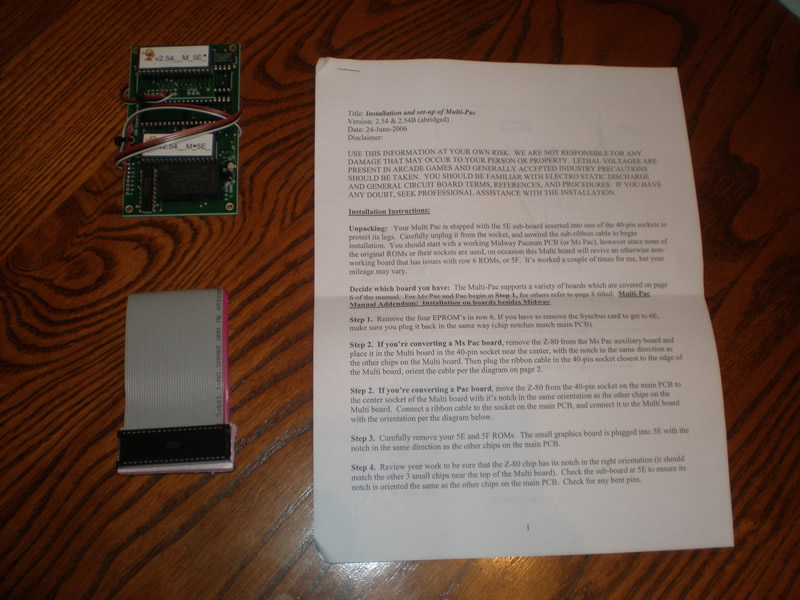
A set of printed instructions (PDF), a small pcb and a ribbon cable.
The instructions are written simply, and to the point. I am going to include snippets of them here to help explain the installation. Here are the general installation instructions;
Installation Instructions
Unpacking: Your Multi Pac is shipped with the 5E sub-board inserted into one of the 40-pin sockets to protect its legs. Carefully unplug it from the socket, and unwind the sub-ribbon cable to begin installation. You should start with a working Midway pacman PCB (or Ms Pac), however since none of the original ROMs or their sockets are used, on occasion this Multi board will revive an otherwise non-working board that has issues with row 6 ROMSs, or 5f. It’s worked a couple of times for me, but your mileage may vary.
Decide which board you have: The Multi-Pac supports a variety of boards which are covered on page 6 of the manual. For Ms Pac and Pac begin at Step 1, for others refer to page 8 titled: Multi-Pac Manual Addendum: Installation on boards besides Midway.
I will be upgrading my Ms. Pac-man board, so that is the PCB I will be using for this photorial. If you are still bootleggin’ like it’s nineteen eighty three, Shaft say you be outta luck in dis tutorial. But seriously, I am sure making the swap on most any PCB is pretty easy. Back to the instructions provided;
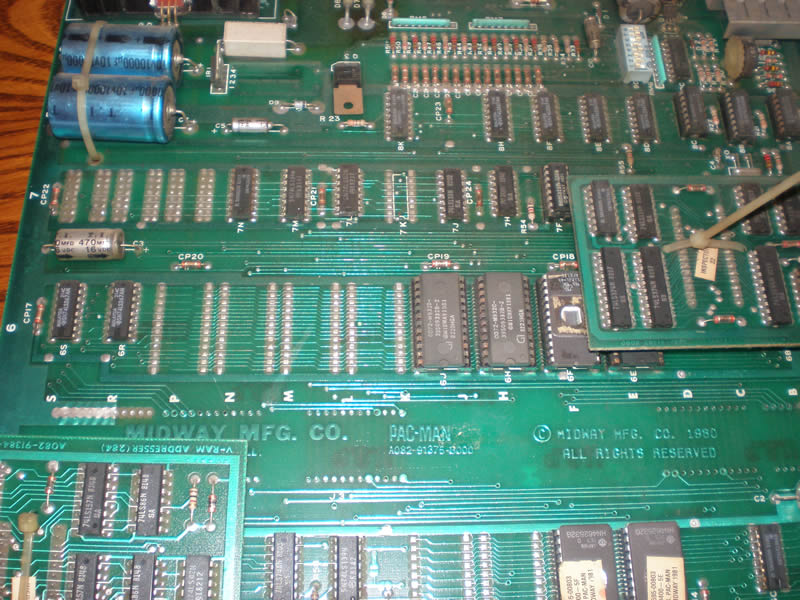
Step 1: Remove the four EPROM’s in row 6. If you have to remove the Syncbus card to get to 6E, make sure you plug it back in the same way (chip notches match main PCB).
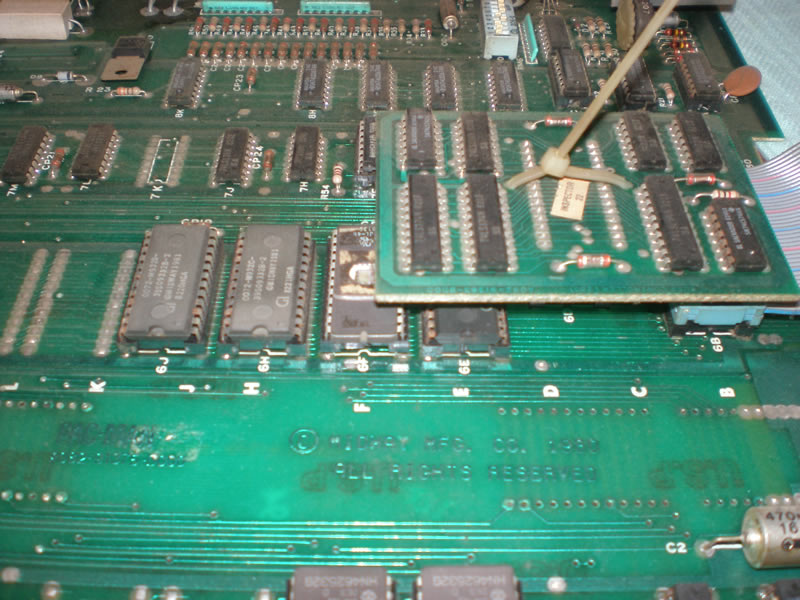
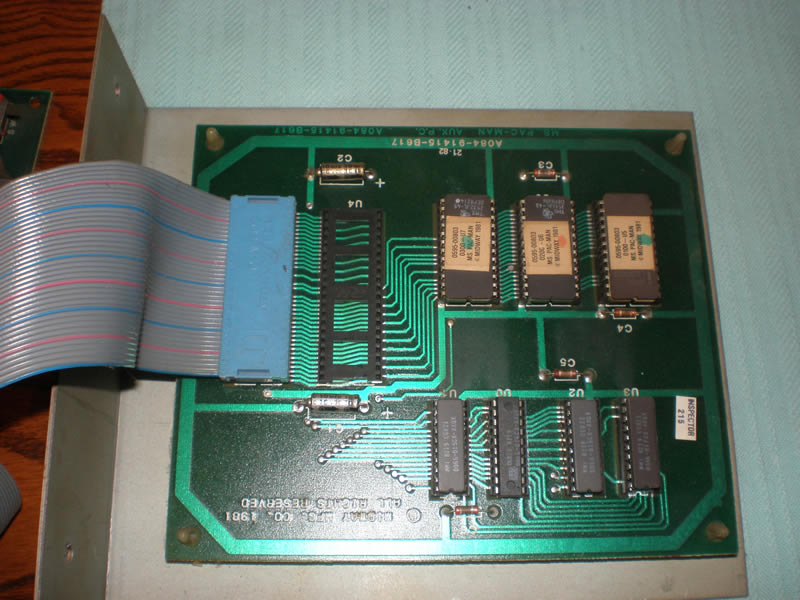
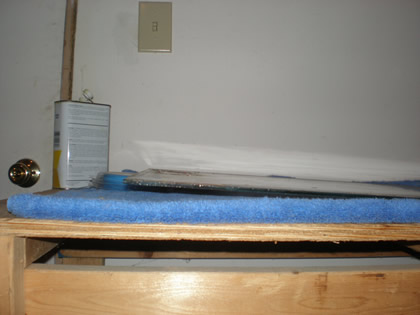
Here are some photos showing the section of the PCB that the instructions are referring to. In the first two photos you can see the EPROMs at 6J, 6H, 6F, 6E. The Syncbus card is the elevated mini PCB with the dusty 20 year old zip tie:)
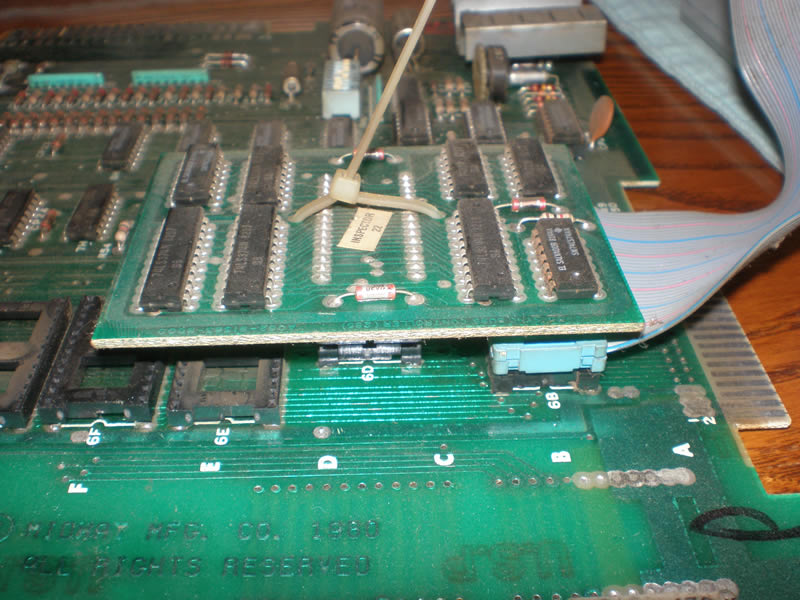
Here is a photo showing those four EPROM’s removed from the Ms. pac-man board. Removing chips is really easy, and this is something you’ll want to do a lot. Even your grandma approves, she says practicing this activity won’t make you go blind. So do a little less of that “other thing” you do in the dark and more playing with your circuit board.
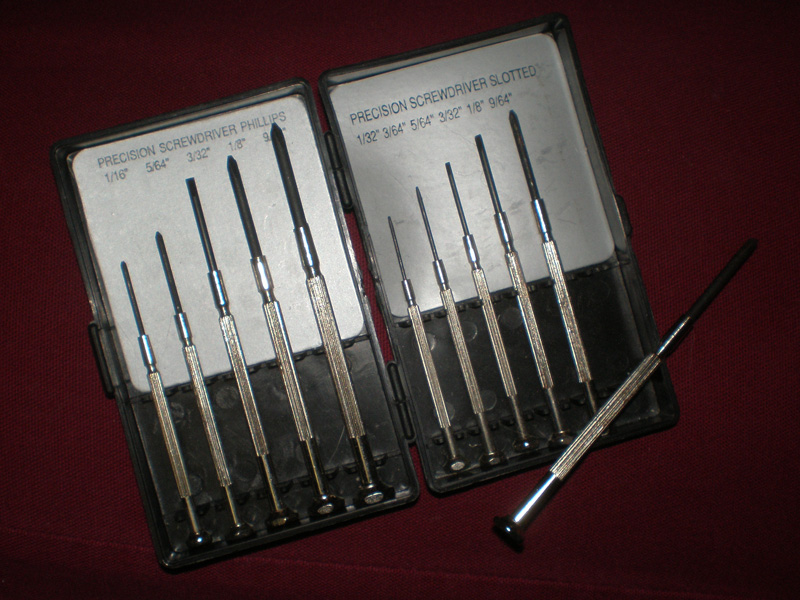
There are chip pullers you can try and can purchase one at most any major arcade dealer like HAPP, or probably even from Bob Roberts. The main idea is to make sure you remove the EPROM, processor, or whatever else without bending the legs. A small screwdriver will usually do the trick and a little Patience, yeah, yeaaaahhhh. Just a little Patience. Here is the set of mini screwdrivers I use constantly.
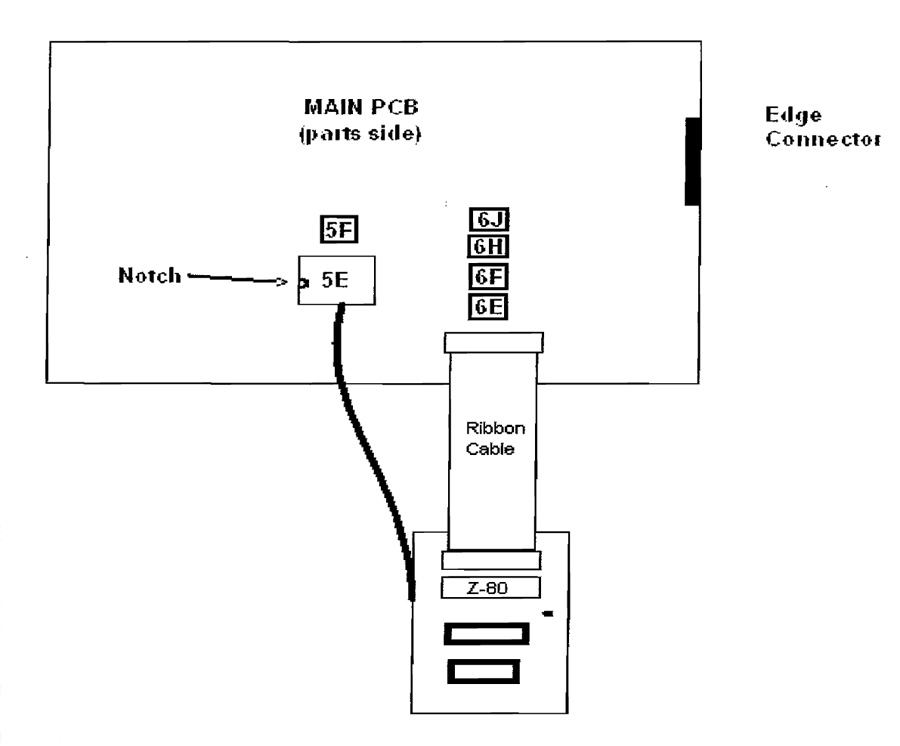
Step 2: If you’re converting a Ms Pac board, remove the Z-80 from the Ms Pac auxiliary board and place it in the Multi board in the 40-pin socket near the center, with the notch in the same direction as the other chips on the Multi board. Then plug the ribbon cable in the 40-pin socket closest to the edge of the Multi board, orient the cable per the diagram on page 2.
Here’s that diagram showing where you plug in the ribbon cable straight from the multi pac kit instructions;
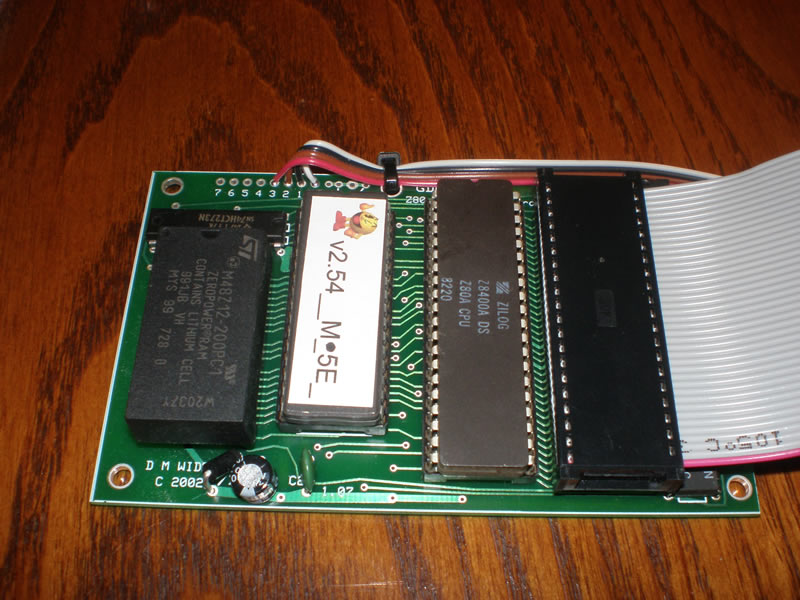
I apparently didn’t get a photo of the Ms. Pac-man auxiliary board with the Z-80 processor still secured but here’s a photo after I removed the processor. Just like the chips, you will need a very small flat head screw driver and gently work the chip upwards, twisting the driver back and forth until the chip comes out.
Now put that Z-80 processor in the Multi Pac-man board in the open socket. Make sure to orient the chips correctly as the instructions warn. You can destroy your Z-80 processor if you power it up with the chip incorrectly socketed. But fortunately, you would just destroy the processor and not the board, and if the angels shine highly on you, you may not even trash the processor. I personally don’t like electronic risk, but if that does it for ya. Go right ahead. Just look at the half moon inset on the chip to make sure you line those moons up with the socket in the right direction. As a general rule of thumb, you can look at the direction of the half moons on the chips around the one you are pulling, but that is not a hard and fast rule. Take note of the direction when pulling an EPROM and just make sure you put it back where you found it.
Ok. We’re pretty far along here, there aren’t too many steps left before you have your Multi-Pac kit up and running. Check back for Installing the 96 in 1 Multi Pac – Part 2 where we’ll pull 5E and 5F and finish up installing the small graphics board and mounting the multi kit in your cabinet. And of course, enjoying your 96 different versions of Pac-man, you yellow pizza freak!
Go to Installing the 96 in 1 Multi Pac – Part 2
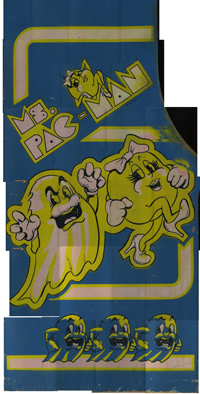
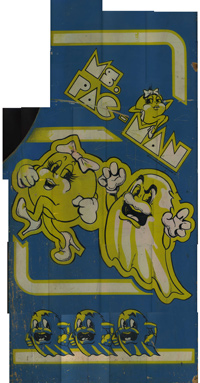
Scans of Ms. Pac-man Sideart
I love little surprises like this.
I had a visitor (Kevin T.) stumble on my post about the Ms. Pac-man stencils that Joymonkey was working on last fall. I haven’t heard anything from Joymonkey, but some BYOAC members have reported that they got their stencils and are just waiting for nicer weather to use them. Kevin was looking for a set because his Ms. Pac-man artwork has the typical fade where there is no longer any pink, only yellow.
I know that many members over the years have probably scanned in the Ms. Pac-man cabinet artwork, and I know Joymonkey scanned it in from scratch when he remade the vector file for the stencils. But as far as I know, there aren’t any websites out there that have the scanned Ms. Pac-man available to download at this time. If you know of any other websites with a good Ms. Pac-man artwork scan, leave a comment and let’s start a list here. Joymonkey said he’d release his Ms. Pac-man vector file, maybe his sideart scan, once his stencils are done. But I don’t know if and when that might be.
Kevin spent a lot of time working on these scans, I mean a ton of time scanning in the Ms. Pac-man cabinet. But anyone who has attempted scanning arcade artwork before, knows how time consuming scanning can be. And not only do I have the composite files of the artwork, I have the individual pieces, all in two zip files. If you get a chance, leave a comment here and thank him for his time. I’ll make sure he gets the thank you. It sounds like he may attempt to also scan the Ms. Pac-man kickplate artwork, so let’s keep our fingers crossed.
The other note I should mention, Kevin expressed to me that these are a touch inaccurate in that some of the lines don’t align correctly. But, at first glance the artwork composite looks good, and if you don’t like the composite, you can remake your own full Ms. Pac-man sideart with the scan pieces. He shared a link on where with me on where the files are hosted, so just click on the images below for start downloading the zip files.
I am posting this brand new today, and don’t know how long it will be online, so get the files while you can. I am sure I may get some sort of nasty email from a nasty company who make a shoddy poor product with someone who would gladly take your money for an incorrect product (read dishonesty) for a President. But for a short while, you’ll have the artwork files available to you at least to do with them as you please.
Has anyone else used MediaFire to host files? It says there isn’t a time limit for hosting, but if the files aren’t downloaded frequently enough, will they remove them? I was able to successfully download the files, is anyone having any problems downloading the zips?
~Edit – In case you have issues downloading the scans of the Ms. Pac-man artwork from the links above at Mediafire, you can try to download them from this website mirror.
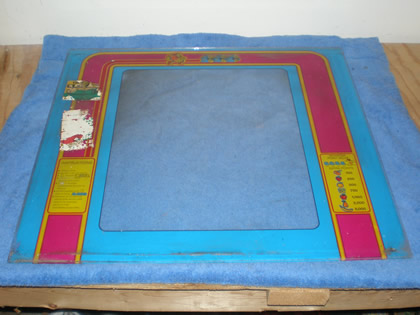
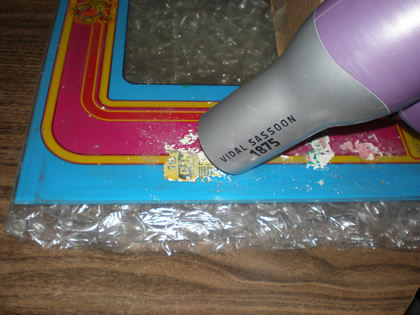
Removing Plastic Stickers on Bezels
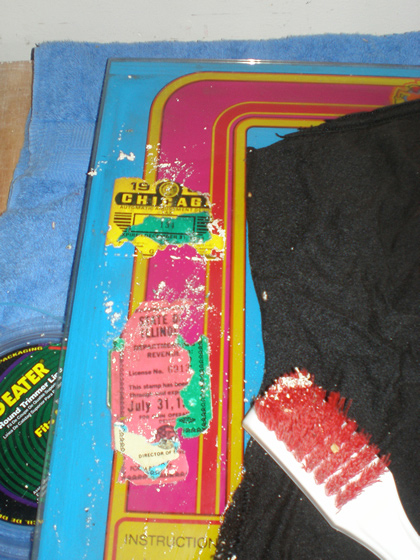
When I first saw my Ms. Pac-man in MI, I noticed right away two sets of thick overlaid stickers, probably 4-5 stickers on top of one another. They were some sort of license sticker for the Ms. Pac-man to legally be placed in different states. Darn tootin’, that’s authentic. But a little too authentic for me, they’ve got to go, and I had a dickens of a time getting them off.
I tried some Goo Gone on the plastic stickers while the machine was still in MI, and that did squat. So I turned to researching on the collecting newsgroups. I found very little, but I also don’t like to look through more than about two pages of results. I decided I would turn to an old favorite – Goof Off.
After I setup a protected area on my workbench, I put the Ms. Pac-man bezel down, and propped it up on a slight angle. Having worked with Goof Off in the past when striping acrylic paint off of cabs, I was concerned that some would run over the edge and ruin the printed Pac artwork on the backside.
On an angle, I could more easily control where the liquid went. I just poured the Goof Off on, and put the rag down so that I could let it sit on the bezel overnight.

But, one application;
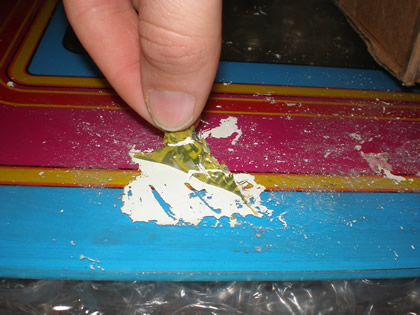
Then, two applications later I had had it with the Goof Off.
It seemed to be working, especially on eating off the white sticker residue, but it wasn’t disintegrating the stickers fast enough. I was lucky enough to have a plastic wire brush to work at the stickers otherwise I may not have been as successful. I even turned to picking it off with my fingers which was killer and I was concerned about absorbing it in my skin.
Originally I had read that that heat is the best way to get resistant stickers off of arcade game glass and plexiglass pieces like the marquee, bezel and control panels. I just assumed that a hair dryer wasn’t going to get hot enough to make a difference and I would need to borrow a heat gun to get the sticker remnants of the Ms. Pac-man bezel. I was wrong. I propped the hair dryer up, left it for five minutes, came back, and the sticker(s) peeled right off.
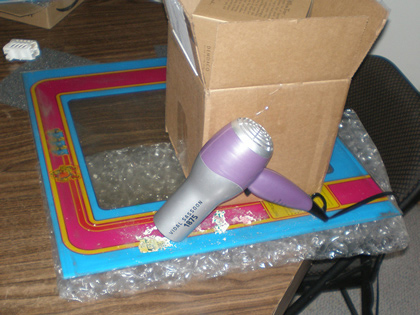
I wish I had started with this method, and this is why I am writing so that someone else learns from my lost time.
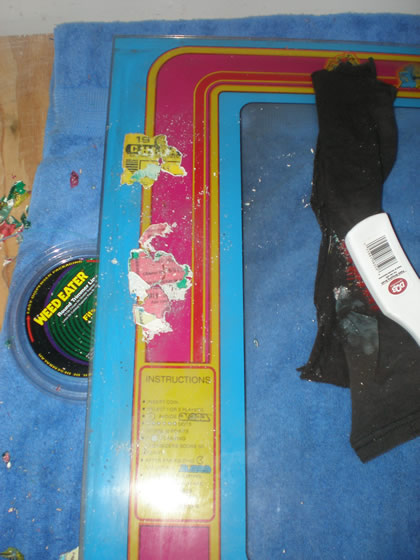
At that point, I knew the Goof Off would take the remaining residue right off, so I let it sit for 5 minutes and do it’s thing. You can kind of see by the photo below the white residue is eaten up and lifting off the glass.
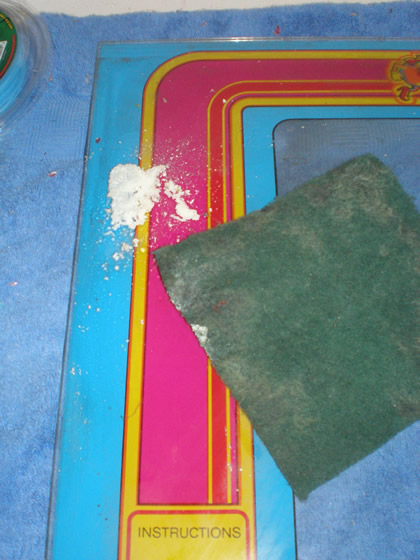
A good scrubbing with a scotch brite pad and a thorough cleaning to get off all of the residue particles (dampened one rag with the Goof Off and one with water) it looks great (minus the flaking in the lower left corner).
I’m not sure it can get more simple than heating the stickers. Anyone else have a better method or some additional suggestions of other things I could have tried?
Stash of arcades in Indianapolis, IN
I will post more on this later, but here is a photo of a couple of the arcade games to give you an idea. I wished now I had taken a straight on view of one of the four storage units of games, but I didn’t, so this will have to suffice.
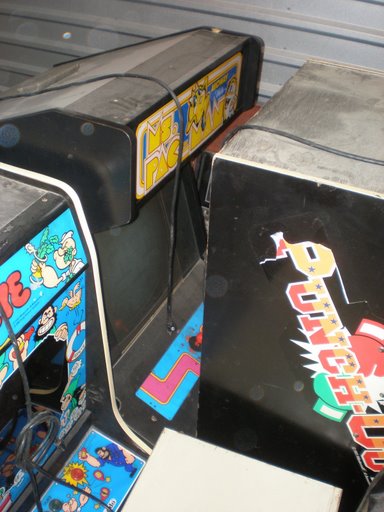
We see a crappy Ms. Pac-man conversion, a Popeye that is in decent condition, it is missing sideart on the right side, and Super Punch Out, missing the Duck Pull from the control panel and the “Punch Out” sideart is torn up a little on both sides.
There are many other games, about 30 total. I am going to get my stuff together and then post a photo album of about 95 photos of this stash of arcade games here in Indianapolis, IN.
Classic Childhood Photo of Chuck E. Cheese Arcade Room
Late November last year I got an awesome surprise. My sister had sent me some 900 scanned slides of photos my parents had taken of our childhood years. The idea was, I was supposed to put the slides in a “slideshow” with music and burn them to a DVD and this would be our Christmas gift to our parents this year. Great idea! They’ll cry for sure:)
However, all of the slides had some level of dust on them so I had to go through and touch up each and every one of them. Knowing how much work that would be, my sister and I went through them one by one to weed out any photos that were just so bad that they weren’t worth including and saving me some touch up time.
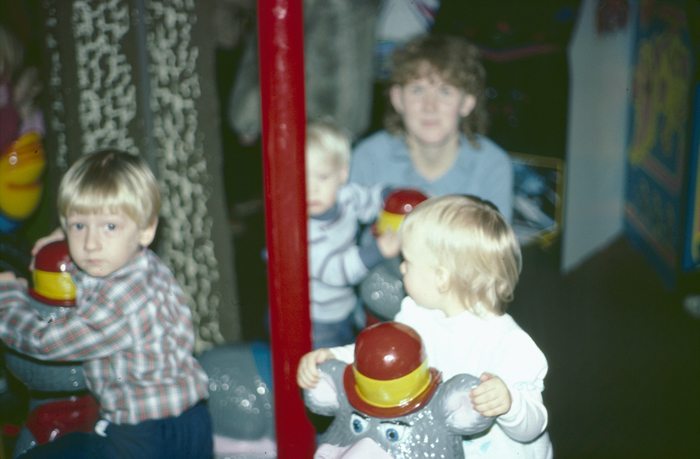
I was so excited when I found a photo of me, as a child, on some sort of Merry Go Round in a Chuck E. Cheese (on the left looking worried). In the background you can see a beautifully pink Ms. Pac-man, and some other machine. (I had posted on the forums to find out the identity of the arcade game, and within minutes, another collector identified the blurred machine as a Bosconian.)
“This would make an awesome Rotheblog post!”, I thought. How more original could this be? A vintage arcade photo now digitally preserved. Oh wait, my mom occasionally reads this thing, and the slide present is supposed to be a surprise. If I post this, she’ll wonder how I even got this photo.
So, I waited to post my Chuck E. Cheese arcade photo, and I almost completely forgot about it. Until I rediscovered the Chuck E. Cheese photo today.
Little did I know. As I sat on that frightening molded horsie that someday I would own a Ms. Pac-man machine and yearn for a time when all I had to worry about was whether my sister could actually catch me riding that plastic frog.
Sold my Xevious Cabinet
Over the last year, I kept trying to think of ways to get up to Michigan and meet Mudmantim to get a couple of cabinets off of him, an Xevious and a Tempest. He basically told me I could have them if I wanted to come get them.
Well, the trip itself would have cost more than the cabinets were worth, so we figured out another way. I met him midway in Fort Wayne and got four cabinets in trade for the non working (at the time) but complete Frenzy in exchange. This was a game he really wanted and he is a good friend so even though it wouldn’t benefit us either way financially, I knew Frenzy would get a good home.
I immediately sold the Tempest, I got sticker shock on my gas costs. But I kept the Xevious with intentions to put it back together. But as circumstances changed (GMAT and MBA program), and I fought so much with other games this summer, not to mention fully working Xevious’s top out at about $200, I decided that maybe the cabinet was expendable.
Two weeks ago I found a guy in Dayton would wanted to buy a cabinet for a Mame machine and I offered it up at my cost. He came over last weekend and bought it.
I was sad to see it go. I still love the sideart on Xevious, even though the gameplay isn’t that great. I am going to keep hoping that I can find one locally for market price, it is hardly a rare game.
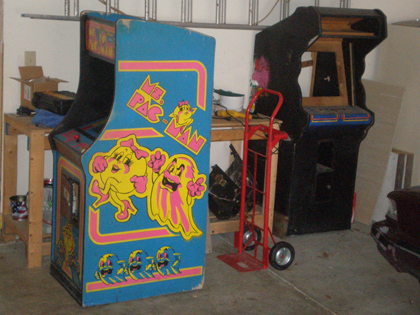
But even with the sale I still managed to keep two games in the garage, the Food Fight cabinet, and the new Ms. Pac-man.
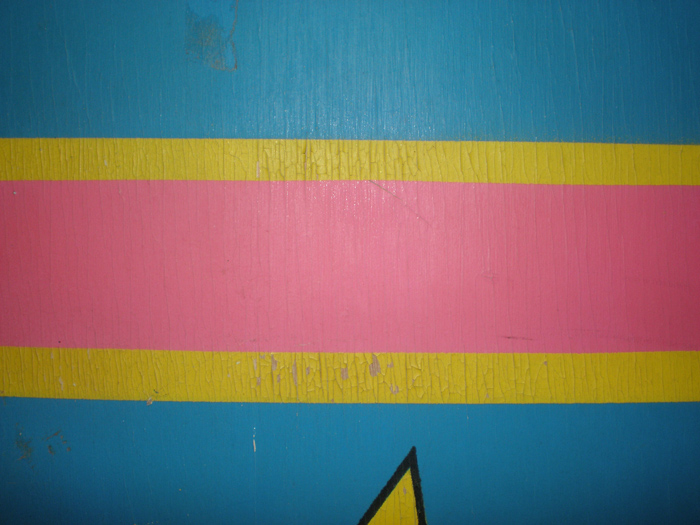
Flaking Ms. Pac-man Artwork Part 2
A week ago last Sunday, my vibrant, pink Bally Ms. Pac-man finally made it’s way down to Indianapolis, IN via a visit from my mother in law.
I originally posted on January 13th about the flaking artwork, how it was severely cracked in spots and starting to flake. With a strong wipe of the hand, I could probably brush off pieces of the pink, yellow and blue artwork. What would have caused this, what type of storage conditions?
At the time, I had limited photos to work with. Here is a close up photo I took to illustrate the flaking a little better on some of the pink bands on the facing right side of the Ms. Pac-man cabinet.
I still intend to go down to an antique shop, if and when I ever have time, with some printed photos of the cabinet artwork and see if anyone has any suggestions. The best I know to do right now is try to put on some sealer, carefully clean the bottom of the Ms. Pac-man cabinet as needed and hope for the best. Like the other post said, most of the products out there are preventative to preserve painted artwork.
I guess the worst case scenario is someday I take the sideart completely off, purchase some TBD Ms. Pac-man stencils, and re-do the whole game. (Once I have my mba, I shouldn’t have to worry as much about cost).

