
Tremendous Collection / Photos of Reproduction and NOS arcade artwork
Brendon Zeilder’s collection of reproduction and new old stock arcade artwork is staggering. Brendon was the catalyst in getting the Super Punch Out Decals reproduced. He found me first, I don’t remember how, maybe he knew I had developed the Professor Pac-man control panel overlay (Come to find out he was one of the buyer’s). Even though we didn’t work together on the Super Punch Out sideart decal, I still followed the production updates in the Klov threads online.
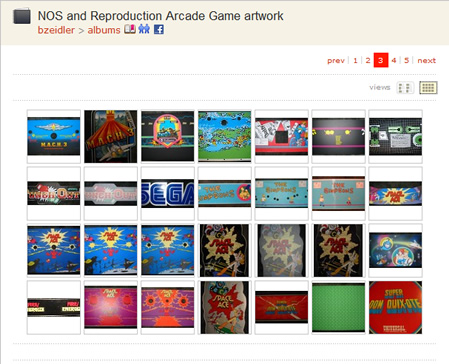
The decals are finished, and a photo was referenced in Brendon’s online webshots album. Little did I know it was in a album with rich detail and information of other pieces of arcade artwork. I was blown away, take a look at some of these screens.
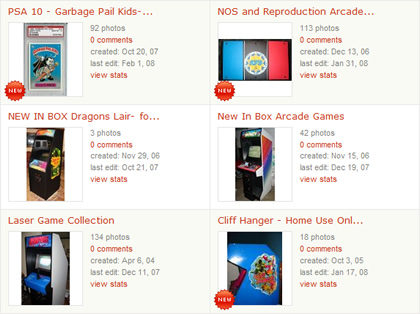
He has one album for New in Box / Home Use Only machines, and one gallery just for his NOS and Reproduction Artwork collection. In the NIB and HUO arcade machines album he has photos of a Dragon’s Lair, Elevator Action, Pac-Land, Paperboy, APB. Some pretty nice machines that were probably time and cost intensive to aquire. But the repro artwork album is what will blow you away. From less popular items like APB NOS artwork, to Zookeeper, Food Fight, and Professor Pac-man control panel overlay’s and beyond, Brendon’s collection is a a great insight into some of the limited run of reproduction projects for arcade artwork have taken place over the last 5-10 years. It also gives me a good idea of just how passionate some collectors are about their artwork.
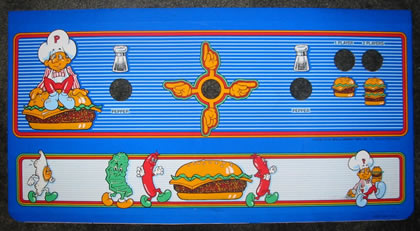
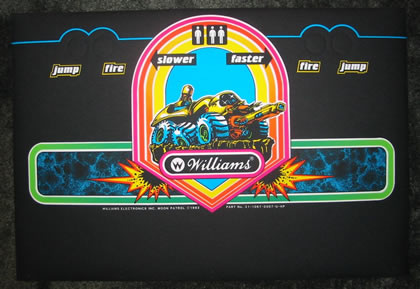
Here are a couple of pieces he has. I would think they are fairly rare, but maybe not….a NOS Burgertime CPO and NOS Moon Patrol CPO.
If you have ever asked yourself, “Has reproduction artwork been made for “X” game?”, take a look at this collection. Well labeled as to who made it, Arcade Renovation, Quarter Arcade, Arcade Shop etc. his photo album is a great arcade reproduction artwork reference material. Here is a list of what I could see in the NOS album, or you can follow this link and visit Brendon’s artwork yourself.
- APB
- The Act Prototype
- Arch Rivals
- Arm Wrestling
- Astron Belt
- Badlands
- Bega’s Battle
- Bubbles
- Burgertime
- Cheyenne
- Chiller
- Cinematronics Coin Door Decal
- Cliffhanger
- Cobra Command
- Combat
- Commando
- Crossbow
- Dragon’s Lair
- Elevator Action
- Esh’s Aurunmilla
- Exidy Logo
- Firefox
- Food Fight
- Frogger
- Gauntlet
- Ghosts Goblins
- Goal to Go
- Jungle Hunt
- Jungle King
- Karate Champ
- Kid Niki
- Kung Fu Master
- Mach 3
- Moon Patrol
- Mystic Marathon
- Paperboy
- Professor Pac-man
- Punch Out
- Sega Logo
- Simpsons
- Space Ace
- Super Don Quixote
- Super Punch Out
- Tetris
- Thayer’s Quest
- Timber
- Travelor
- Track & Field
- Toobin
- Ultracade Artwork
- Up N Down
- Us vs. Them
- Wild Western
- Xenophobe
- Zaxxon
- Zoo Keeper
Do any other collector’s know of photography albums online that are as well cataloged, labeled, and as extensive as this artwork collection? Or photos of artwork collections that aren’t as large, but interesting? I know that Richard Ford probably has a better artwork collection, and I know there are probably a ton of collector’s not on the klov boards who may have more than this. Quite an impressive collection Brendon.
Progress on Bump N Jump Control Panel Overlays at This Old Game
Everyone knows that Rich at This Old Game does great work. But today, I get to show just a glimpse into some of the quality steps that Rich takes to make sure that he has great arcade reproductions and most importantly, great buzz in the collecting community which leads to return customers.
On ThisOldGame.com, Rich has a section talking about his current ongoing projects, aptly named “Projects”. You should check it out. From Burgertime and Galaxian to Return of the Jedi and the now well publicized Agent X, Rich has a ton of ongoing arcade reproduction projects that customers have contracted with him to produce.
One of those projects is Bump N Jump control panel overlay reproductions. Today, I have photos showing a little bit of the color matching process and color tests that Rich went through on for the orange on the Bump N Jump artwork.
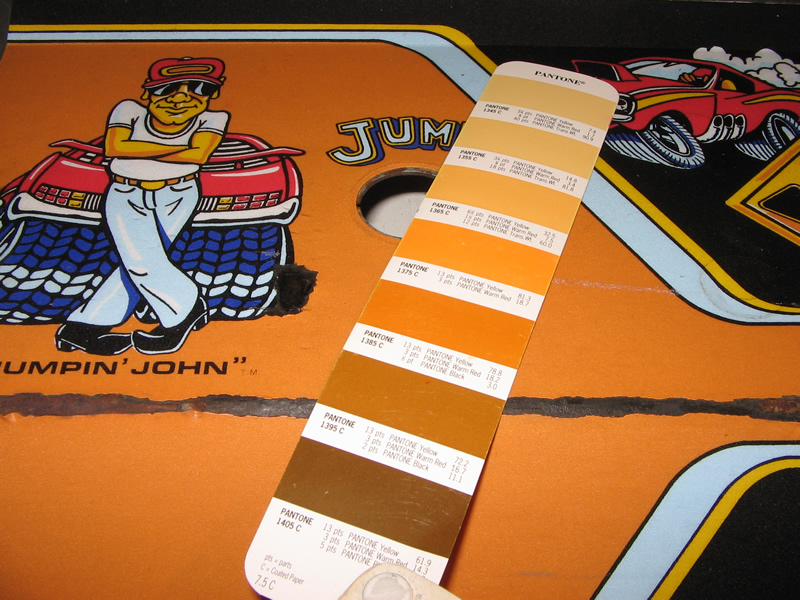
Here we see the original Bump N Jump sample for color matching, overlaid with a range of orange’s from the Pantone Coated book. If you click on the image, you can see that the closest match to the original burnt orange of the control panel is PMS #1385.
PMS #1385 gives us the breakdown of the different colors mixed to get this shade of orange;
- 78.8% Yellow
- 18.2% Warm Red
- 3% Black
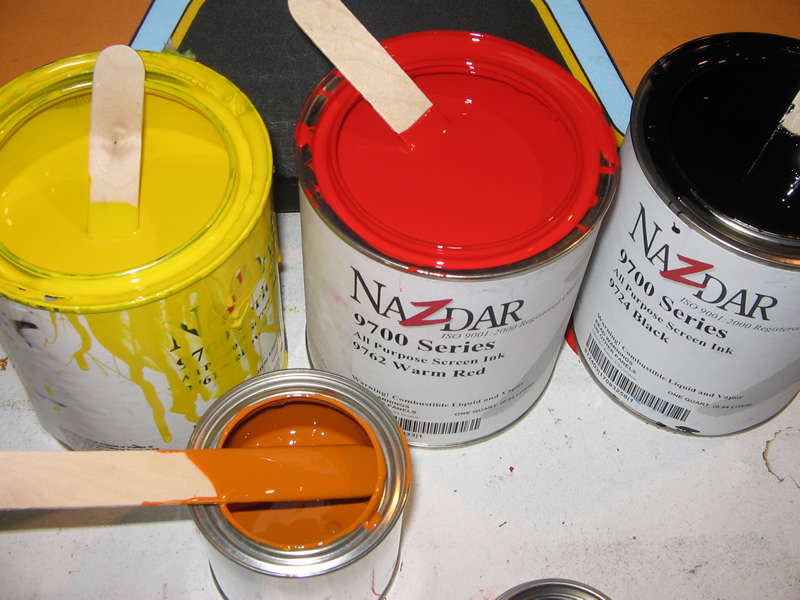
Time to mix the colors. Here we have NAZDAR 9700 Series of all purpose screen inks, a 9762 Warm Red, 9724 Black and I can’t see the Yellow. You can also see the final orange mix in the lower left after adding in the correct percentages. I don’t understand how the colors are measured out of the bigger containers, is it with a measuring cup of some sort? Rich is the expert, I am sure he’ll comment and give me some insight about that.
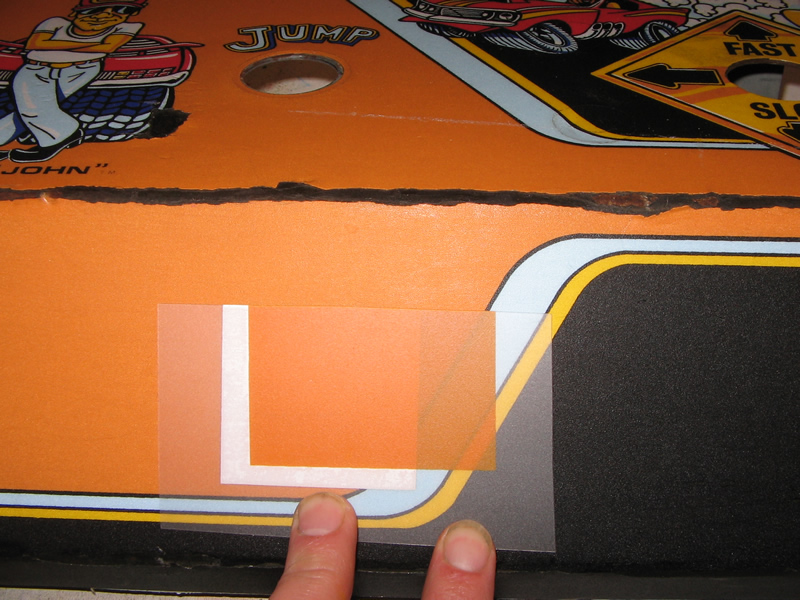
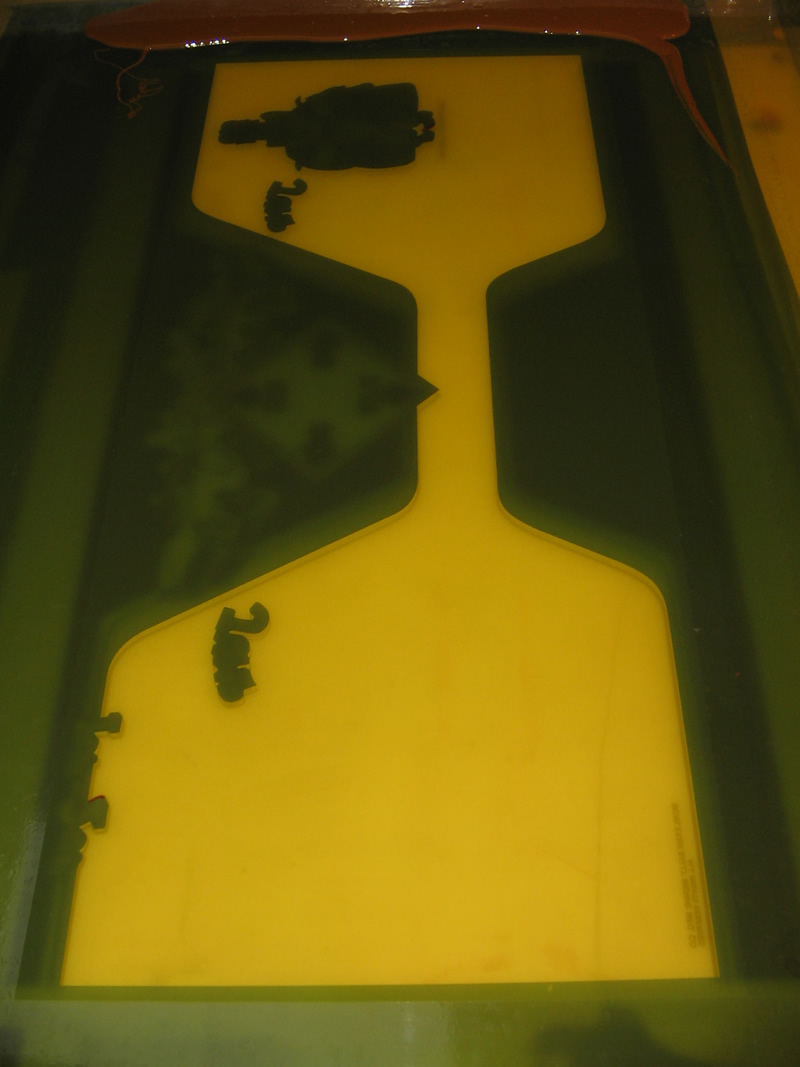
As Rich has mentioned in the past, and now I am starting to understand, the inks are slightly transparent, as you can see in the photo above. (Right Half) The inks are laid down on the raw, clear polycarbonate, and then backed with white, (Left Half) which takes away the transparency and makes them more brilliant. In the first test here, the burnt orange is a little too bright.
How does he do test screens? Does he have a little film to apply the colors evenly for testing purposes?
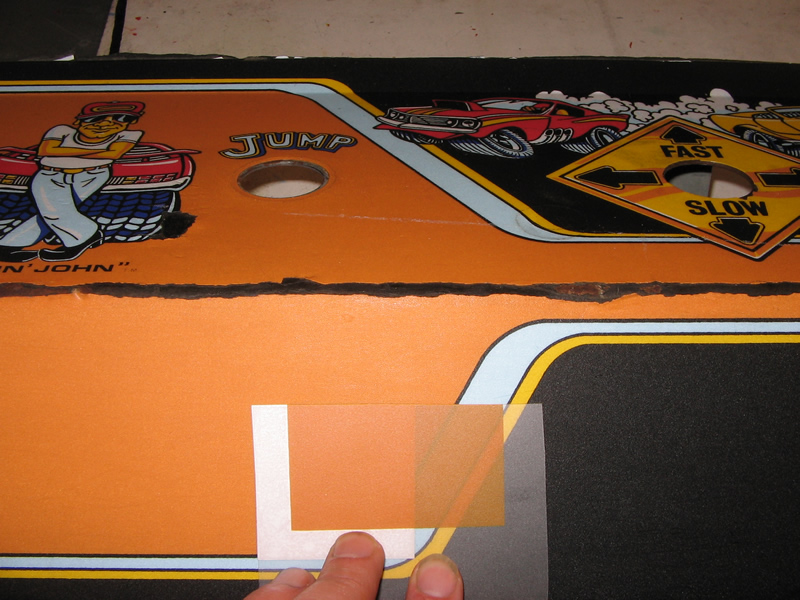
Added a little black to the original formula, and the color is “On like Donkey Kong”!
Now all that is left is to screen the orange. In this photo we see just the orange film. I can’t see the registration marks, but I am sure they are there. Can you point them out Rich?
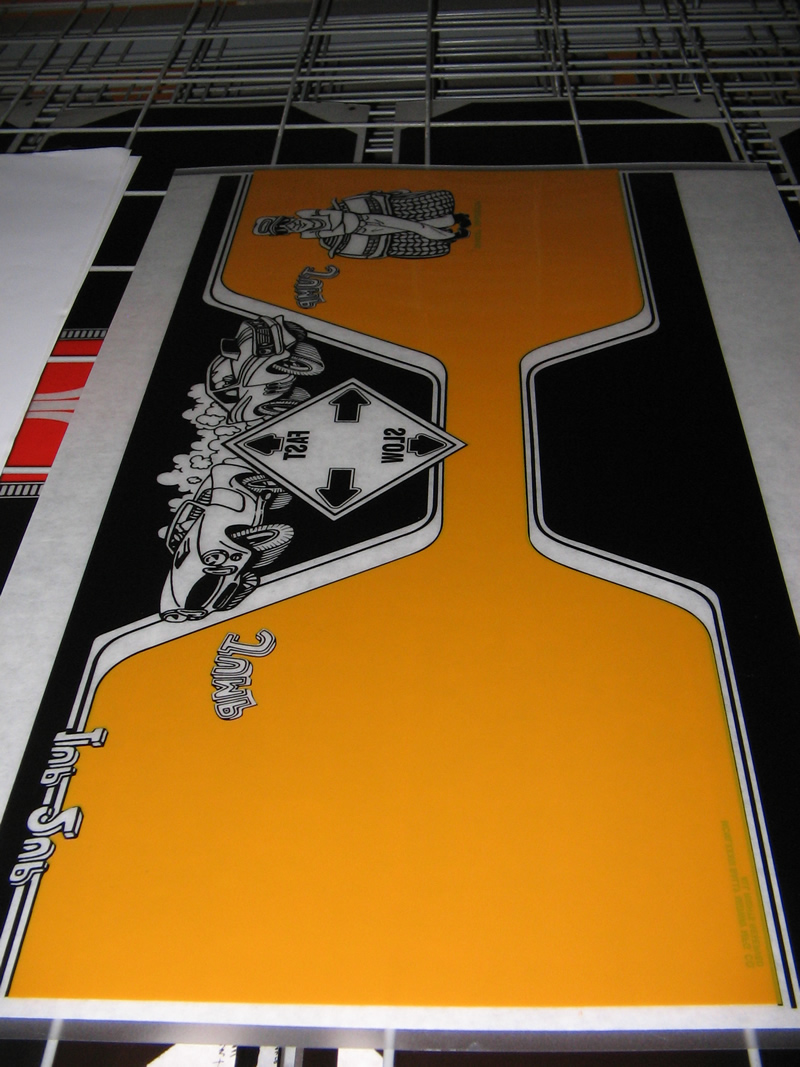
And here we see the final piece after the orange is laid down. The printing is done on back of the polycarbonate in reverse, not on the front. The back is where the 3M is adhered for application to the games.
The first color laid down was the black with bleeds, and now the second color was the orange laid down on top of the blacks. I had originally thought that there was a white flood laid down first, but that must be paper underneath the polycarbonate on the drying rack, because laying down white first just doesn’t make sense.
Either way, thanks to Rich for an insight into the printing process, and hopefully he’ll continue to have a few minutes here and there to provide more information to those of us that are interested about the process between all of his printing jobs.
So, remember, if you don’t have a printer yet for your arcade reproductions, you will want to look up Rich at Thisoldgame.com
You got it here first, exclusive content about the Bump N Jump control panel reproductions at Rotheblog.com.
Screen printing / color seperations diagram of Defender marquee
After my post yesterday on “Artwork Bleed for Screen Printing Reproduction Arcade Artwork” I got some awesome feedback from industry experts like Rich at This Old Game, and Brian at Oleszak Creative. As I still grasp at understand some of the ideas in screening arcade game marquees, I thought it might be best to draw up a little illustration to show how I am picturing how a typical marquee would be printed in an exploded view.
Putting accuracy of the artwork found on Local Arcade aside (view my breakdown of the Midway Pac-man sideart artwork inaccuracies), I went out and grabbed the Defender marquee for demonstration purposes.
Defender marquee vector file at Local Arcade – (http://www.localarcade.com/arcade_art/r29.search.htm).
Assuming the colors in this file are correct, and taking each color of Defender marquee artwork and separating them into layers, I would have six layers total, a black, a blue, a yellow, and orange and a red.
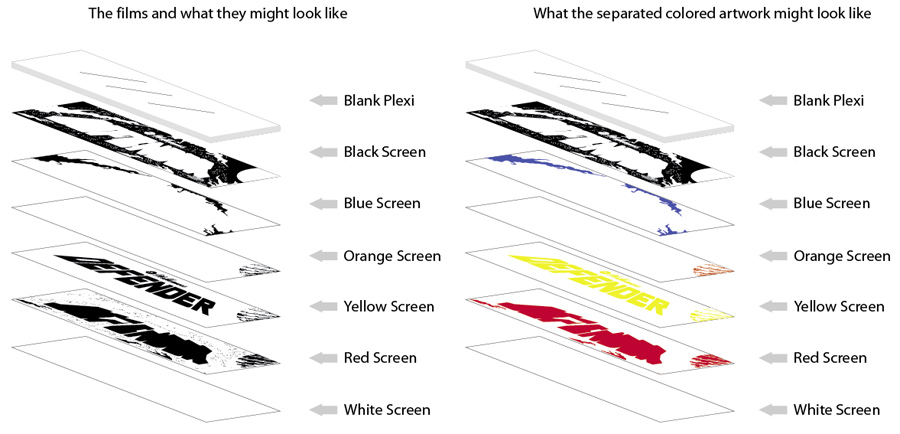
As you can see from the illustration above, this is my understanding and how I picture the screen printing order, with the black being printed first (to trap all of the other colors below it, and to hide the bleed) , the blue second, the orange third, the yellow fourth and the finally the red with a white sealing coat over the back. In the illustration, I have shown the Defender artwork in a fashion so you would be able to recognize it, but in reality, the films would be printed in reverse, and if you looked straight down at the marquee, you would also see the printing in reverse. In fact, the Defender marquee artwork might looks something like this;

Plus, this isn’t a really good illustration to show bleed amounts, but I wanted to check to make sure I had the bigger screen printing concepts correct. (I don’t know the detailed history of my games enough to know if the Williams Defender marquee was on glass, or plexi. Probably glass.)
Some good resources that are written simply and helped me get a better understanding on this topic.
- eHow : How to Design a Multiple-Color Stencil for Silk Screen Printing
- YouTube – Screen printing multiple color print video 1
- YouTube – Screen printing multiple color print video 2
Worth a note, I am not starting from scratch on my experience and knowledge base on this topic. I silk screened a couple of shirts way back in 8th grade. How much that counts, not a lot. But it does give me some familiarity with inks, and frames for the screens. But we never “burned” our films, and we never messed with more than one color or registration. These are the areas where I am shaky. A quick (10 minute) search didn’t bring up any visual tutorials on bleeds in screen printing. I didn’t think there would be resources specifically for arcade reproduction artwork screen printing, but thought there would be something else. I must not have searched with the right terms.
So, I need feedback. Is my thinking wrong? Is there a white sealing layer, and what is that actually called? Do you have any good links, or even better yet, and great visual image based tutorials on screen printing that focus specifically on multiple colors, registrations, and bleeds? Leave a comment.
Want a copy of the Illustrator (CS) file I worked on above? Download it here (.zip – 2MB). Edit it and send it back to me if you want, show me where I am wrong. (I just whipped this up quickly, not wanting to spend hours doing accurate separations for artwork I never intended to have printed, so remember this file is for illustrative purposes to help me understand screen printing and films.)
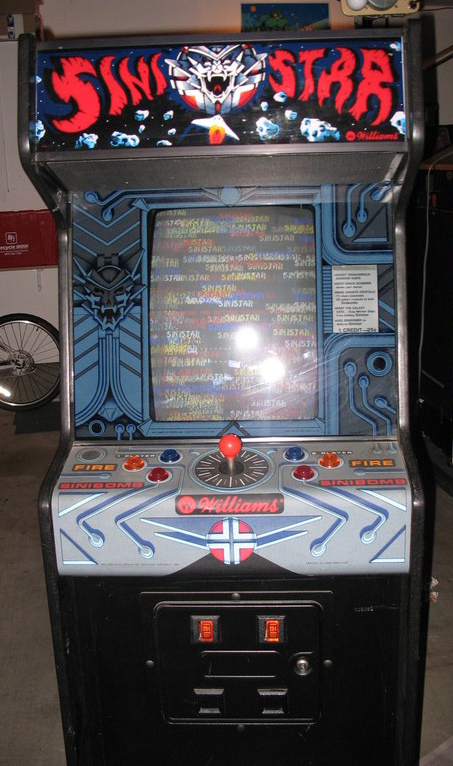
Sinistar CPO’s and HUO Sinistar
Today is the day of Williams Sinistar.
Surfing Klov there was a mention that Quarter Arcade is doing reproduction artwork for William’s Sinistar control panel overlays. Here are the photos;
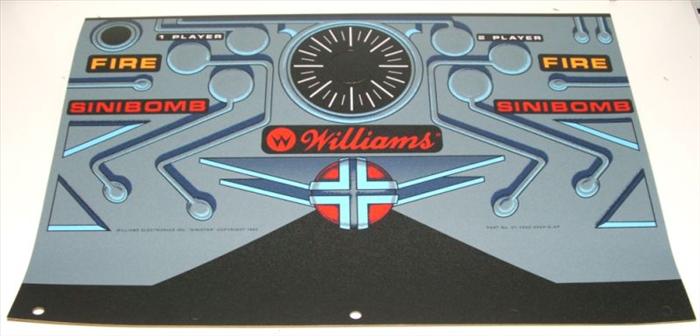
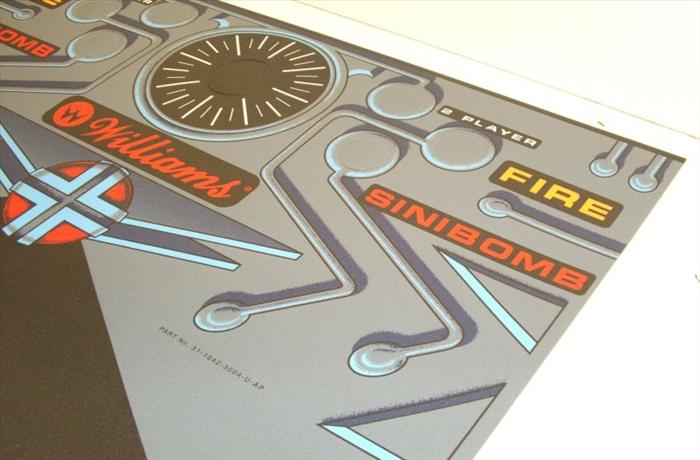
I emailed Anthony at Quarter Arcade, and he was nice enough to let me know that Darin at Phoenix Arcade did these Sinistar CPO’s and he just had a few he bought and now is re-selling them. I visited Phoenix Arcade, and I must have missed the listing of Sinistar before. Maybe the control panel overlay’s had sold out before 2006 when I got into collecting.
I would guess that Phoenix Arcade might have had the original Williams Sinistar films. I did a quick search on both Google and the arcade.collecting usenet group to see if there was a mention of the Williams films but I didn’t turn up much of anything I didn’t already know. I already knew that Darin produced the Multi Williams artwork for a number of successful runs up to 2004 and then he ebayed the files. I also found a mention to Illinois Pinball.com, but I assume they would have Williams films for for pinball artwork.
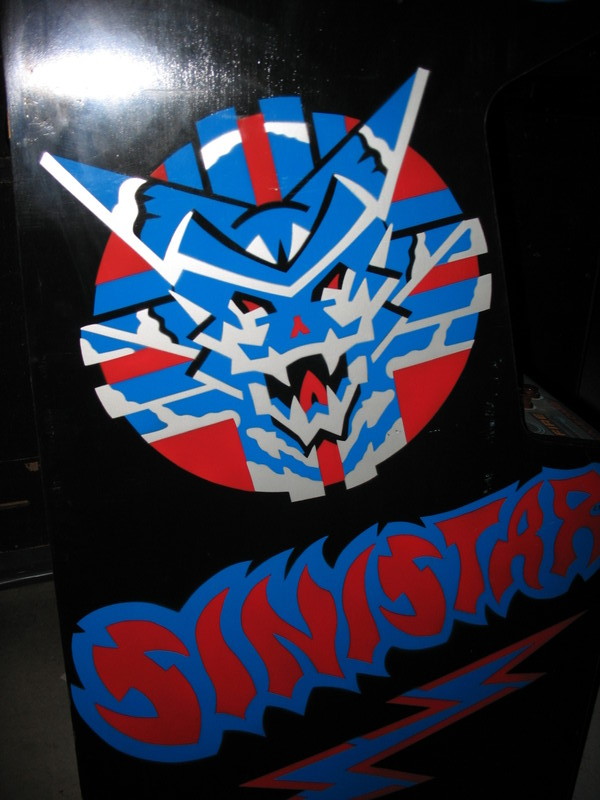
Any of the Sinistar artwork is a challenge to reproduce because of the detail in the splatter / speckle / pointilism effects. Like always, Darin did an awesome job, whether he scanned an NOS CPO or he had access to the original Sinistar films. Wikipedia says gives credit to Noah Falstein and John Newcomer for co-developing Sinistar. I don’t know which of them actually created the artwork, but maybe they were the inspiration for the “Idle Hands” movie:) (Surely, you must have a love of detail to create artwork like that, it would make you, and your hand crazy way before completion.)
Since I already “hunger” to share Sinistar news, how about jkoolpe in San Francisco scoring a Home Use Only (HUO) Sinistar.
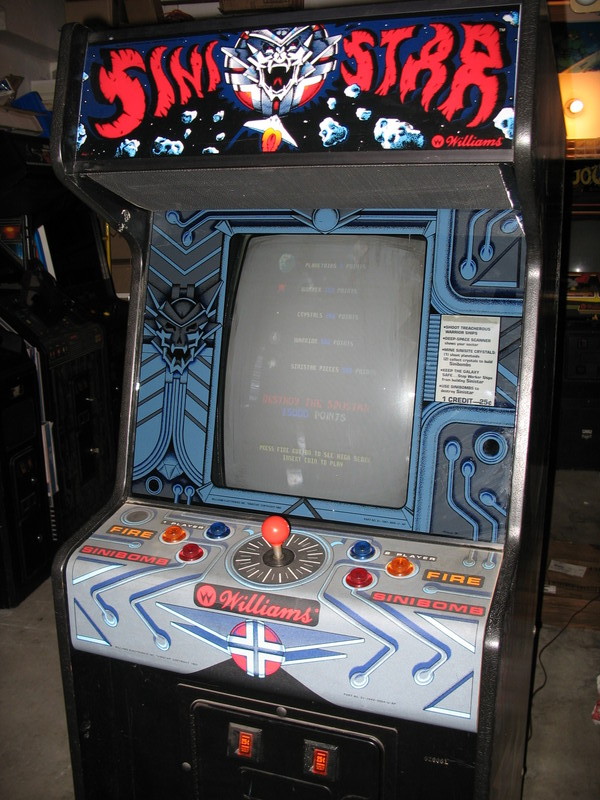
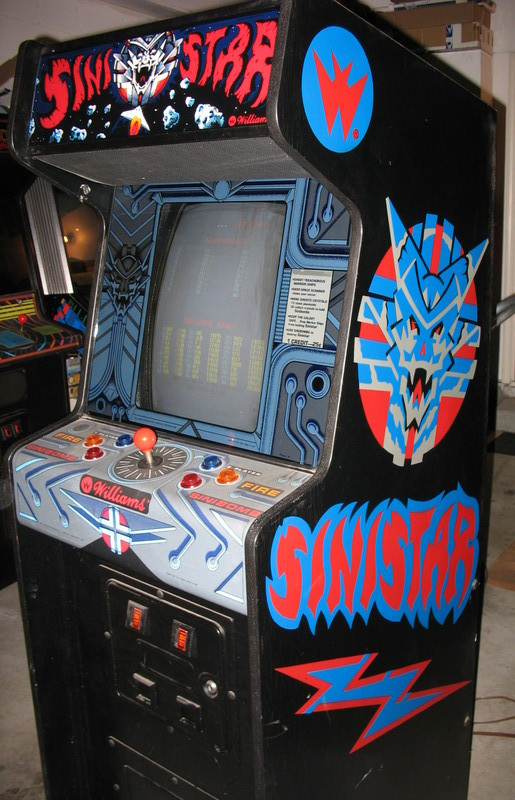
Here is some backstory on his Sinistar Aquisition;
According to the guy I got this from, this baby was originally owned by a Cinematronics game designer…he also had a Boxing Bugs as this was the game that this previous owner had helped design (a fellow CAX staffer got the BB).
The Boxing Bugs designer who originally owned this machine was named Jack Ritter. For whatever reason, he apparently did not take the 3 games he had owned with him when he moved from my area and the new home owner assumed custody.
The 3rd game was a Defender that I think was also HUO (not 100% sure), but it needed a marquee and bezel, and the CPO was lifting. Otherwise, the cabinet was also in GREAT shape and worked fine (after I replaced one RAM chip)…he is also looking to sell it so someone will get a nice Defender once they replace the aforementioned items.
I still haven’t played Sinistar in person, but I love it on the William’s game collections for the playstation, even if playing causes pre-mature arthitis. I am sure as time goes on, over the next 20 years, as we see some of the original developers move into the later stages of life some of their classic games, artwork, notes and other materials will start to come up for sale. But Jon (jkoolpe) got a find this time and bragging rights for the week.
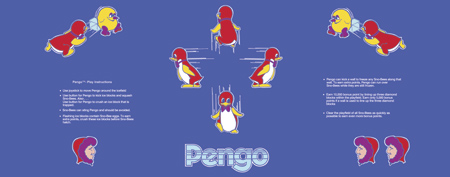
Pengo CPO Vector Update 3 – Tracing Complete!
Today I had a chance to finish up the “eskimos” Pengo control panel overlay. Here is the small image of what it looks like;
Pengo CPO Vector Update 2
Been really looking forward to doing a Pengo control panel vector artwork progress update for over a week. It has taken me forever to find a few minutes here and there to work on tracing the remaining Pengo characters on the overlay. But here is the progress to date;
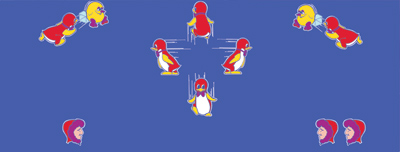
One glance and a collector knows, well, it looks like the Sega Pengo control panel is almost done. But, here are my notes so far;
- I traced the “left” direction Pengo and mirrored him. The “right” is slightly different, just enough that I will have to trace Pengo again.
- The Upper left Pengo and Sno-Bee are a mirror of the left side. They are a touch different as well, but that character artwork is a little more complex. I will have to take votes on what people think
- I think there are some color separation discrepancies from the original control panel overlay. I will also have to take a vote on what to do about that.
- Of course, the “Pengo” logo has to be traced.
I will probably post blown up raster images of the Pengo overlay details in question above, so keep posted here. But first things first, trace Pengo going for the right joystick direction and go from there.
~Edit 12/13/2007 I have now crossed off some of the completed items above on the Pengo control panel overlay. Check my new updated post “Pengo CPO Vector Update 3” – Tracing Complete! to see the current progress.
Pengo CPO Vector Update 1
I started working on vectorizing the Pengo control panel overlay (cpo) the day after I scanned it. In the first day I got the Pengo on the underside of the joystick (down motion) finished, as well as most of the Pengo eskimo player 1. On day two, I finished the eskimo player 1, and two players by mirroring the same artwork. Today, I also finished Pengo pushing an ice block into a sno bee on the upper left. But just Pengo, not the ice or the sno bee themselves.
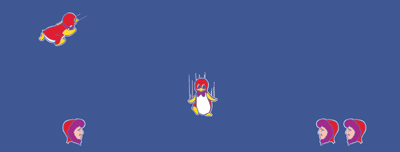
Don’t know what tomorrow will bring for the Pengo artwork, hopefully continued progress.
There has been a ton of great debate and information on the Klov forums over the past couple of days on this Pengo project. We’ll have to pick between the two versions of most of the Pengo artwork, I will probably only do one set of reproduction artwork for this Sega game. We’ll have one marquee, one bezel, and one control panel reproduced. There is only one version of the Pengo sideart.

