Archive for June, 2007
Pooyan
The same collector that recommended Zoo Keeper to me has this game. And just like usual, since I hadn’t hear of it I thought I would try it out.
The idea of the game is that you are a little pig that is trying to prevent foxes from coming in and stealing your babies. When you look at the screen you see a cliff above where the foxes get balloons and float down to the ground. On the ground and to the right there is a house where the pigs are at. Your character is on the right with a blow dart gun, ready to blow and pop the balloons dropping the foxes to their death.
I played this a little more, and the levels and difficulty change, even in the first level, you have to prevent a fair amount of foxes from getting your piglets, and that only increases with the upper levels.
I will say I liked how this played, it was pretty fun, but I wasn’t crazy about the characters. I know there is a story there, but I felt like this game was a really young one, whether it was targeted at an even younger audience at the time or not, it felt like it.
Turkey Shoot
I was exposed to this game for the first time in September of 2006. I was in Chicago, and I visited another collector who had this game. He had mentioned it in email before I left, and I checked it out, but I didn’t think too much of it.
The idea of the game is to shoot the turkey’s that are robbing this town. You are looking forward at some digital buildings, and turkeys with robber masks are running around, and one has a bag with a money sign on it. Which ever turkey is holding this bag of money at the time is the one you must concentrate on. Once you shoot the one with the money, they will pass it to another and so on and so on. If the turkey with the money gets off screen before you get him, your game is over.
Pretty simple, I wasn’t all that interested in a computer format. But then, I played the real game. You have a gun that you have to point and shoot the turkey’s with, but here is the best part. When you get the turkey and win the round, your shot it on the mark, in between the outer glass and an inner plane of glass a gust of air blows of feather in front of your view. It adds a whole new dimension to the game and makes it completely unique. The gameplay is pretty cool, but I just think this is the coolest idea.
The collector I met with says it is a hard to come by game, and when you do find them, usually the blown up feathers don’t work, it is missing that part. Which makes his that much more valuable.
Adjusting Dig Dug Color, now it looks great!
This afternoon I took some time on the Dig Dug outside to see if I could figure out what was going on with the color issues. I took my huge oversize mirror out so I could see what I was doing. I was able to adjust the vertical sync a little bit more to get the picture right, and then I adjusted the color controls, mostly adding more blue into the picture and the game looked great!
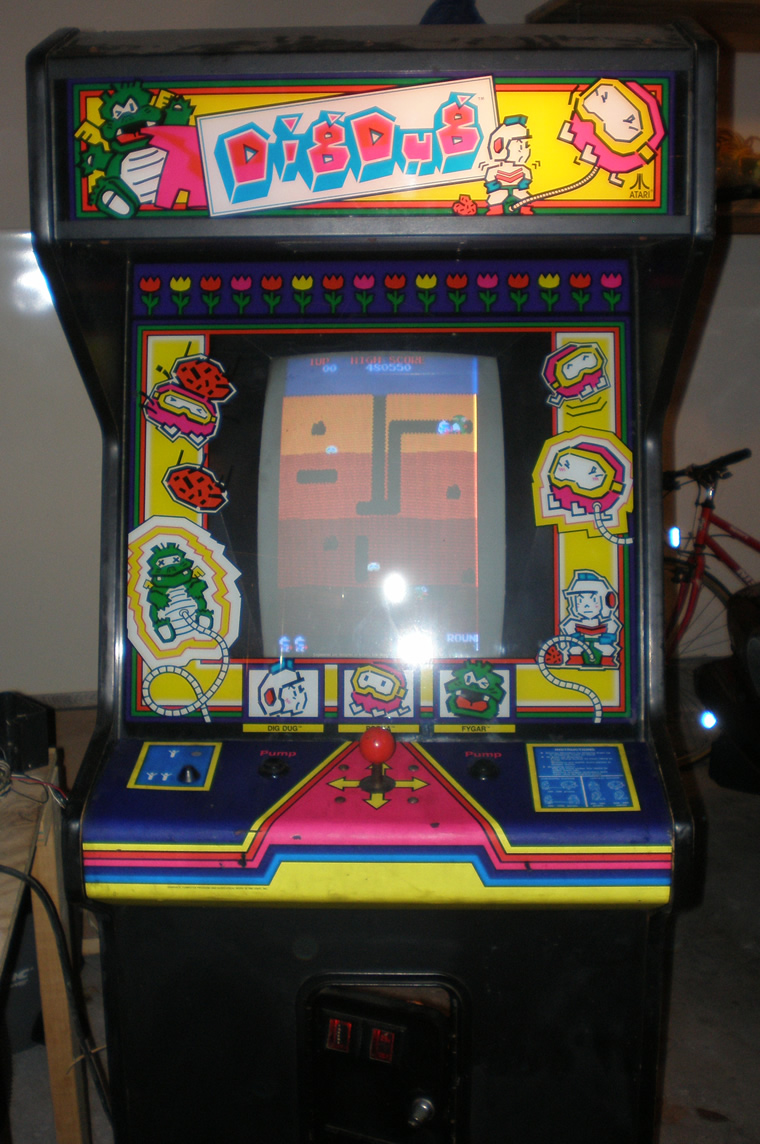
I was pumped. I was starting to get nervous that somehow I had did some of the caps wrong. I knew the color caps shouldn’t be on the main chassis, but again, don’t know that much so who knows what all that affected.
I got the paper bezel out, and brought out the glass one with artwork from the basement and put it all back together. Pretty exciting to have the Dig Dug game in a working condition. I also put in a new lightbulb into the marquee and everything lit up just fine. The sound was defening, just like the Pengo, and I couldn’t figure out what to do. I looked at the schematic, and I could tell that there was supposed to be some sort of sound control inside the coin door. Well, turns out, the little control mount inside there that I got off ebay was missing the knob for the sound dial. I only figured that out when I compared it to what I had on the Dig Dug inside the house, which still had the dial. My old control mount from when the game was still a Land Sea and Air didn’t have the dial either. It seemed like it was well mounted on the machine it was on, so I don’t know why the other two mounts had lost it.
So, I got the metal peg to turn and make the game playable sound wise. So, for now, the game is done. I listed the one in the house on ebay, so now I have to figure out what to do with this one. I have to work on the cone one and two player buttons on the Dig Dug outside a little bit, but that is the last piece to finish.
June 21, 2007
We have noticed Nokes starting to lose teeth, two tiny ones, but tonight he lost a major moler type tooth. Pretty huge, there is a gaping hole in his gums, so I hope something comes in there pretty soon. I know this is natural, but it makes you nervous how big that hole is in his gums.
New Dig Dug Coin Door Amp Connector
Got the new AMP connector hooked up with the old coin door wires tonight, so that was pretty exciting. I coined up and played just fine, the coin door bulbs even came on. However I realized I hadn’t hooked up the Player 1 and Player 2 LED Cone buttons. So I had to go inside and check the connections on the other machine. The one button has solder on it for some reason, so I may just swap that one out. It has a broken cone, so it doesn’t even stay in the hole. I also had to re-attach the right side pump button.
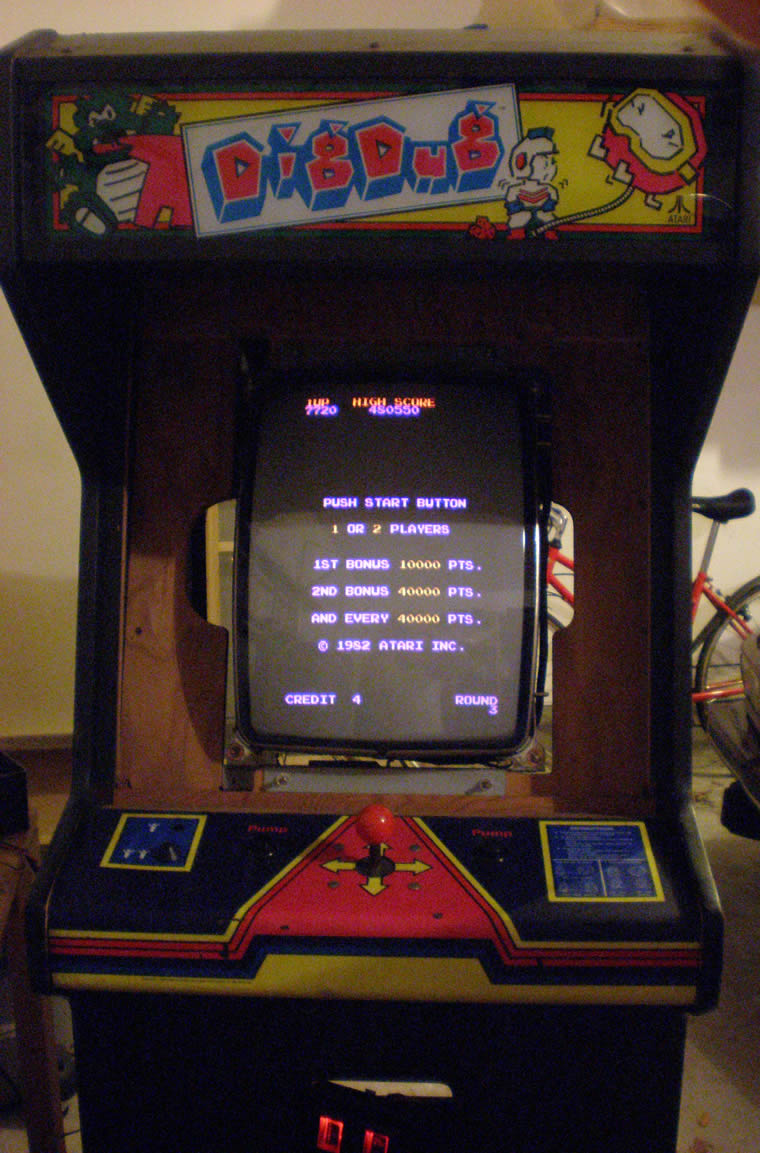
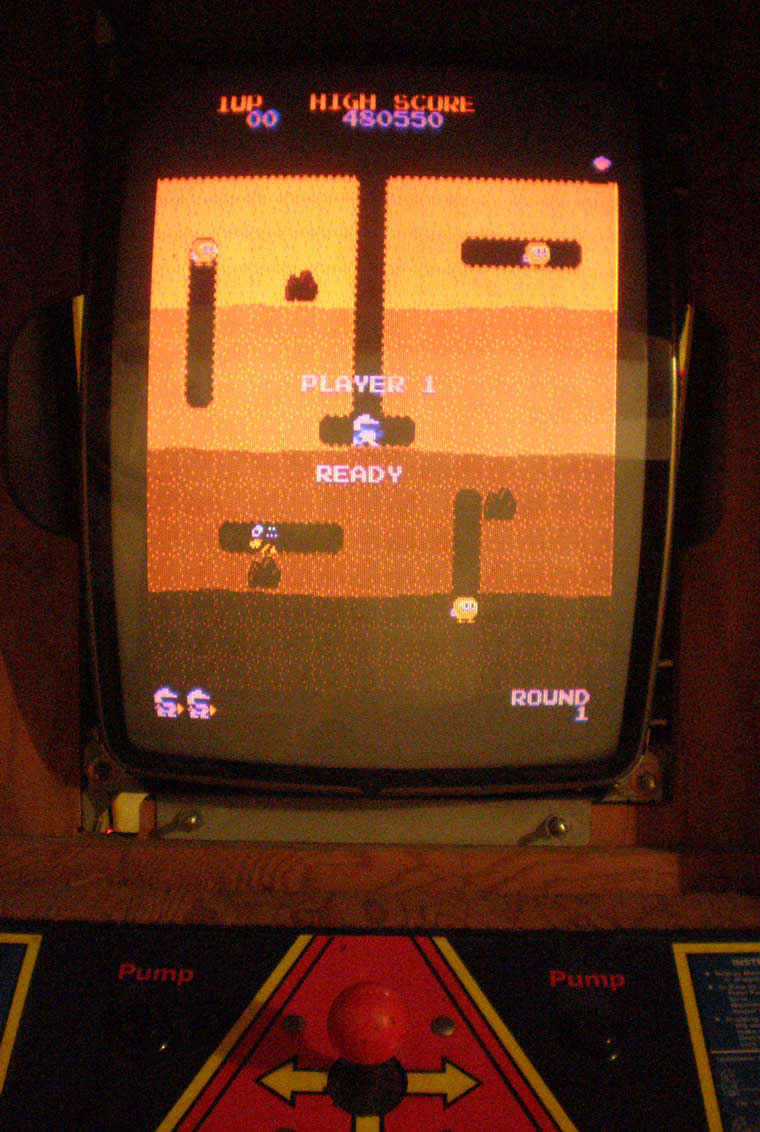
But other than the fact that there was quite a red tint to the game, I got to play it tonight. The alignment is off a little, the guys look a little funny. I also noticed that the marquee light didn’t come on, so I have to figure that out. Plus, the sound, is deafening, just like my Pengo. I will have to see if there is a Pot for that somewhere, and if it is working.
So, every time I think I am close, there is something else minor going on. But I think I am still going to try to list the other game this weekend.
Troubleshooting Pengo Power Supply
Spent a couple of hours tonight looking at the Pengo game and trying to do some troubleshooting, mostly on the liner power supply.
As you see in the photo below, this is what a Sega/Gremlin Linear Power Supply looks like fromt the front, with the PCB board mounted on the inside of the humongous heatsink.
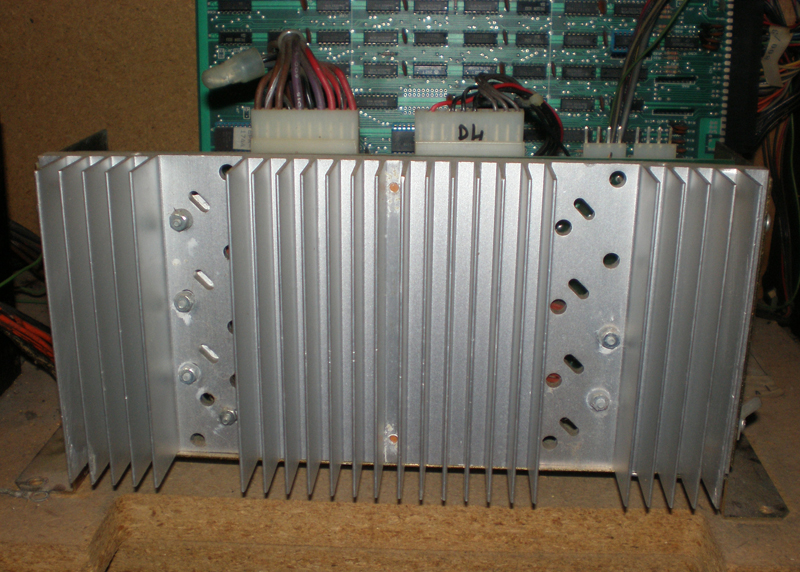
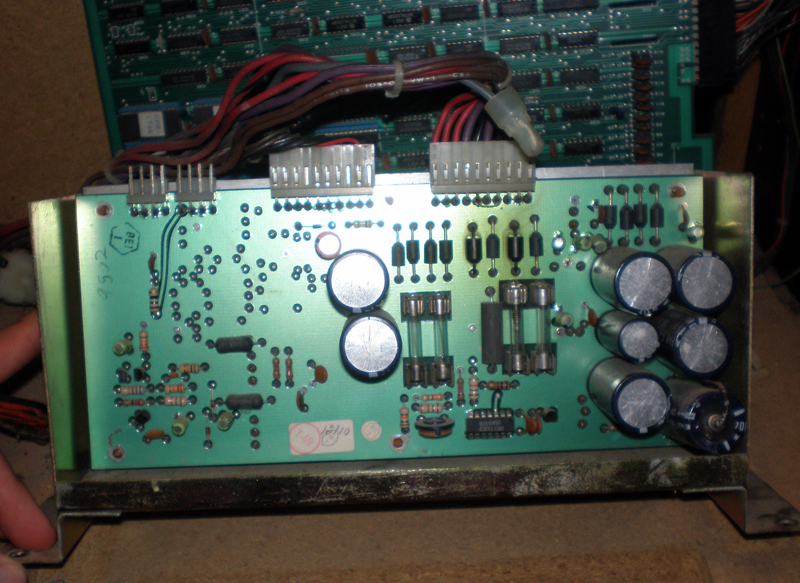
I had made contact with two different people who said to start by testing the Power Supply Voltages. The Power Supply in this machine is mounted awkwardly, so I just decided to unscrew it and get rid of some of zip ties. Most collectors like their games to be perfect and neat, right now, I just want to understand them and care little about that.
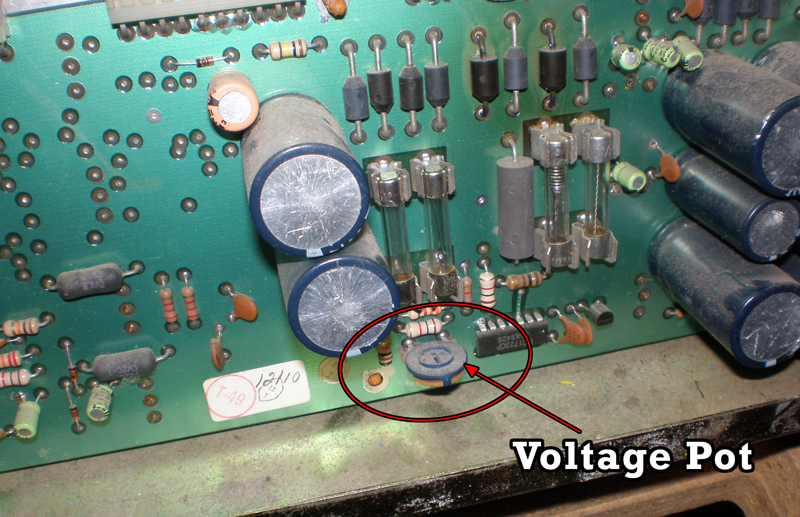
I took out the first two fuses and checked for continuity, and those seemed to be ok. (Those are the fuses on the left in the photo, just above where I indicated where the pot for controlling the voltages is at.) So, now time to check the voltages.
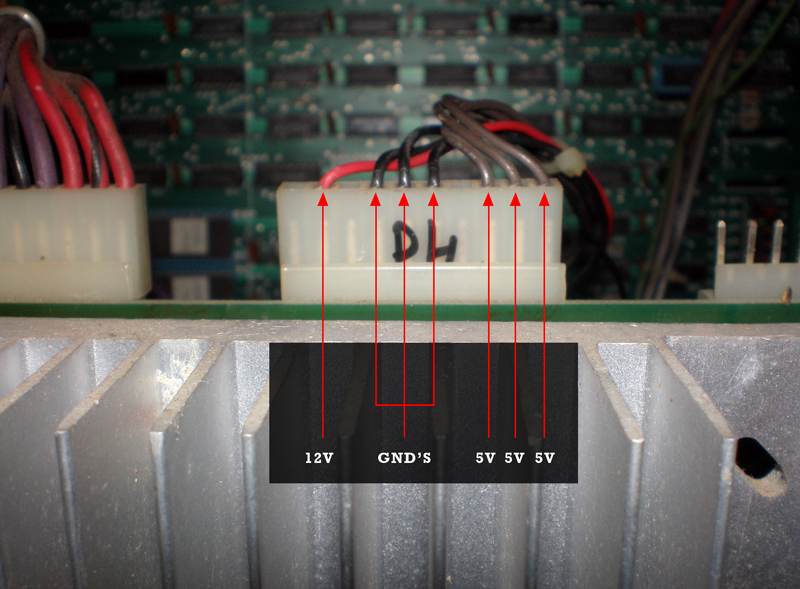
These second two photos above show the power connection for the 12V, 5V and Ground connections that supply the PCB. The 12V would be for the audio, and the 5V for the game board. I stuck my black lead into one of the ground, set my meter to 20V, and put my positive lead into each of the 5V and 12V connections, four tests in all.
For each 5V I read 5V exactly, and the same with the 12V, I read 12V exactly. So know that voltages can be dropped on the way to the board, I checked the voltages in the connector. Same thing, all of them right on the money which is weird, they usually fluctuate about .2 a volt. So, I decided to test right on the traces for the edge connector. I am going to point those places below, as well as the pinouts for this 44 (22×2) pin connector for the Pengo.
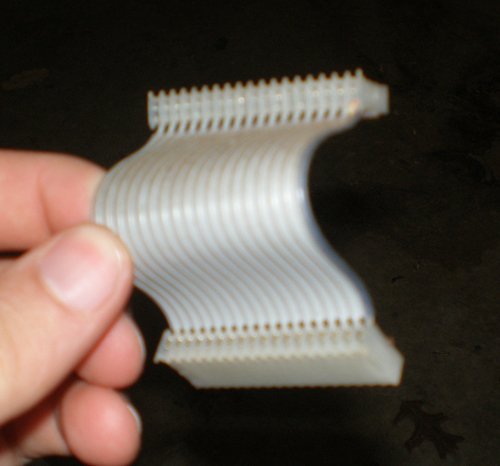
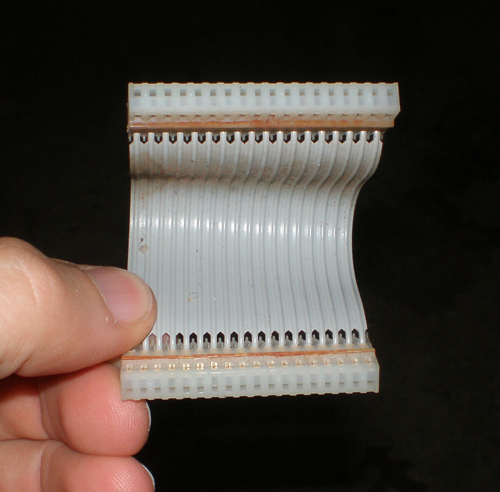
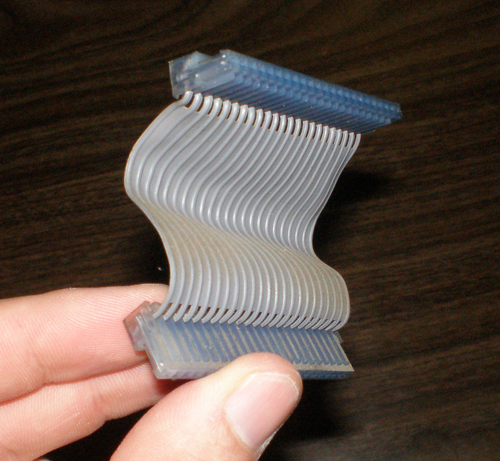
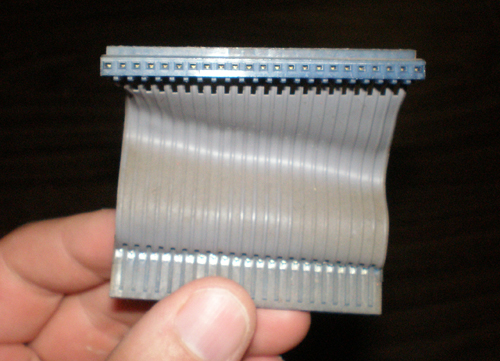
Should I replace the Stern Frenzy Ribbon Cables?
I started to think that maybe the ribbon cables were bad, I read that these were also a source of problems with the game. I read in posts that people have replaced Stern’s ribbon cables in a number of ways. Either they find a known working set on ebay, they find exact cable replacements for the pin configurations, or in some cases they make their own.
I read somewhere that people used scsi cables as replacements, but I didn’t find that to be true. Scsi cables are pretty huge, and regular ATA cables where usually in configurations of 20×2 = 40 pins, or 22×2 = 44 pins. The two cables I took from the Stern Frenzy game where in configurations of 23×1 or 18×1. So, without knowing for sure if they were bad and pumping more money into a game I wasn’t going to keep, I decided to wait and see if another solution presented itself.