
Stencil Ms. Pac-man Cabinet – Part 1
There have been plenty of great tutorials written by other arcade collectors on the topic of re-stenciling artwork on arcade game cabinets. This article series will incorporate those tips and tricks and specifically apply them to stenciling and restoring a Ms. Pac-man arcade game. Wundercade was one of the select few who got a set of the Ms. Pac-man stencils from Joymonkey, and he is going to walk us through his Ms. Pac-man re-painting and stenciling process from start to finish. Hopefully this will be helpful information to the general public since Ms. Pac-man is one of the widest known arcade games around.
First Step – Get some measurements
Before you do anything, let’s get some measurements of where the Ms. Pac-man artwork sits on your cabinet. Fortunately, you can mostly get an idea of where most of the artwork sits by measuring distances to the edges of the stripes, top and sides. I didn’t take measurements of all sides, just a couple of photos;
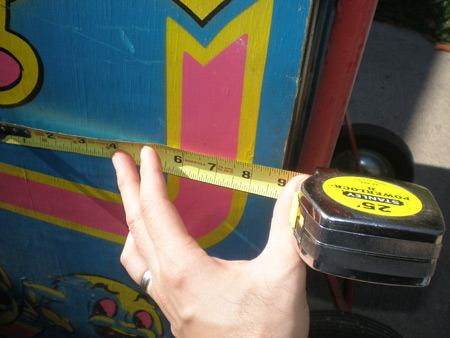
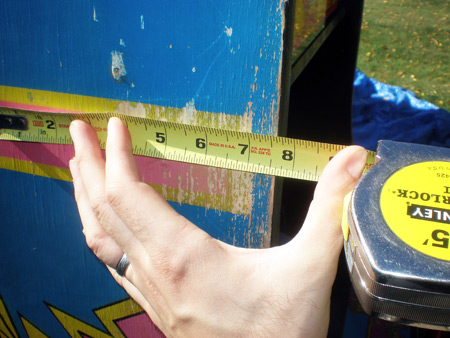
The most important thing you’ll need to know the distance from the top of the cabinet to the first stripe, and 2 distances on either side of the artwork on one side of the cabinet. Draw on a scrap piece of paper a diagram, showing the outline of the cabinet and a blog for the artwork so you remember how to position your first stencil. File that away, it’ll probably be at least a week or two until you come back to it.
In the end, nothing is perfect, I am sure the placement varies from machine to machine. But you want to have it fairly close so that your Ms. Pac-man doesn’t look like the red headed stepchild.
Just a briefing on removing arcade game artwork
This post about prepping a Ms. Pac-man arcade cabinet for stencils will be brief, and won’t have too much detail. If you are looking for additional insights into removing artwork, prepping an arcade cabinet for stencils, or just stenciling arcade artwork, you might check out some of the additional stencil links following this article.
Also, I am not going to cover using stripper and other tools to remove paint from your old cabinet. If you are just interested in some ideas on how to strip your Ms. Pac-man cabinet, you can click the photo below to take a look at the extensive photo gallery. There are photos showing a Ms. Pac-man and Pac-man cabinet with the paint being removed.
One tip : I learned this when stripping my own Ms. Pac-man cabinet is that you will want to mask off with newspaper or something else the inner area by the bezel and monitor. If you spill stripper onto the black you will need to repaint that section of the cabinet as well.
Cabinet Fixing Tools
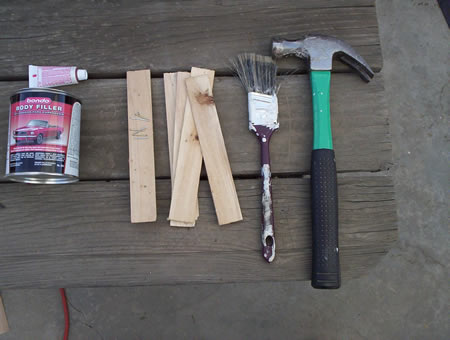
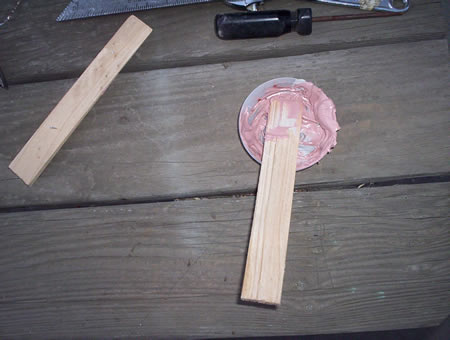
Let’s get started. Shown left to right in this photo, here are some of the basic tools you will need to sand and prep your Ms. Pac-man arcade cabinet for re-stenciling.
- Bondo body filler – For patching larger holes and pieces.
- Shims, or any small flat straight pieces of wood. If you don’t have some small scraps like this, you could cut down 2×4’s, pieces of plywood, or anything that you can use as a guide for a corner, however the smaller the better. The larger the wood, the larger the nail you may need to fasten it to the cabinet and a larger nail can splinter your cabinet edge.
- Brush – Preferably a general purpose garage type brush, not one you’ll be using for painting later.
- Hammer
- Nails – Small nails, usually tack will work. Will depend on the thickness of your wood.
- Tack cloth – Optional
- Stenciling a Williams Stargate cabinet
- Arcade cabinet painting preparation – Excellent examples / Bella Arcade Mame project
- Benefits of using vinyl stencils
- Re-stenciling Robotron by hand – Exactly what Brian is talking about here, I included this tutorial to show you some of the things not to do.
- Removing paint from a Joust machine using a heat gun
- Stripping the paint off of a Robotron arcade machine
- Removing paint from Robotron cabinet – Arcade Restoration Workshop
- Tips for stenciling pinball cabinets
- Stencil a Ms. Pac-man Cabinet – Part 2
- My Ms. Pac-man Stenciling Progress
- Prologue – Stencil a Ms. Pac-man Arcade Cabinet
- My Ms. Pac-man painting is moving along
- Stencil a Ms. Pac-man Cabinet – Part 3
You will use Minwax wood filler for smaller patches, like lock bar holes, nail holes, divets or gouges in the side of the cabinet, but don’t use wood filler for bigger holes. Over time the patch will crack and pull away from the cabinet, which I hope to talk about in a later tutorial. Anything the size of a half dollar is too large for the wood filler and so you’ll use Bondo instead.
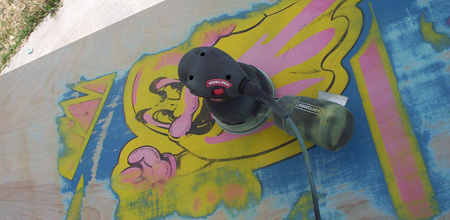
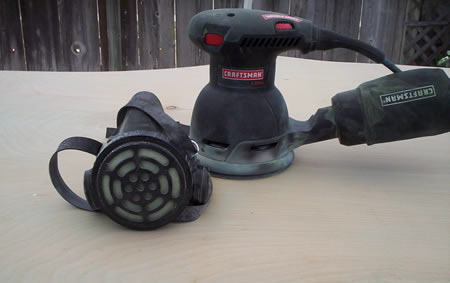
For the sanding portion, you will need a sander and a face mask. For this cabinet project we used a Craftsman 2.8 amp orbital sander and any industrial face mask will work. You will be sanding down paint and other potentially toxic dust, so don’t cheap out on the mask, you won’t regret it. Take it from experience 😉
Another Tip : I learned when sanding my Ms. Pac-man cabinet for stenciling was to not use a belt sander. You will put grooves into the sides of the cabinet. It is paramount that you use some sort of Orbital sander when working on your cabinet.
Step 1 – Patch the cabinet with Minwax Wood Fillter
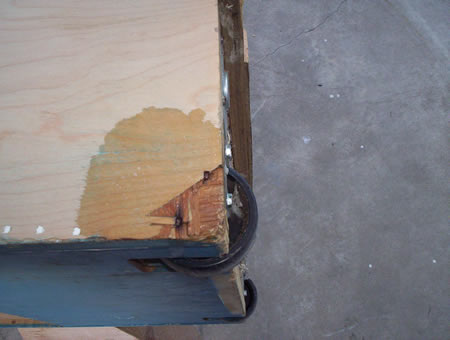
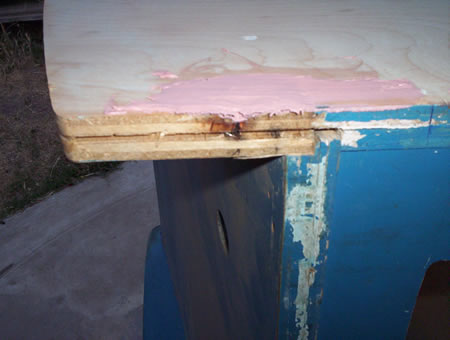
Completely go over your Ms. Pac-man arcade cabinet and check to make sure that it is sound. Check for loose wood, holes, and any chips that might need to be removed. After you have found all the troublesome areas use the Minwax wood filler to patch up any small holes. You can see a couple of the small fills on the Ms. Pac-man cabinet in this photo, but you can also see where we are missing a chunk of the plywood upper.
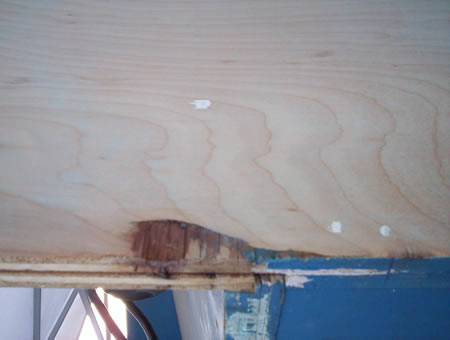
We did the wood filler first because it takes longer to dry typically than bondo. These Bally Midway plywood cabinets have the tendency to splinter at the edges, and that is the case with this Ms. Pac-man arcade. There are a number of chunk missing around the corners and edges that we are going to need to patch with Bondo. Even though there can be a number of rough edges, I personally like Bally / Midway’s arcade game cabinets, they were made of a decent quality plywood.
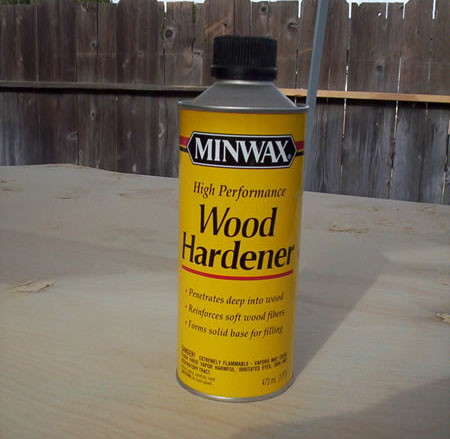
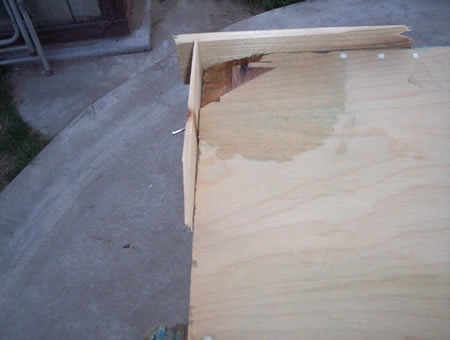
Step 2 – Use Minwax wood hardener on the larger holes
For those chunks of missing plywood we are going to be using Minwax wood hardener which binds the splintered or even sometimes rotten wood fibers together to better accept later application of the bondo. Apply a coat with your brush and let it dry for an hour or so, you may see a shiny finish. Apply 2-3 coats to really solidify the area before applying bondo.
Note: Minwax wood hardener works on a plywood base cabinet, but I am not confident that it will work on a cabinet made of particle board or other similar composite board. You might search BYOAC for some other more appropriate cabinet patching solutions for your Ms. Pac-man.
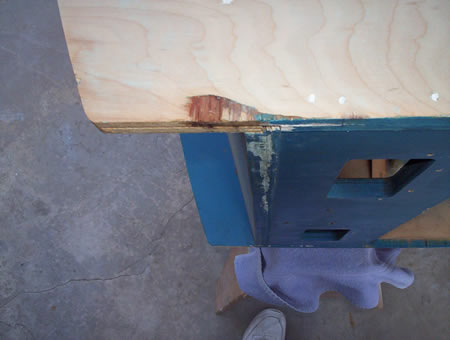
Step 3 – Use shims to make corners
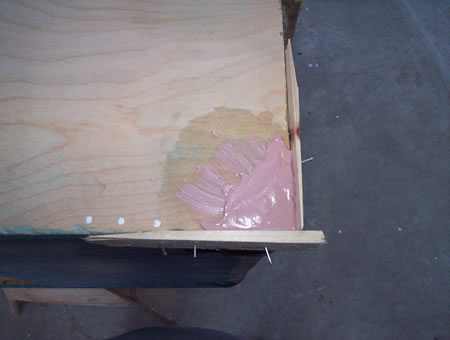
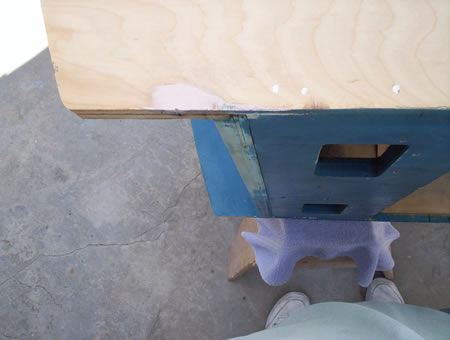
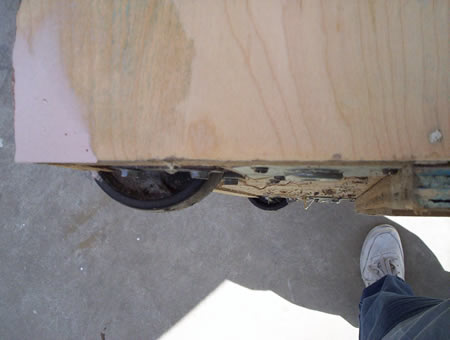
If you are using shims, you can take some tack nails and hammer them to the edges of the cabinet to make a corner edge to guide your bondo application. Take a look at these photos for some ideas.
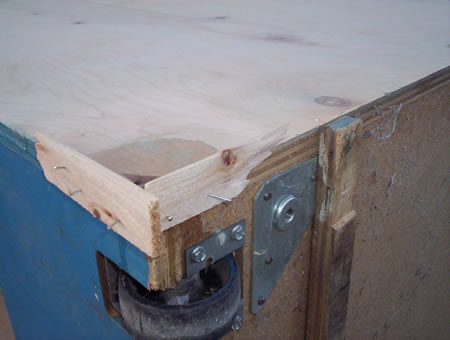
You can also hammer these shims next to a splintering edge of your Ms. Pac-man cabinet to aid your application of bondo. Anything to help make an edge and reduce the amount of sanding you will need to do.
Step 4 – Apply the bondo
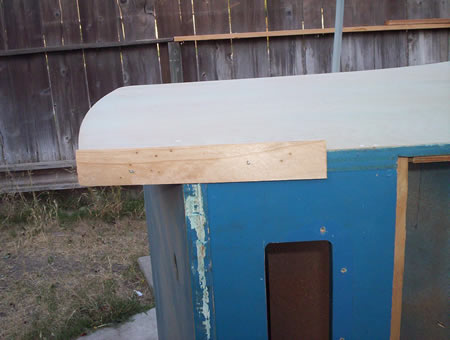
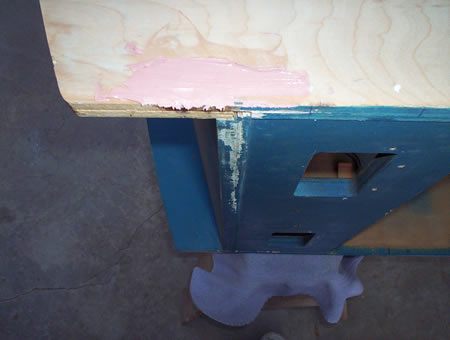
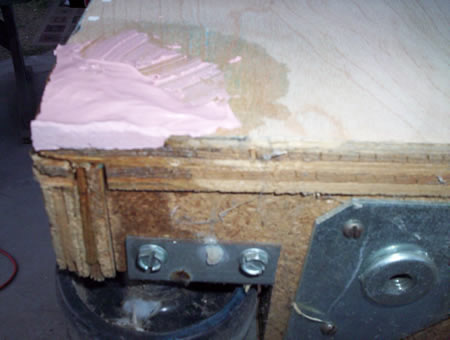
I have always had a love hate relationship with Bondo, so that is why it helps to prepare you cabinet beforehand. By adding the shims to the sides and edges you can quickly and efficiently apply your bondo to the arcade cabinet before it hardens. You won’t need all that much, you can mix up just enough bondo in the provided lid to apply to your own cabinet (depending on the extent of damage).
Here are some after photos. Notice that the edges aren’t built up too much unless a whole chunk was missing from the Ms. Pac-man cabinet.
Step 5 – Sand the bondo and wood filler holes
Give yourself 4-24 hours to let your wood filler and bondo completely harden if you feel the need. Don’t rush your process, but if you’re ready go ahead and start sanding. Make sure to get those trouble areas of the Ms. Pac-man arcade cabinet completely smooth. This is critical, you will need an attention to detail. Make sure to get those edges as even without ridges otherwise they will be that much more pronounced when you go to apply your blue base coat of paint and your stenciled Ms. Pac-man artwork later on.
Also make sure to remove any loose wood dust with a tack cloth. If you leave that dust on your arcade cabinet you may have a gritty finish after applying your primer.
Additional Arcade Stencil Links
That concludes part one. By now you should have a sanded, blank wood Ms. Pac-man cabinet with no holes or rough edges that is ready to accept the primer. Don’t forget to double check for blemishes, all holes and un-smooth edges will get more pronounced as you keep moving forward.
Here are some similar arcade posts
If you enjoyed this post, please consider to leave a comment or subscribe to the feed and get future articles delivered to your feed reader.
Comments
@Jeff Rivera:
I think you have a tough decision. Ms. Pac-man are easy enough to come by. I would sell the Home Use Only machine to another collector for decent money at some point. But I would buy a second machine to fix up and restore to complete colorful glory. For me, I wanted to do this myself, but I didn’t have the painting tools already so I was sure the expense would be worth the stencils at this point in my life. Otherwise, I would do just what I suggested. I have two Ms. Pac-man machines, one that is more faded than Wundercade’s.
I’d agree with Jeff.. if your machine is home use and physically very nice, just faded.. i’d sell it and get one you can give the treatment that Wundercade is doing.
@wundercade – please remember to use a detail gun when spraying your actual stencils at fairly low pressure. Also remember to put your color down in numerous very very light coats so you can avoid making that ridge where the paint meets the stencil.
Even though I made a few sets of stencils for some guys I never got around to restoring my own cabinet, oddly enough. Hopefully I’ll get to it this summer and this walk-through will come in very handy. Thanks!!
@JoyMonkey:
I have photos of the priming and am waiting on the blue base coat of paint for the Ms. Pac-man stencilling. Hopefully I’ll have photos of the second step this week and can post it.
If you find anything out when you go to stencil your Ms. Pac-man cabinet later this summer please let me know. Would like to have the most comprehensive tutorial for stenciling a Ms. Pac-man as possible, so the more feedback the better.
@Dave:
Have you been to Appolo’s website? His Ms. Pac-man paint codes seem to be the standard for re-stenciling and re-painting this game. I know a couple of the colors may or may not be available anymore, and I think he provides replacements for them.
I have a decent working faded ms pac-man. When you are doing all this work to the cabnet for repainting, how much if any of the inside workings should be removed? I have a total of 8 uprights, but never attempeted removing anything major on the insides. Thanks alot. Jeff
YouTube vid of my games “Steeljaws game room” thanks in advance
Jeff – Each time I’ve re-stenciled a Ms. Pac-man I’ve gutted the cabinet completed. Label, annotate, diagram and…lots of photos just in case. I used that opportunity to give the inside of my cabinet a good scrubbing as well…
hey guys,
this was a good read and some great info. I had still been looking over the web and found a guy that did his ms pacman one color at a time with a roller, this might work better for me with budget and what I have to work with. However a lot of cool tips picked up here, namley the idea of a wood hardner before any bondo goes down. Thanks again, will try to post a photo when I get started. Jeff J.
Leave a comment
Your email address is never displayed and cannot be spammed. If your comments are excessively self-promotional you will be banned from commenting. Read our comment privacy policy.


May 28, 2008
I’m torn whether or not I want to repaint my Ms. Pac-Man. One side looks absolutely perfect, and the other side looks great, but it has faded some. The machine was a HUO Ms. Pac-Man, but it was next to a window and it picked up some fading on the left side. I’ve considered stenciling just that one side and the front, but it looks so nice I’ve been hesitant to mess with a good thing.
It does look a little odd having one side look mint and the other faded, but it’s all original still. Decisions, decisions…