
Ms. Pac-man black artwork – Live & in progress
Exciting, today is the day, the be all to end all. Either I screw things up completely on my Ms. Pac-man, or the final black artwork will really make my cabinet sing. So far so good, I’ve sprayed the kickplate stencil and removed it and here is what things are looking like to date. Keep checking back as I’ll be working on the sides and finishing touches until 4:00 pm today.
Black spray paint and stencils = easy to work with
The black spray paint is easy to work with and is going to hide some of the rough edges left from the yellow artwork debacle. Black is forgiving, and I am happy with how things are going so far beyond one small screwup that I may or may not disclose. Here are some photos.
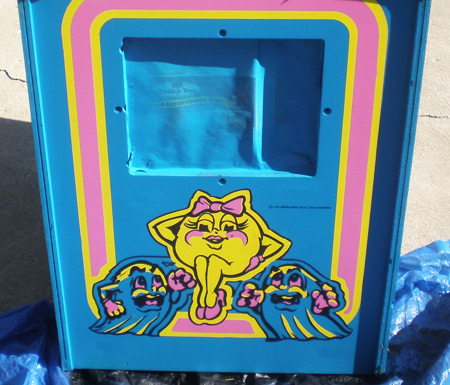
I am having to pick out the floating pieces in the black with an exacto knife. I hope that is the right tool to use, I am afraid picking them out with my nail with tear up some Ms. Pac-man artwork as well. Thoughts?
Update – 4:15
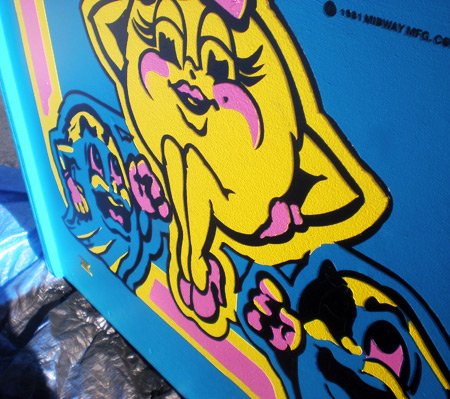
I got to be a weeding expert, I was zooming trying to pick out all of the little pieces in the ghosts at the bottom of my Ms. Pac-man cabinet. Just like the front, the copyright notice came out really nice, I was worried about that section.
When I show some detail shots, and even in this photo of my Ms. Pac left sideart, you can see the fact that my yellow was textured killed me, I got a lot of little overspray areas for the black, and it is that much more noticeable because it is black. Oh well, I have to love this Ms. Pac-man for its stencil flaws I guess.
Update – November 2nd, 2008
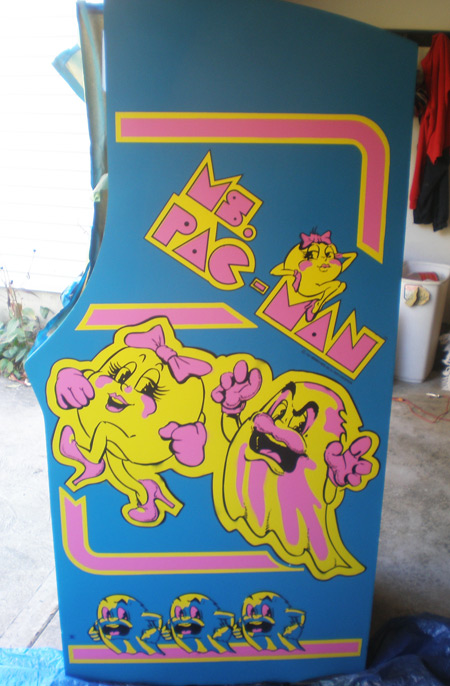
Yesterday I got through the final black sideart stencil. I did a couple of other things as well, including a touch up coat (to finish off my second can of painters black) on the inside of the cabinet. Genius here spilled a little bit of stripper on one side in the initial process, taking out some of the black paint.
I also took a brush and touched up a couple of spots in blue, one right under the ghost on the side, one on the top edge of the cabinet, and a couple of spots of black overspray onto the blue on the kickplate. You’d have to look hard to see them, and I didn’t see any dried brushstrokes.
I also put down three coats of clear on the top and black, and five coats on the front kickplate artwork. I heard other arcade collectors saying they couldn’t tell a difference at three, and the can said to apply at least three coats of clear, so I went with five for the moment.
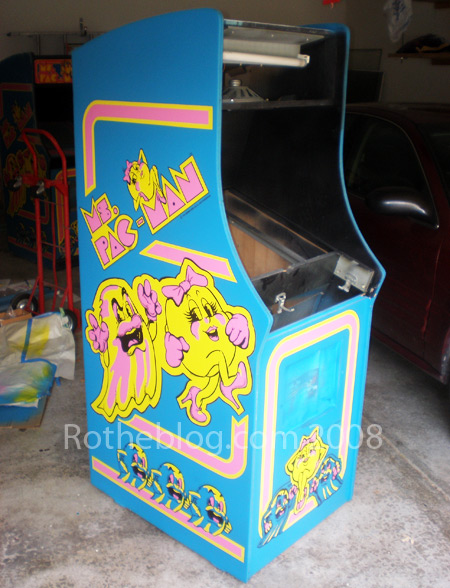
What’s left? Adding the clear coat to the sides and re-assembling my Ms. Pac-man. Now, I am still unsure what to do about the sides. The black overspray drives me bonkers, but remember my yellow touchup half pint is a Valspar base from Lowes. I couldn’t get anything that small with a satin Glidden base from Home Depot.
So, I would be nervous about some small brushing about the paint not matching, and I am not sure how to ‘hack’ together some stencils for touchup. Do I use clear acetone sheets? Do I buy plain vinyl? Not sure…will be thinking about it today since it is still warm outside.
Here are some similar arcade posts
- Ms. Pac-man Pink Finished
- Interesting Arcade Links – 2008-11-02
- Ms. Pac-man Stencil File Missing Artwork?
- Ms. Pac-man Yellow Finished
- How Bally Stenciled Ms. Pac-man Cabinets
If you enjoyed this post, please consider to leave a comment or subscribe to the feed and get future articles delivered to your feed reader.
Comments
Lookin good. YOu can fix 99% of the flaws with a little quick airbrush work. The key to avoiding most of your issues is working out why you had texture in your yellow (my guess is paint too thick). Give it a couple coats of clear and most of the texture will go away.
Forgot to say, pretty damn good if you ask me for both your first spraying AND stencilling attempts!
Nicely done…you have to be proud of that bro! Very cool, and as usual – see it first on ROTHEBLOG.com This site is awesome.
@Jamie:
I will try to post side by side comparison photos of the old Ms. Pac-man and new stenciled version if I can. I have to look back and see what photos I have, it would be nice to have the exact same perspective.
@Brian
How do I fix the errors with a little airbrushing? Do I have to buy some acetate and cut it to the shapes I need? Or do I just cut painters tape?
Thanks for the compliment. But, without sounding cliche, I wouldn’t have been able to do this without Donnie, Jamie and Brian. Especially Brian, sheesh, considering what is going on with you shows what an altruistic heart you have to even be popping by here.
On the clear coat…I read the can today, it says something about wet sanding. But I got the impression that was only needed if I waited beyond an hour and a half before my second application. As in, if I let the first coat dry and cure thoroughly, and want to apply more I have to sand the first coat first.
Spectacular! I’ve been following your progress, I keep flip flopping between buying art or stenciling. This post makes me want to stencil my Ms Pac!
@Metahugh – @Audiomidiman:
Thanks for the compliments. I feel a little guilty of taking the far away shot, like you see on forums, that totally hides the flaws in the small details….but as a whole I think it is pretty good. But if you saw my post from last night, you can see the black overspray that is hard to pick up on in the full length Ms. Pac-man cabinet photo.
Obviously I would say stencil yours…I just can’t stand the shine on the vinyl on the Ms. Pac-man artwork. I know you have it on yours Bill, and it looks clean, but I couldn’t live with it. And if you do stencil it, I would really look at the route Donnie was going to take and get all the colors in spray cans, get about 2-3 cans of each color. Removes the work, removes buying some tools, and the pressure of the spray won’t cause as much in the way of the problems I had. So much easier I would think.
Leave a comment
Your email address is never displayed and cannot be spammed. If your comments are excessively self-promotional you will be banned from commenting. Read our comment privacy policy.


October 31, 2008
Hey nice job. 🙂 It looks awesome! I think when I finally decide to do my Pac-Man, I’m going to go the stencil route instead of trying to silk screen it. Maybe you can post some side by side before and after pics when it’s all done?