
Tutorial – Change your coin door to accept tokens
You’ve got your gameroom full of your favorite games, but you’ve decided that you want to change those games over from accepting quarters to accepting tokens. I didn’t write this article, but it is a very good post detailing how you can change over all of your coin door ‘mech’ or ‘mechs’ to accept tokens. Strap in, the tutorial is long but it has lots of photos. Enjoy!
How to instructions for arcades to accept tokens
If after you’ve read this article and you still have questions about how to get your games to stop accepting quarters, here are a couple of links to Arcadereplay for other articles you can check out;
- Modifying Happ Plastic Quarter mechs for .984” token use
- Modification of Coin Controls Metal Quarter Mechs
Alright, on to the tutorial, written by Mike “Cadillacman” on the Klov forums.
How to modify standard coin mechs to use a 25mm token
As you can tell a token is slightly larger in diamater than the quarter, so modifications are necessary. Don’t be scared! It’s actually prtetty easy.
Tools Needed
- Screwdrivers – Good but small needlenose pliers
- File – Decent & small, preferrably with file edge on the sides of the file as well
Optional Tools (Highly reccomended)
- BEER!!!!!!!!!!
- BEER!!!!!!!!!!
- Uhm….more BEER!!!!!!!!!!
First off, I’m going to be showing you this with the Coin Mech Inc. coin mechanism. It’s a pretty standard unit. Most mechs are the same or similar.
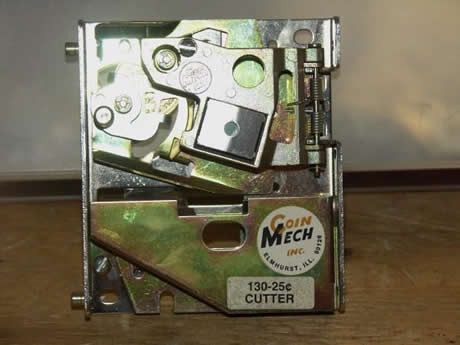
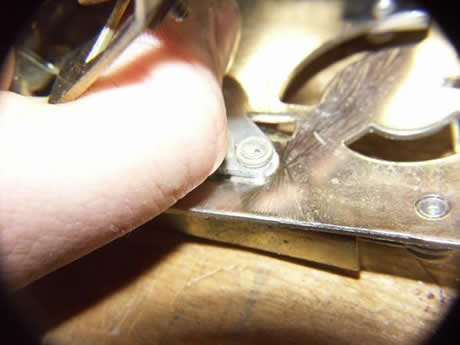
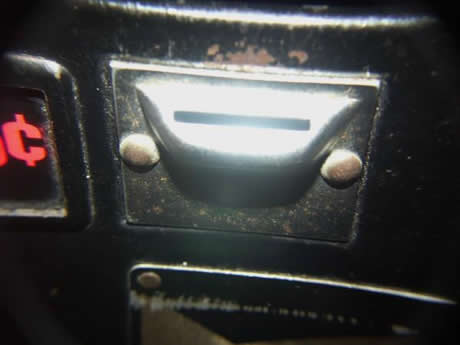
Ok, so try to drop a token in. You will notice that the token stops before it really even gets into the mech. There are two “guides” (one on each side of the token) that I think are also there to stop oversize coins from getting in, therefore they stop your token. Do Not bend these. Trust me on that one.
Using your file, file the edge of these that the token is hitting. Keep filing a little bit at a time untill the token passes by easily. Do Not file so much that the token goes in all sloppy.
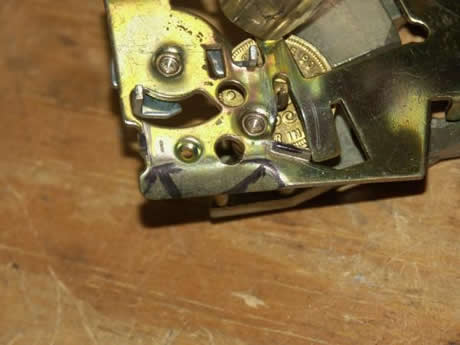
(Ignore the token in this pic, I was using it to hold back another part of the mech.)

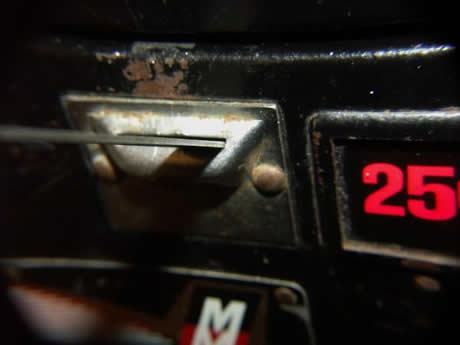
So, at this point a token should go in, but most likely gets stuck in the cradle.
This is happening because of two reasons;
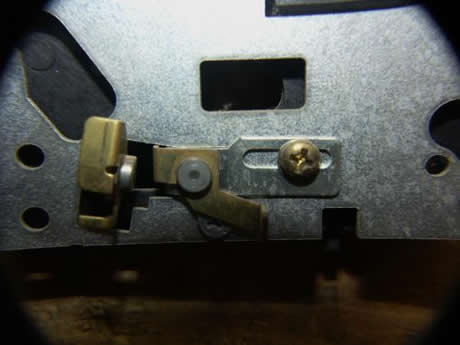
- The brass “hook” piece needs to be filed and re-adjusted
- The token usually hits the end of the “reject rod”
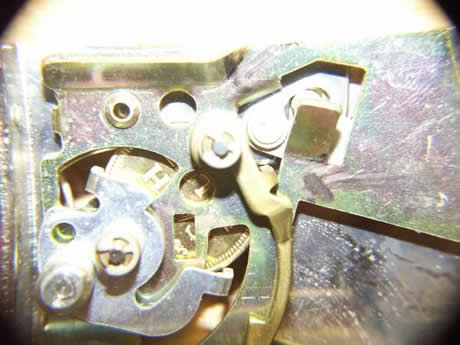
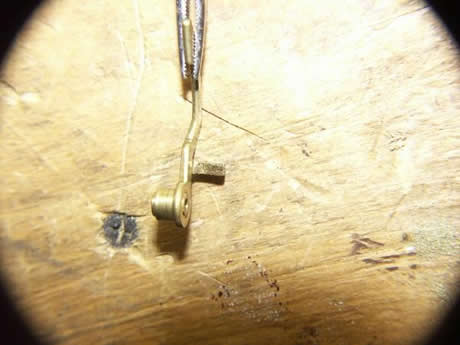
It is at this time that I remove the “brass hook”. One e-clip and its off. Save it, you will need it later!
Like I stated before, you need to file the end of the “reject rod” Heres a before and after pic.
You will want to file primarily at a 90 degree angle to the long part of the rod, as well as on the underside of the rod, but smooth the whole corner out while you’re at it.
Now clean the filings out and test. If you’ve done everything right a token should go through the mech easily, but will probably reject. This is for several reasons, one because the hook is missing, and because the mech will also need a few more mods. I have tried bending the cradle instead of filing the reject rod, and the result was me bending the cradle back to the way it was and filing the reject rod. It almost made the mech work worse when I bent the cradle.
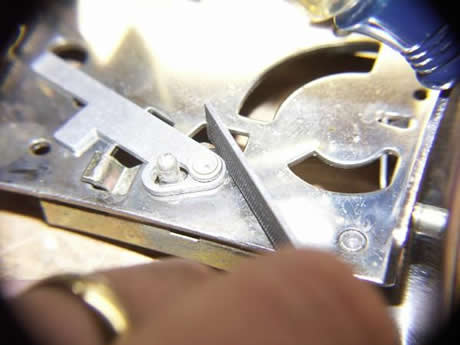
The next step is filing and modifying the “brass hook”. Some peole just leave this out, but I’ve found the mech seems to work better with it in – but modified. I think this hook is designed to keep too small of a coin from passing through the cradle by locking the cradle. The problem is that the 25 mm token it too big, and maxes out this hook the other way. You need to file the part shown (the part that contacts the coin)
Before:
After:
I also file the sides and the other side of this part slightly, just to clean it up and give it slightly more “swing room” to accomidate this larger 25mm coin. Now you can Re-install the modified brass hook.
Again, try a token through the mech
If the token is again hanging-up in the cradle, then you will need to bend that same piece you just filed on the “brass hook” outwards sligltly(away from the coin) just slightly! It won’t take much. Be patient, this process may take a few tries.
Now you should be back to getting a token through the mech, but is most likely rejecting every token you put in.
Relax, it’s ok. Now for the easy modifications!
The next thing to mess with is this sheet metal thing. Somehow the coin hits it and it decides to reject or not reject.
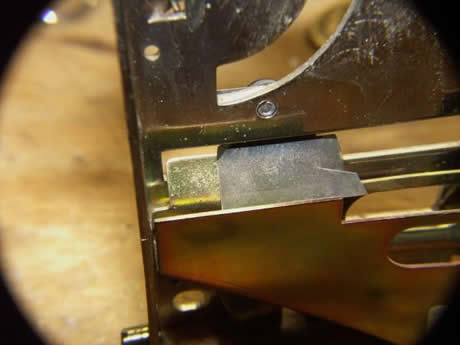
I prefer to just remove it. Sometimes you can just adjust it. One screw and its gone. You can always save it for later if you want to go back to quarters.
Only one mod left! whoohoo!
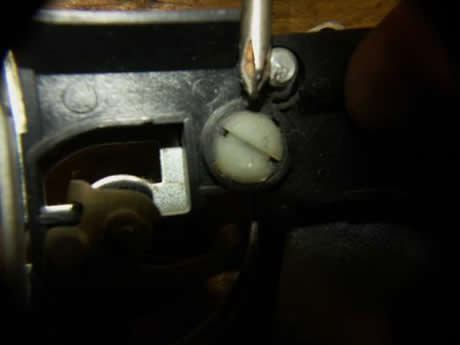
See this little thing? (bottom part)
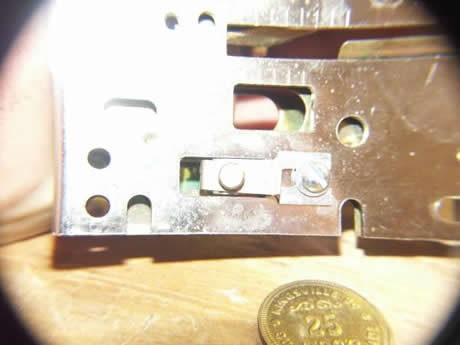
Somehow it helps the coin decide which hole to go to. You want to it to Not reject, so loosen up the flatblade screw, and slide it out as much as you can, while still letting the little metal finger at the end free-float, then retighten the screw.
At this point, you should have a working mech that takes 25mm tokens easily, and accepts them every time.
Additional Tech Tips
There is also an adjustment at the metal slug grabber. (Its a magnet) If your token gets hung up there, simply increase the gap by adjusting the magnet out further. This can be done by adjusting the flathead machine screw at the top of that part. The more you screw in the screw, the further away the magnet sits (increases the gap).
To change this mech back to quarters, re-add the small sheetmetal piece, re-adjust the bottom arm, and re-bend the hook part that you filed back previously (in slightly). Alternatively, if you removed the hook just re-install it.
With a little more finesse you could probably make it take both quarters and 25mm tokens, but I have had better luck just making them take one or the other.
Then there’s other types of mechs
First off, the “newer” coin controls mech.
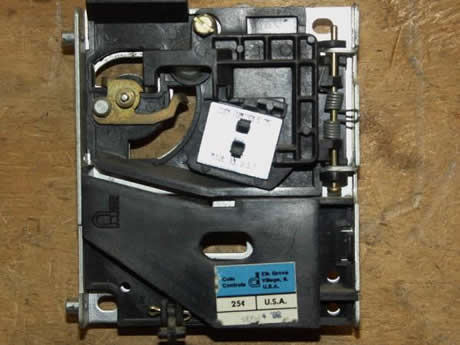
This one only required adjustments, no file modifications.
Insert a token, it will most likely get stuck in the top of the mech. Adjust the white plastic piece with a flathead screwdriver, just a little bit of a turn at a time. Eventually you will get the token to go through the mech.
Now it may be rejecting alot or all of the tokens. Simply adjust the final reject/accept linkage (similar to the older coin controls 130 mech) and you’re done. This mech also has the same type of metal slug rejector magnet and adjuster. Adjust if necessary.
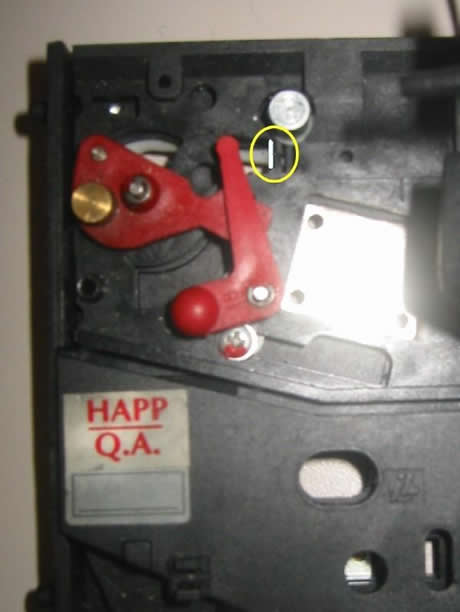
Up next, a plastic Happ mech.
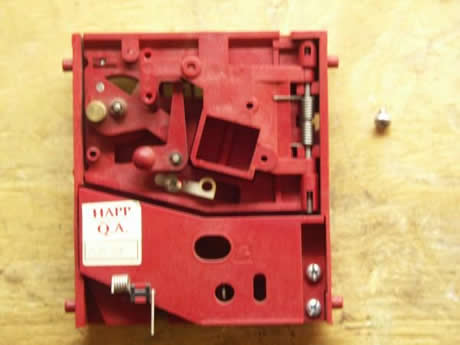
Im my case, this didn’t take much to make it take tokens. I think its been messed with previously. Just a very slight filing of a few key areas mentioned in the first mech mod, (same as the old coin controls 130), except it did not even require that much work. This mech also has a similar reject / accept piece at the end, adjust as necessary to make the mech accept your token after it makes its way through the cradle and everything else first.
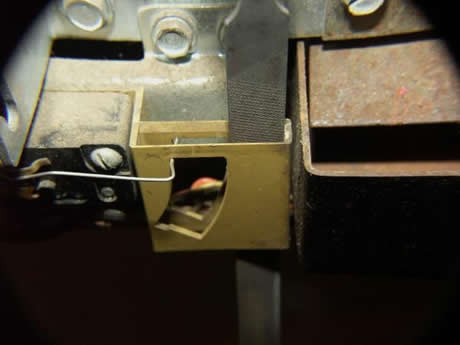
One website mentioned that some people have had to scrape out some plastic in this marked area, but I personally have not:
The final mech I have encounteredis the Simonex plastic mech.
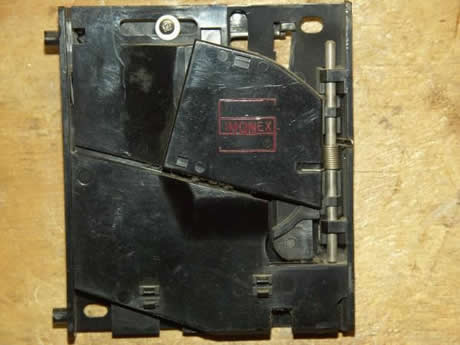
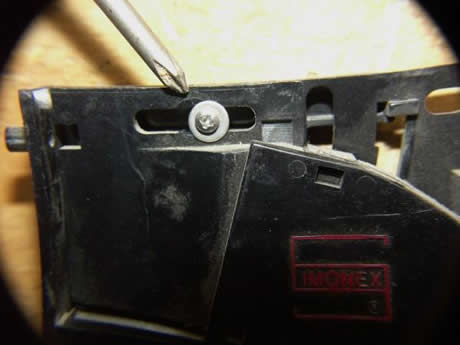
If you have this one, pat yourself on the back. There are no moving parts in this mech! Its a pretty cheap and crude mech. Simply adjust the coin slot at the top so it will accepta 25mm token, and thats it!
This is a very hobbiest-friendly mech. It’ll take almost anything and since there’s no moving parts, it really can’t jam up!
That’s all there is to that mech. Very simple.
I’ve gone over all the mechs I’ve come across, most have a similar design.
Now, the other battle is getting the token into your coin slot on the coin door, and getting the token through the coin switch and out into your coin bucket. These slots were also designed for quarters, and sometimes a token will not fit.
First Up Standard Happ-type Coinslot
There is a small metal plate sandwiched in between the parts in this door. You need to modify that piece. Using your file edge, file out this hole (make the opening taller) It does not take much. You could also just remove this piece if desired. Your token should now go in and on its way to the coin mech!
Next Up – A Midway Type Coin Door
On my Mr. Do! (originally a Gorf) the slot was simply too small to accept a 25mm token, but only by mabye a 1/2 mm.
Again, using the file edge, file both ends of this slot so you make the opening slightly wider.
If you are careful doing this, nobody would ever know that you have modified it.
Now we have gotten the token into the modified coindoor slot and through the modified mechanism. On most modern doors, the 25mm token will exit right through the coin switch area with ease. On the older coin doors, you also have to do a little bit of trickery here too.
I have a midway door here that the token was hanging up at the switch. I remedied this situation by doing two things:
- I bent the wire that the coin hits. Make it “hug” the left side of the chute as much as possible without dragging.
- If that’s not enough, slightly clearence the right side of this chute using the edge of your file. It won’t take much.
It sounds like a long process, but I get most done in about 5 mins!! The first one does take awhile, then once you work through all the issues the next ones go alot easier.
Questions on making the token modification?
I think that’s about it. If anybody has a question when it comes time to do yours just leave a comment below. I hope this tutorial / how-to helps some guys out. I’ve done all the cursing and head scratching so you don’t have to!
Here are some similar arcade posts
- 22nd October 2006
- Pengo sound controls inside coin door.
- Updated Website – Tokens Only
- Can’t get my Illustrator crop marks to go away!
- Stenciling a Ms. Pac-man – Part 8
If you enjoyed this post, please consider to leave a comment or subscribe to the feed and get future articles delivered to your feed reader.
Comments
Mike
No problem. Anytime you want to write some sort of useful arcade game tutorial like this, give me a hollar, and I will write it up nicely like this…
This was an awesome tutorial! I have the mechs you described as “newer”…the ones with the blue and white Coin Controls sticker on them.
Anyway, I just wanted to mentioned that I had to make one other modification. I posted info on a blog page of my own, but in short, the tokens I got from eBay yesterday were a little too light. What was happening was that the coin was rolling off the cradle before dropping it down completely, which caused the coin to shoot out more rapidly. This then caused the coin to drop all the way to the back of the mech and it would get stuck each time.
I was able to add a brass tab to the mech that essentially allowed the coin to bounce back into the acceptance slot and now every coin works every time.
Why not just pop off the C-clips on the little weight arm. That’s what I did with my Ms. Pac-Man and Allied Leisure Pinball. That way the mech is preserved, no filing, and I can stick the weight arm back on anytime to switch it back to quarters.
Thank you for sharing. Just picked up a Rowe BC-25 and trying to decide if I want to install tokens or quarters in it. Because I have kids under 10 I’m thinking tokens might be the better way to go and all my coin mechanisms are temperamental right now (didn’t care because everything is set to freeplay). Decisions Decisions. Oh, and is there anything “special” about Nintendo cabinets / coin mechs as far as modifying them?
Leave a comment
Your email address is never displayed and cannot be spammed. If your comments are excessively self-promotional you will be banned from commenting. Read our comment privacy policy.


December 31, 2008
Thanks for cleaning up all my typos and reposting this on your site!!
-da cadillacman