
My Ms. Pac-man painting is moving along
Last time I had written about my Ms. Pac-man re-stenciling progress I had just finished patching my cabinet. The next major block was to figure out the spray gun factor and I have learned a lot over the last week or so.
Fixing Splits in the plywood surface
When I was reading about painting cabinets, I kept hearing that every little blemish will be personified. So, I felt like I was really picky when looking over the cabinet, patching even small dings. But I kind of figured that some of the splits in the cabinet would be masked by the primer and or the coats of paint. But so far, that hasn’t been the case.

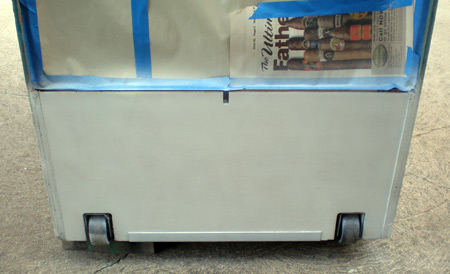
I don’t know exactly what I should have done. I could have used bondo, but I guess I didn’t feel like the splits were deep enough for bondo, and if the wood was lifting how would bondo be the solution for that?

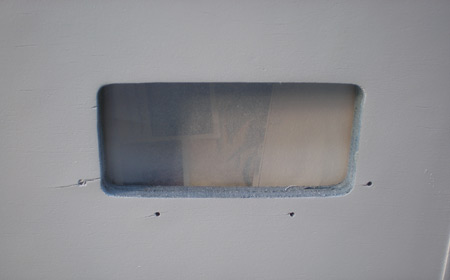
I guess I just didn’t know the extent to how noticeable these cracks would look. And in this example, the split in on the back, and it should be mostly covered up by the filter covers. (The only screw hole that really applies here and is bad enough is the one on the left.) But how should I have attempted to fix these? Suggestions? Should I have totally pulled up the piece of wood? Should I have pulled it back a little and try to glue it down? Put wood hardener over it?
Tank size for the air compressor has been critical
The first person I asked to borrow their air compressor had one. I think I have used an air compressor a handful of times in my life, and since I didn’t own one I really was pretty clueless about tank size and even that some compressors you have to maintain, and some you don’t as much.
The air compressor I borrowed first has a 2 gallon tank DeWalt.
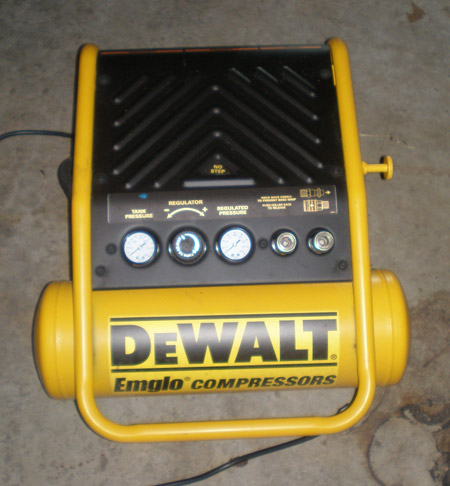
Never having done this before I didn’t think it was odd that my first coat of paint wasn’t very thick and it took me nearly 2 hours to lay it down all over the cabinet! I don’t want to take anything away from this compressor either. It was so freaking hot when I was done, but it powered through a two hour session. I had the owner check the manual on running time, he said he couldn’t find anything. I am guessing though that I may have decreased its life span a little bit. 🙁
But by the second and third coat, and judging by the streaks I was getting and how long I was having to wait for the compressor to refill I was realizing that a 2 gallon tank was a nightmare to use with a HLVP spray gun. After talking more to Chris Moore, I wasn’t even sure a 10 gallon tank would cut it, let alone the 6 gallon tank that was recommended by Donnie in Part 2 of the Ms. Pac-man stencilling tutorial. He didn’t mention having any problems with his tank, but I wasn’t willing to risk buying a 10 gallon and then still have problems.
I tracked down a friend who owns a number of rental properties, and he had a 20 gallon Craftsman air compressor.
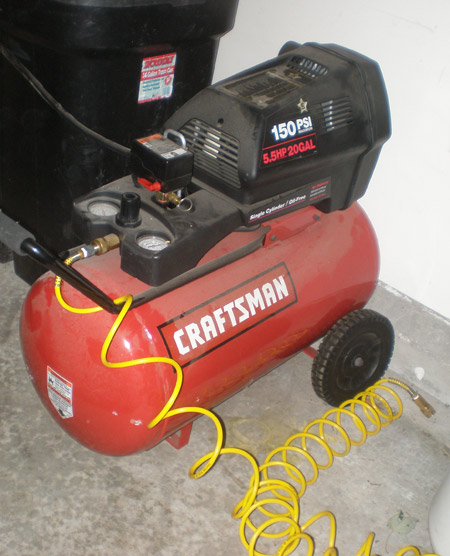
I put the third coat of primer down on my cabinet in half the time and with much more ease in general with a thicker spray. Now, the compressor did come on and stay on for a good portion of the time I was spraying. But it didn’t flip my breaker, and I never lost pressure.
I can’t speak to another tank, but that says to me that in the most ideal situation a 20 gallon tank air compressor is the minimum for a job like this. They’re expensive at that size, and it may be hard for everyone to find a friend who has one, but my guess is that anything under 10 gallon will make you go crazy.
We’re I’m at now
I am cranking. I feel more confident about the spray gun and other things related to the cabinet painting. I know that my days for painting in Indiana are numbered, today we dipped to 68 degrees.
Everyone I know has said under 70 degrees you are asking for trouble in painting an arcade cabinet. The lady at Home Depot told me otherwise, and I am hoping that 68 degrees is close enough to 70 to be ok.
I bought my colored paint today from Home Depot, and I put down my first coat of blue. I am thoroughly embarrassed to show you a photo of that, so I will try to post a photo after I get the second coat down and try some new things with my spraying technique.
If all goes well, I would like to lay down the Ms. Pac-man yellow this weekend. But we’ll see, that means using my first vinyl stencils and I am pretty nervous about that.
Here are some similar arcade posts
- My Ms. Pac-man Stenciling Progress – 2nd Coat of Glidden Blue
- Stencil a Ms. Pac-man Cabinet – Part 2
- Prologue – Stencil a Ms. Pac-man Arcade Cabinet
- My Ms. Pac-man Stenciling Progress
- Stencil Ms. Pac-man Cabinet – Part 1
If you enjoyed this post, please consider to leave a comment or subscribe to the feed and get future articles delivered to your feed reader.
Comments
I’ve talked to some guys that roll on their primer/undercoat and then give it a good sanding after it dries (sandable primer). Rolling on the primer fills most of the small voids. Then after it’s sanded smooth they spray on another coat of primer “IF NEEDED” then spray the top coats.
Looks good though.
Wow…nice progress there, Jeff. I guess I made a typo on the compressor. My compressor is a 16 gallon not a 6 gallon. Anyways, I had those same pesky cracks in the finish after sanding (before primering) and I had to do a lot of skim coating with wood patch to fill-em all in. I guess I forgot to also advise you on the spray distance too, sorry. Yes, a foot is about right. You’re definitely going to finish before I do. Nice job so far.
@Donnie M.:
Thank you for clarifying, that makes a ton more sense. So really, a 15 gallon air compressor (if they make them in that size) is about as low as anyone should go when using stencils on their arcade cabinet.
I think if I had the chance to do things again, I would definitely roll on my primer 1-2 coats and then spray on the colors themselves to see if that helped fill in the cracks at all. It appears now that I have put down the yellow that I may not see them all that much, especially if I put down a coat or two of Minwax clear coat. But you know how it is, while you’re in the process of restoring your arcade cabinet you want everything to be perfect. I am sure a year from now I will just be happy I stenciled my Ms. Pac-man at all.
A smaller compressor should be fine IF you have a regular spray gun vs. an HVLP. Mine worked great once I got the right gun for it. The only downside is the compressor may need to kick in while your spraying, but I think that only happened once or twice and didn’t effect the paint volume coming out.
Heading over to checkout the yellow coat now 🙂
@Jamie:
See, since I haven’t done much working on anything wooden I didn’t even think to do something like this. Seems obvious enough, use a clamp and some wood glue and take care of areas on the cabinet that are pulling up.
Of the 5 permanent arcade games I have in my collection, only two of them are stenciled artwork, and the Pac-man I don’t plan on redoing, it is good enough for what I feel about that cabinet. But the games that I might be interested in the future, Mad Planets and Sinistar, this will be good knowledge if I ever have to do any re-stenciling on those.
@audiomidiman:
If I ever do any stencil artwork on an arcade game again, this is what I am going to try. Roll on the primer, cover in one layer of primer spray (2 layers total not three like I did) and then spray. The rolled layer may take a little more sanding, maybe something less fine than a 220 grit, but it would still save that time and fill some of that stuff in with a thicker application.
Thanks for the note.
@Jamie:
Something else crucial I learned about with HVLP spray paint guns a little while into things, the little filters make life easier and the spray so much more even. Totally avoids the ‘orange peel’ texture. Funny looking, it’s hard to believe that the filter should even go inside the gun.
Leave a comment
Your email address is never displayed and cannot be spammed. If your comments are excessively self-promotional you will be banned from commenting. Read our comment privacy policy.


October 17, 2008
Hey,
I didn’t see this post before I commented on your other one. For areas where plywood is lifted, if it is just at an edge and not bad, you can squirt some wood glue in the crack, and use a clothespin type clamp to squeeze it together:
http://tinyurl.com/55d9ps
If when it’s dry it bulges up a bit, you can usually sand it smooth. For larger areas where a piece might be missing, and where it’s a PIA to glue, I usually cut away the bad area with a utility knife, down through the first thin layer that is popped up. If you cut back far enough, you can usually get to a point where it isn’t coming apart. Then slap some bondo on it and sand it smooth.