
Bump N Jump
Progress on Bump N Jump Control Panel Overlays at This Old Game
Everyone knows that Rich at This Old Game does great work. But today, I get to show just a glimpse into some of the quality steps that Rich takes to make sure that he has great arcade reproductions and most importantly, great buzz in the collecting community which leads to return customers.
On ThisOldGame.com, Rich has a section talking about his current ongoing projects, aptly named “Projects”. You should check it out. From Burgertime and Galaxian to Return of the Jedi and the now well publicized Agent X, Rich has a ton of ongoing arcade reproduction projects that customers have contracted with him to produce.
One of those projects is Bump N Jump control panel overlay reproductions. Today, I have photos showing a little bit of the color matching process and color tests that Rich went through on for the orange on the Bump N Jump artwork.
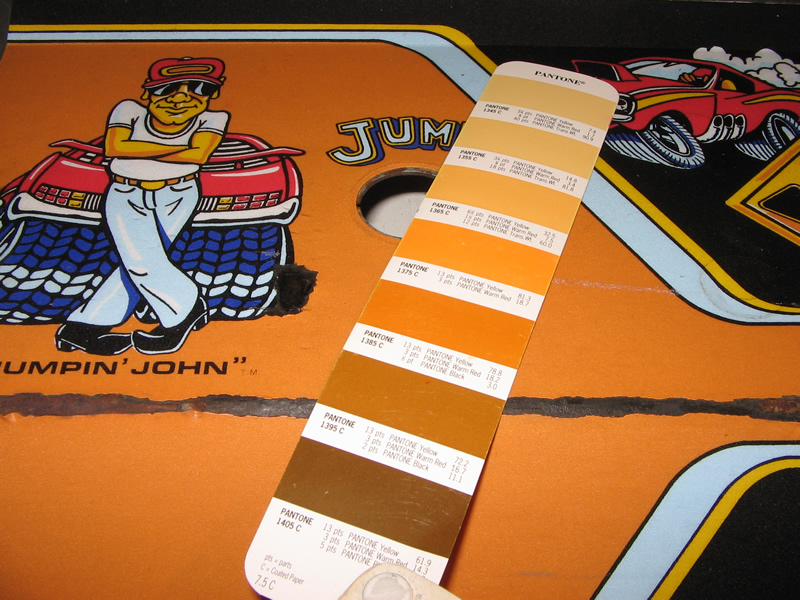
Here we see the original Bump N Jump sample for color matching, overlaid with a range of orange’s from the Pantone Coated book. If you click on the image, you can see that the closest match to the original burnt orange of the control panel is PMS #1385.
PMS #1385 gives us the breakdown of the different colors mixed to get this shade of orange;
- 78.8% Yellow
- 18.2% Warm Red
- 3% Black
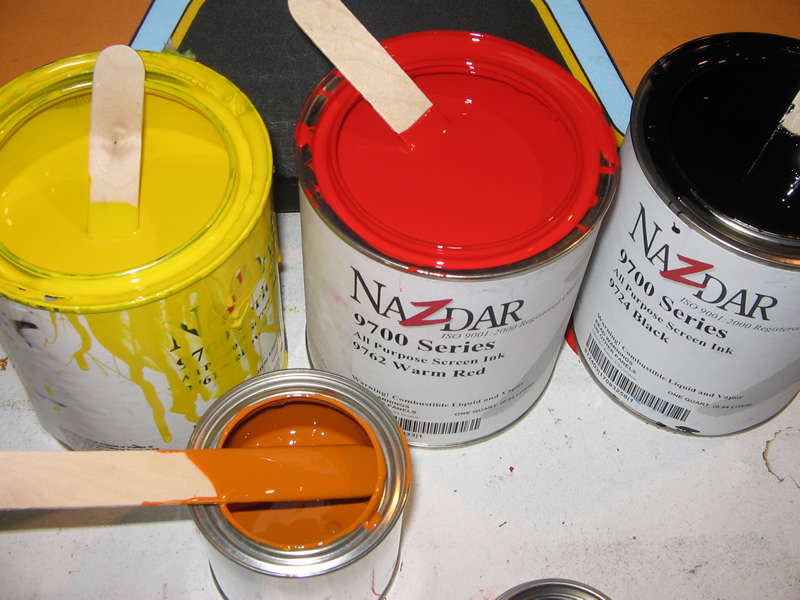
Time to mix the colors. Here we have NAZDAR 9700 Series of all purpose screen inks, a 9762 Warm Red, 9724 Black and I can’t see the Yellow. You can also see the final orange mix in the lower left after adding in the correct percentages. I don’t understand how the colors are measured out of the bigger containers, is it with a measuring cup of some sort? Rich is the expert, I am sure he’ll comment and give me some insight about that.
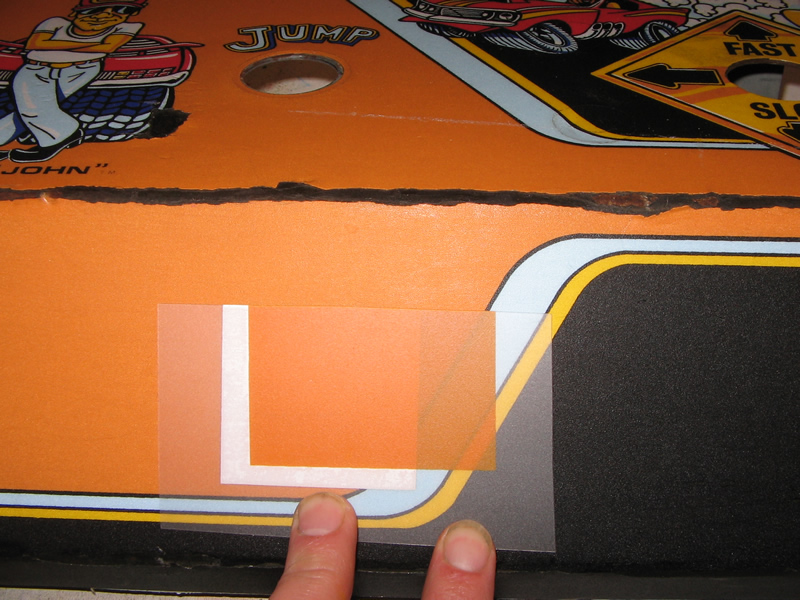
As Rich has mentioned in the past, and now I am starting to understand, the inks are slightly transparent, as you can see in the photo above. (Right Half) The inks are laid down on the raw, clear polycarbonate, and then backed with white, (Left Half) which takes away the transparency and makes them more brilliant. In the first test here, the burnt orange is a little too bright.
How does he do test screens? Does he have a little film to apply the colors evenly for testing purposes?
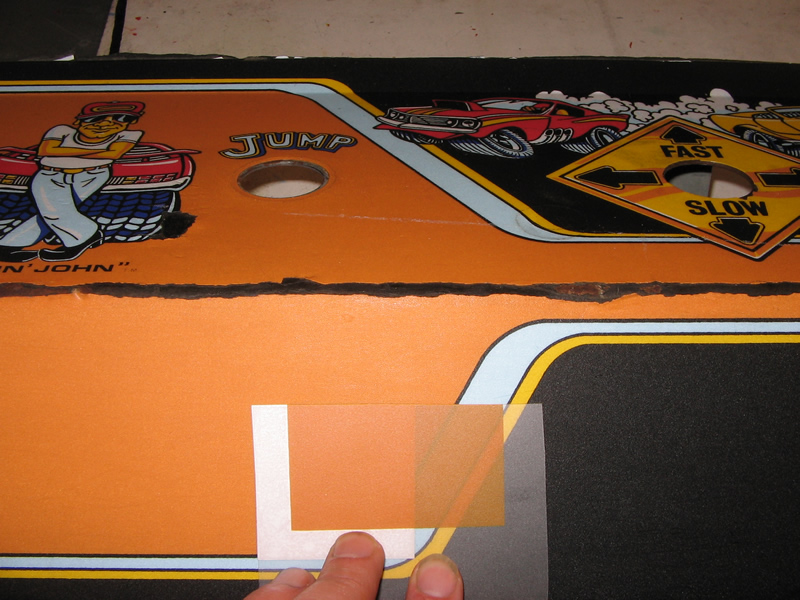
Added a little black to the original formula, and the color is “On like Donkey Kong”!
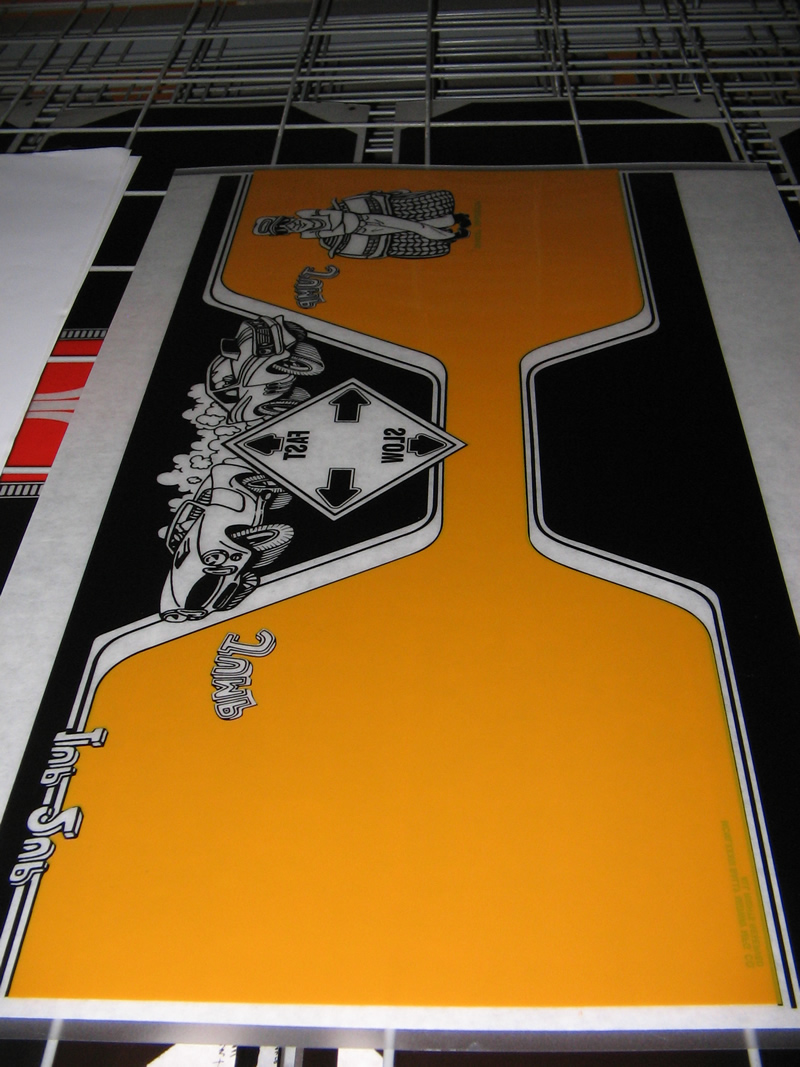
Now all that is left is to screen the orange. In this photo we see just the orange film. I can’t see the registration marks, but I am sure they are there. Can you point them out Rich?
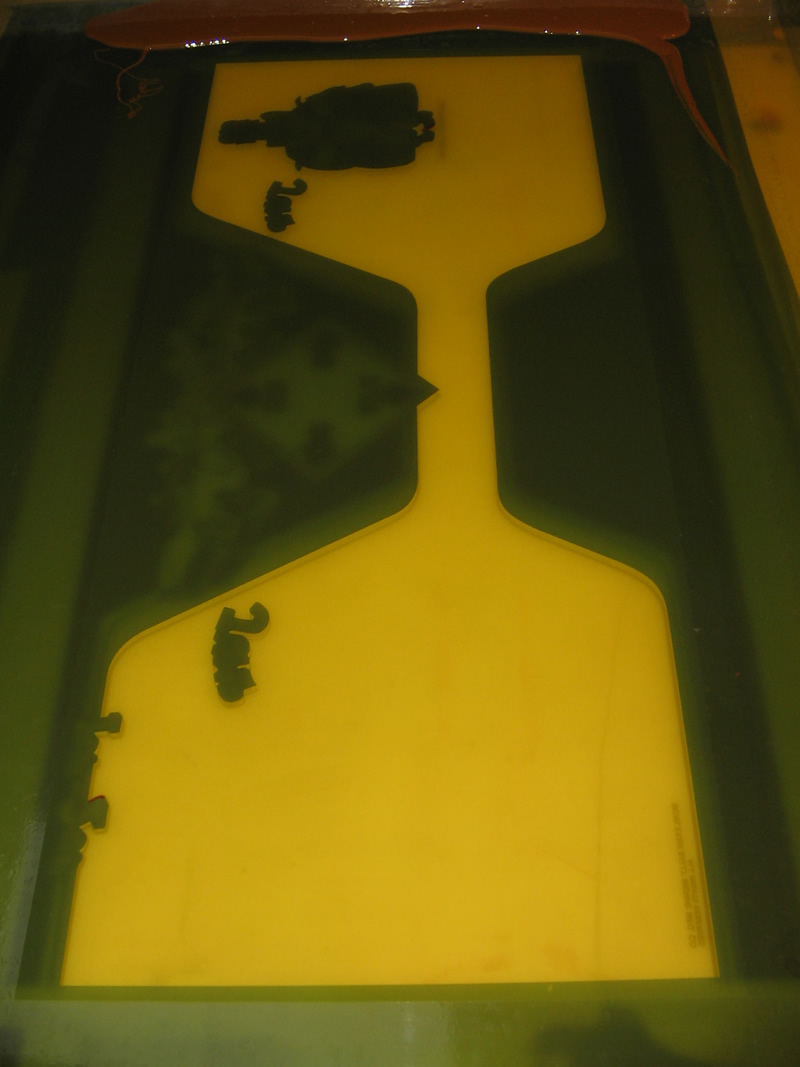
And here we see the final piece after the orange is laid down. The printing is done on back of the polycarbonate in reverse, not on the front. The back is where the 3M is adhered for application to the games.
The first color laid down was the black with bleeds, and now the second color was the orange laid down on top of the blacks. I had originally thought that there was a white flood laid down first, but that must be paper underneath the polycarbonate on the drying rack, because laying down white first just doesn’t make sense.
Either way, thanks to Rich for an insight into the printing process, and hopefully he’ll continue to have a few minutes here and there to provide more information to those of us that are interested about the process between all of his printing jobs.
So, remember, if you don’t have a printer yet for your arcade reproductions, you will want to look up Rich at Thisoldgame.com
You got it here first, exclusive content about the Bump N Jump control panel reproductions at Rotheblog.com.

