
Stencil a Ms. Pac-man Cabinet – Part 2
Too long in between tutorials, and it is completely my fault. But its finally time for part two of the re-stenciling your Ms. Pac-man tutorial. Wundercade has primed and painted his Ms. Pac-man and the cabinet looks beautiful so far. Let’s jump right in, starting with the tools you will need.
Arcade game stenciling equipment
Just like when you were fixing damaged portions your cabinet you will need specific equipment, tools and other misc items for priming and painting your cabinet.
Big Tools for Stenciling Cabinets
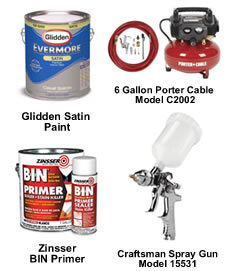
- Air Compressor – 6 Gallon Porter Cable Model #C2002 from Amazon.com – This air compressor will run you anywhere from $160-$180. (Bare minimum tank size. The bigger capacity the better. Check your CFM rating on your gun.)
- Spray Gun – Craftsman Spray Gun 15531 from Sears.com – This Spray Gun will run you about $110.
Smaller Items, Tools, and Primer / Paint
- Primer – Zinsser BIN Primer (Pictured)
- Glidden Paint – “Rhapsody” Color (Pictured)
- 8-10 Rags
- Scrap Board
- Masking Tape / Painters Tape
- Newspaper
- Two Saw Horses
- Sandpaper – 220 grit
- A large piece of scrap wood – Plywood or some other surface you can use to practice spraying paint on
- A Tarp – That can be painted on 😉
Priming your Ms. Pac-man cabinet
Donnie has been so great in getting me information about his process that through the course of 3-4 emails he has written a good portion of this post himself.
For this arcade cabinet we’ll be using Zinsser B-I-N Primer. Zinsser primer is formulated to work best with interior surfaces like kitchen cabinets. It’s fast drying and seals previous holes easily covering stains and works well on smooth surfaces like sanded plywood and chipboard.
You will probably catch that there is a different spray gun used for the priming than the one used for the application of the blue paint. A Binks Model 62 was used for the priming but a the Craftsman with the finer spray and a gravity feed tank was used for the blue paint. There is no need to drop the money for two spray guns, the Craftsman would work just fine for both stages and that will save you quite a bit of money.
Setup your work area
Hopefully you have thought ahead and have space in the back of your yard or outside of your garage away from your house that you can do some spray painting. You will need to set up an area for your Ms. Pac-man cabinet, laying it on your two saw horses and then using the tarp to block off any areas in your surrounding yard that you don’t want to get primer and Glidden Blue Rhapsody overspray on. Take a look at the photos below, there aren’t specific details showing this setup but you will get the idea.
Just remember, free air and paint are a combination you can’t control and you never know where the paint with go when you are spraying the cabinet. Just be cautious.
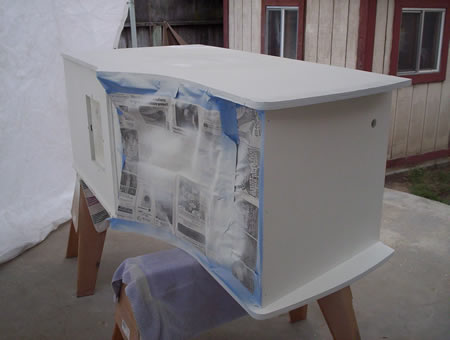
Step 1
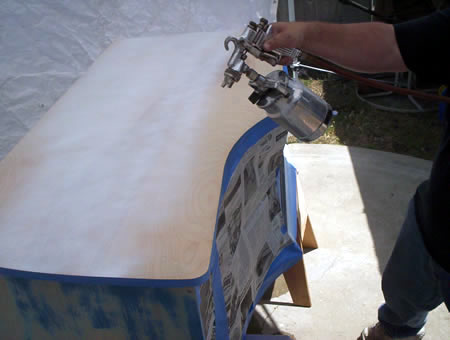
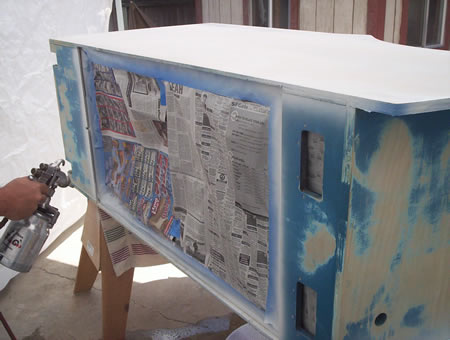
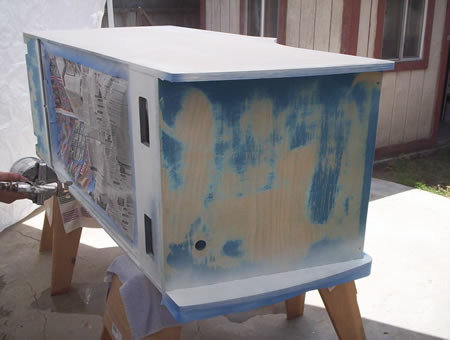
Use your painters tape and your newspapers and tape off your Ms. Pac-man cabinet as shown.

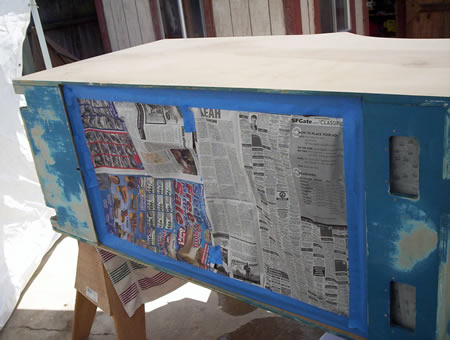
This should be obvious, but cover up any areas of the arcade cabinet you don’t to be covered with overspray. The main area to watch will be the inside back where the monitor sits, you don’t want white spatter over your black paint, unless you are going to repaint that was well. Make sure to seal those areas well, you can cut the pieces of newspaper to size if you want, that is what we did here. But as long as you have all seams sealed with the painters tape you should be fine.
Step 2
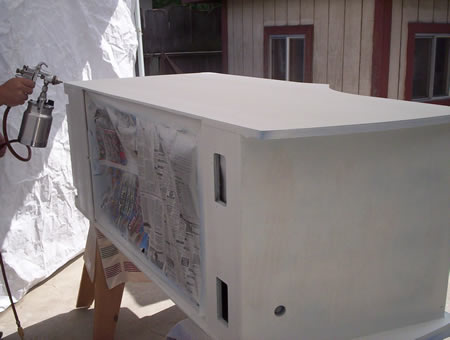
Applying the primer. Properly using a paint gun is out of the scope of this article, we will only be covering basic application techniques. If you have an expertise on using a paint gun and want to help me write a post with some pointers, I would welcome that help.
When applying paint with a spray gun achieving the correct thickness is crucial, but in terms of the Zinsser primer it was already thinned enough. We will talk a little bit about thickness of paint when we explain the application of the Glidden Blue.
Technique for applying the primer – Get out that scrap piece of wood to practice, preferably a large piece of plywood if you have something like that just ‘lying’ around. We’ll get a little bit ahead of ourselves here and you will see a demonstration on practice for applying the blue paint, but the idea is still the same.
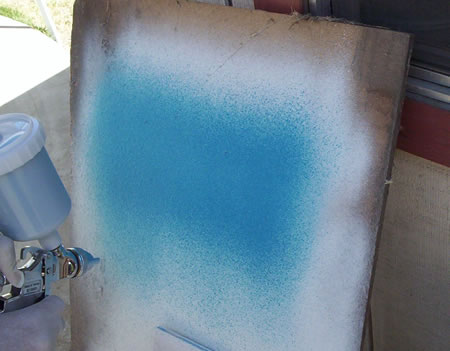
Some of the things you will want to get a feel for when you are doing ‘practice painting’ for your cabinet are the fan width, the air to paint ratio, and you’ll want to get the hang of the overspray technique, which is like when you mow a lawn, your next pass overcuts half of your previous pass.
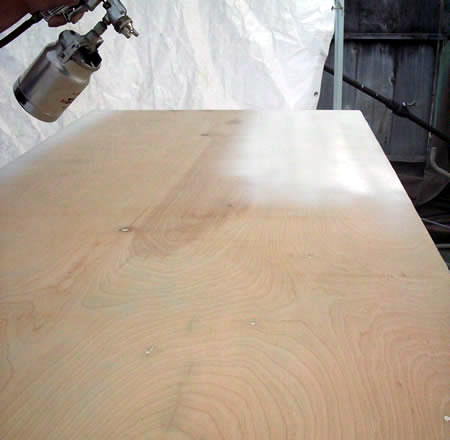
Fan width is the spraying area. You will want to have a larger area, and spray less primer in one pass, and this in turn will give you a sense of your air to paint ratio. You can adjust to taste how much paint you lay down in one pass but the absolute key is the distance from the gun to the cabinet. The spray gun nozzle should be no more than 8 inches from the cabinet, and it might be safest to be about 12 inches away.
If you are spraying the cabinet standing up, you can spray every coat horizontally. It would be really hard to spray it vertically on the sides. However, if you are laying the cabinet (like Donnie) on some sawhorses we recommend spraying it horizontally, then vertically which will give you a very nice even coat of white primer.
Don’t linger to long on one place, but move steadily and consistently in both your vertical and horizontal pass. As a gauge, it shouldn’t take you more than 10 seconds to spray horizontally (the width of your cabinet) with your spray gun. If you take that long you are probably spraying too thick and there is a chance the primer will run. Here are some photos demonstrating how to spray on your primer a little more.
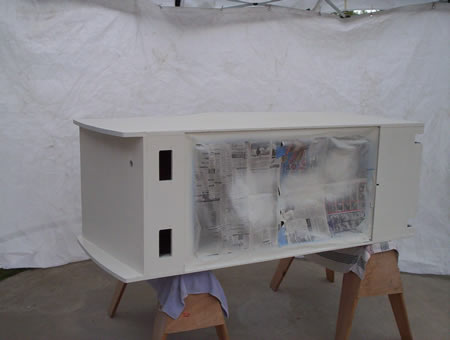
Another tip: Spraying the test board with primer might not give you the practice you want before you start. In that case, I would start with the back or the top, a small side you won’t see as much. This will give you some more confidence and in case you really botch applying the primer, you can always sand the smaller side quicker and start over.
Now, I didn’t mention this before, but you noticed in your list of needed items you will have 220 grit sandpaper. After each coat of paint has dried and you think you are ready coat, be it primer or regular colored paint you will need to do a light sanding of the whole cabinet with the 220 grit paper and blow it off with the compressor to get rid of all the dust. Fun Fun, lots of sanding if you do three coats of primer alone. But you want the most smooth, nice looking Ms. Pac-man out there, don’t you?
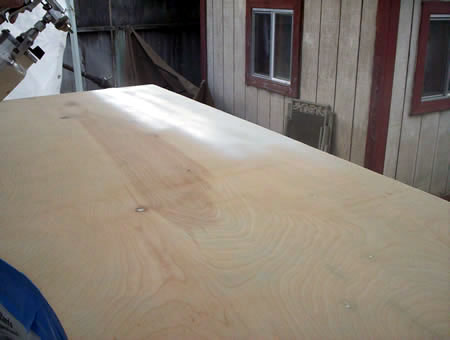
Finishing the primer coat on the Ms. Pac-man cabinet
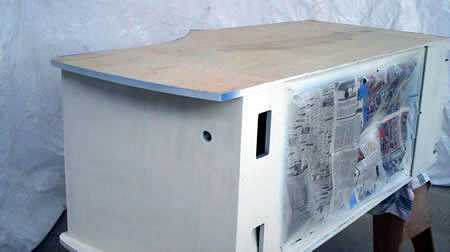
Here are some more photos showing the rest of the Ms. Pac-man cabinet with the final primer applied.
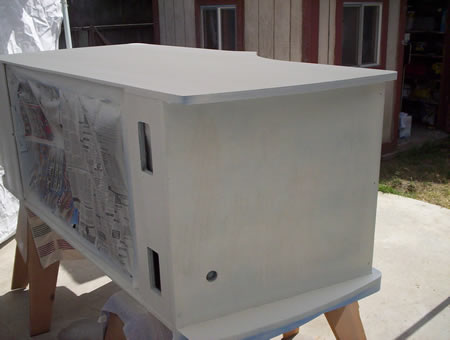
The primer coat is done!
Fantastic job! Doesn’t that Ms. Pac-man cabinet look simple and beautiful? A blank canvas ready to go without imperfections.
I wasn’t originally going to break this into two pieces for part 2 of the Ms. Pac-man stenciling tutorial, but there is so much great content I decided that it would be best to not have one big long scrolling page of photos. We’ve shown you what the cabinet looks like with the primer applied, next we’ll show you what she looks like with the Glidden Rhapsody blue paint sprayed on.
Stenciling a Ms. Pac-man cabinet Part 3 – Applying the Rhapsody Blue
Here are some similar arcade posts
- My Ms. Pac-man Stenciling Progress – 2nd Coat of Glidden Blue
- Stencil a Ms. Pac-man Cabinet – Part 3
- Prologue – Stencil a Ms. Pac-man Arcade Cabinet
- Stenciling a Ms. Pac-man – Part 7
- My Ms. Pac-man painting is moving along
If you enjoyed this post, please consider to leave a comment or subscribe to the feed and get future articles delivered to your feed reader.
Comments
Mike,
Glad you left a comment. In the first two parts of this tutorial, it was another collector's Ms. pac-man cabinet that was being restored. Therefore, I can't comment specifically on this compressor. I know that is what he used. I used something much larger, 10 gallon plus, when I did my Ms. Pac in the later part of the tutorial. I don't know the CFMs on that compressor, but I do know that when I used a 2-3 gallon, the pressure was an issue.
The recommendation for the air compressor is really about keeping the cost to a minimum. Buying a huge compressor, if you don't have one, can be a costly venture on top of a very costly project. The bigger capacity compressor in general, the better. I just edited the post to reflect.
I would honestly say to follow the guidelines if you are going to be perfoming stencil work. However, if you are doing smaller detailed airbrushing mostly, you might be ok. And certainly dusting you would be set as well.
I’m clearly tacking on to an old thread, but I’m trying to figure out the same thing regarding scfm.
I have that craftsman hvlp spray gun – i picked it up off ebay.
Now i’m trying to find a compressor that will match, but I can’t seem to find one at all. 8.5scfm @ 40psi seems really high compared to what i’m seeing.
I was thinking of borrowing my friends 13gallon tank compressor, but its only 6.5@40psi.
Leave a comment
Your email address is never displayed and cannot be spammed. If your comments are excessively self-promotional you will be banned from commenting. Read our comment privacy policy.


August 13, 2009
I'm about to purchase an air compressor for myself, and was eyeing the Porter Cable pancake compressor (the newer oil free model), for painting, airbrushing (my other hobby), and using as a duster for my electronics, so I won't have to buy those cans of compressed air, anymore.
I keep getting mixed signals about this models ability to use HVLP spray guns.
I keep hearing this model doesn't really have the CFM's to properly use a paint sprayer. But your picutres prove otherwise. That Craftsman sprayer says you need at least 9 CFM to use but the compressor tops out at around 3.5 CFM. II'M SO CONFUSED!! 🙂
So are you using the same Compressor for both sprayers? Or are you using a larger compressor for the craftsman gun? Because if you're using just the one, well I may have just found my new compressor.